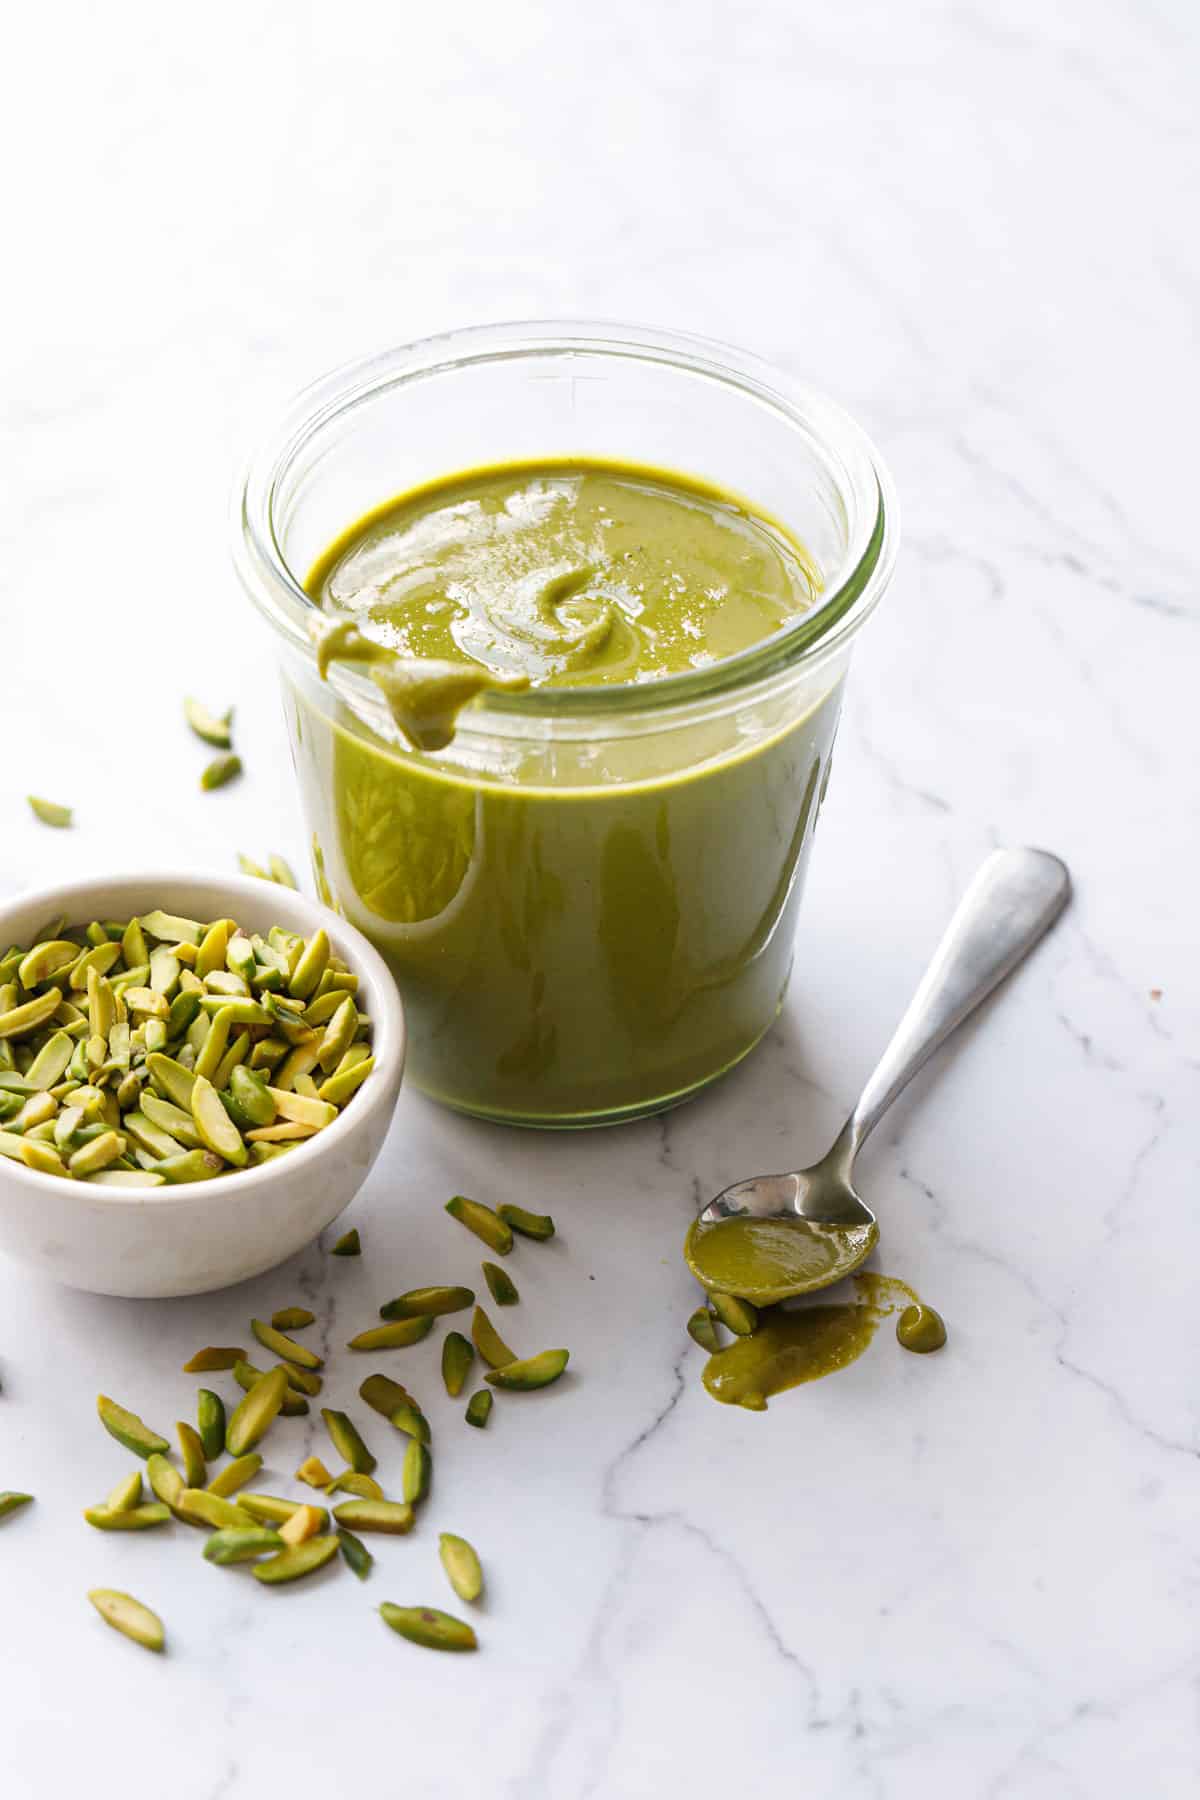
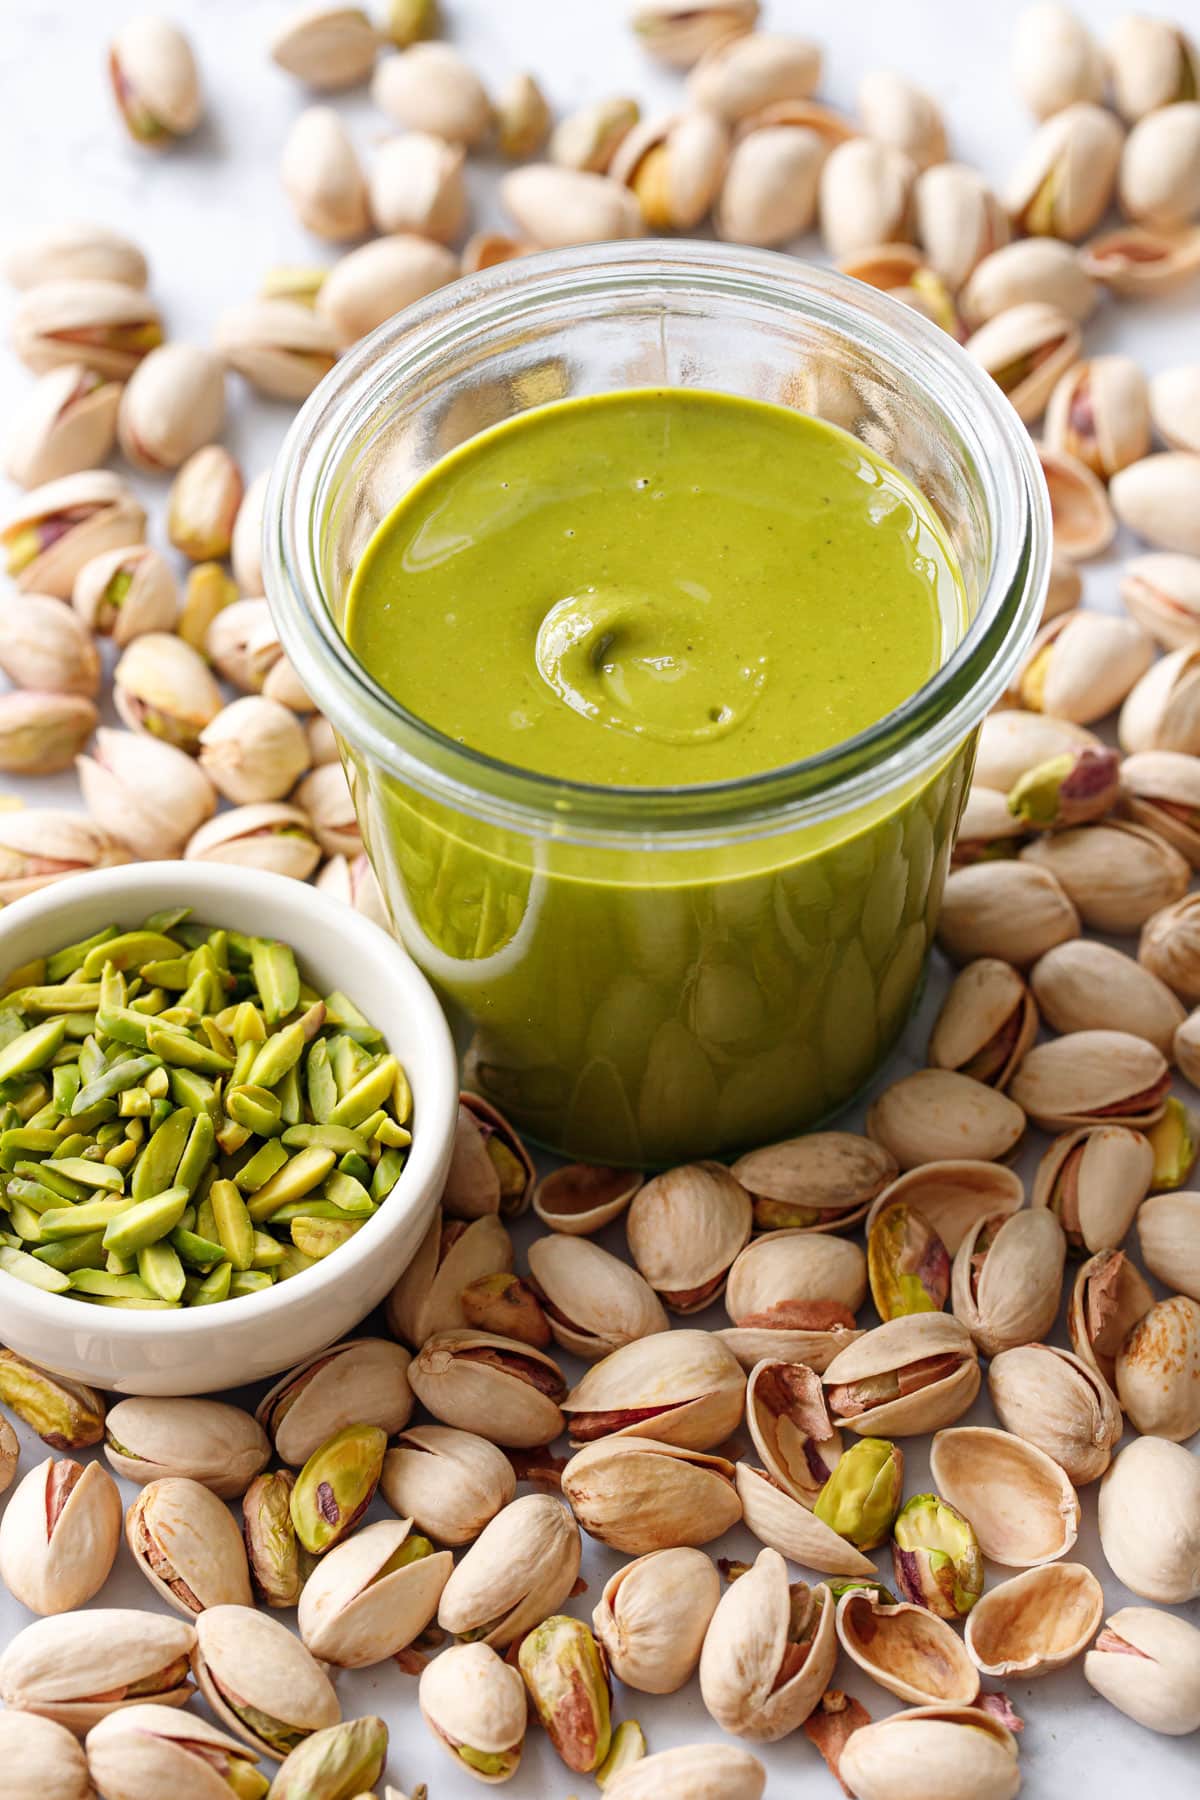
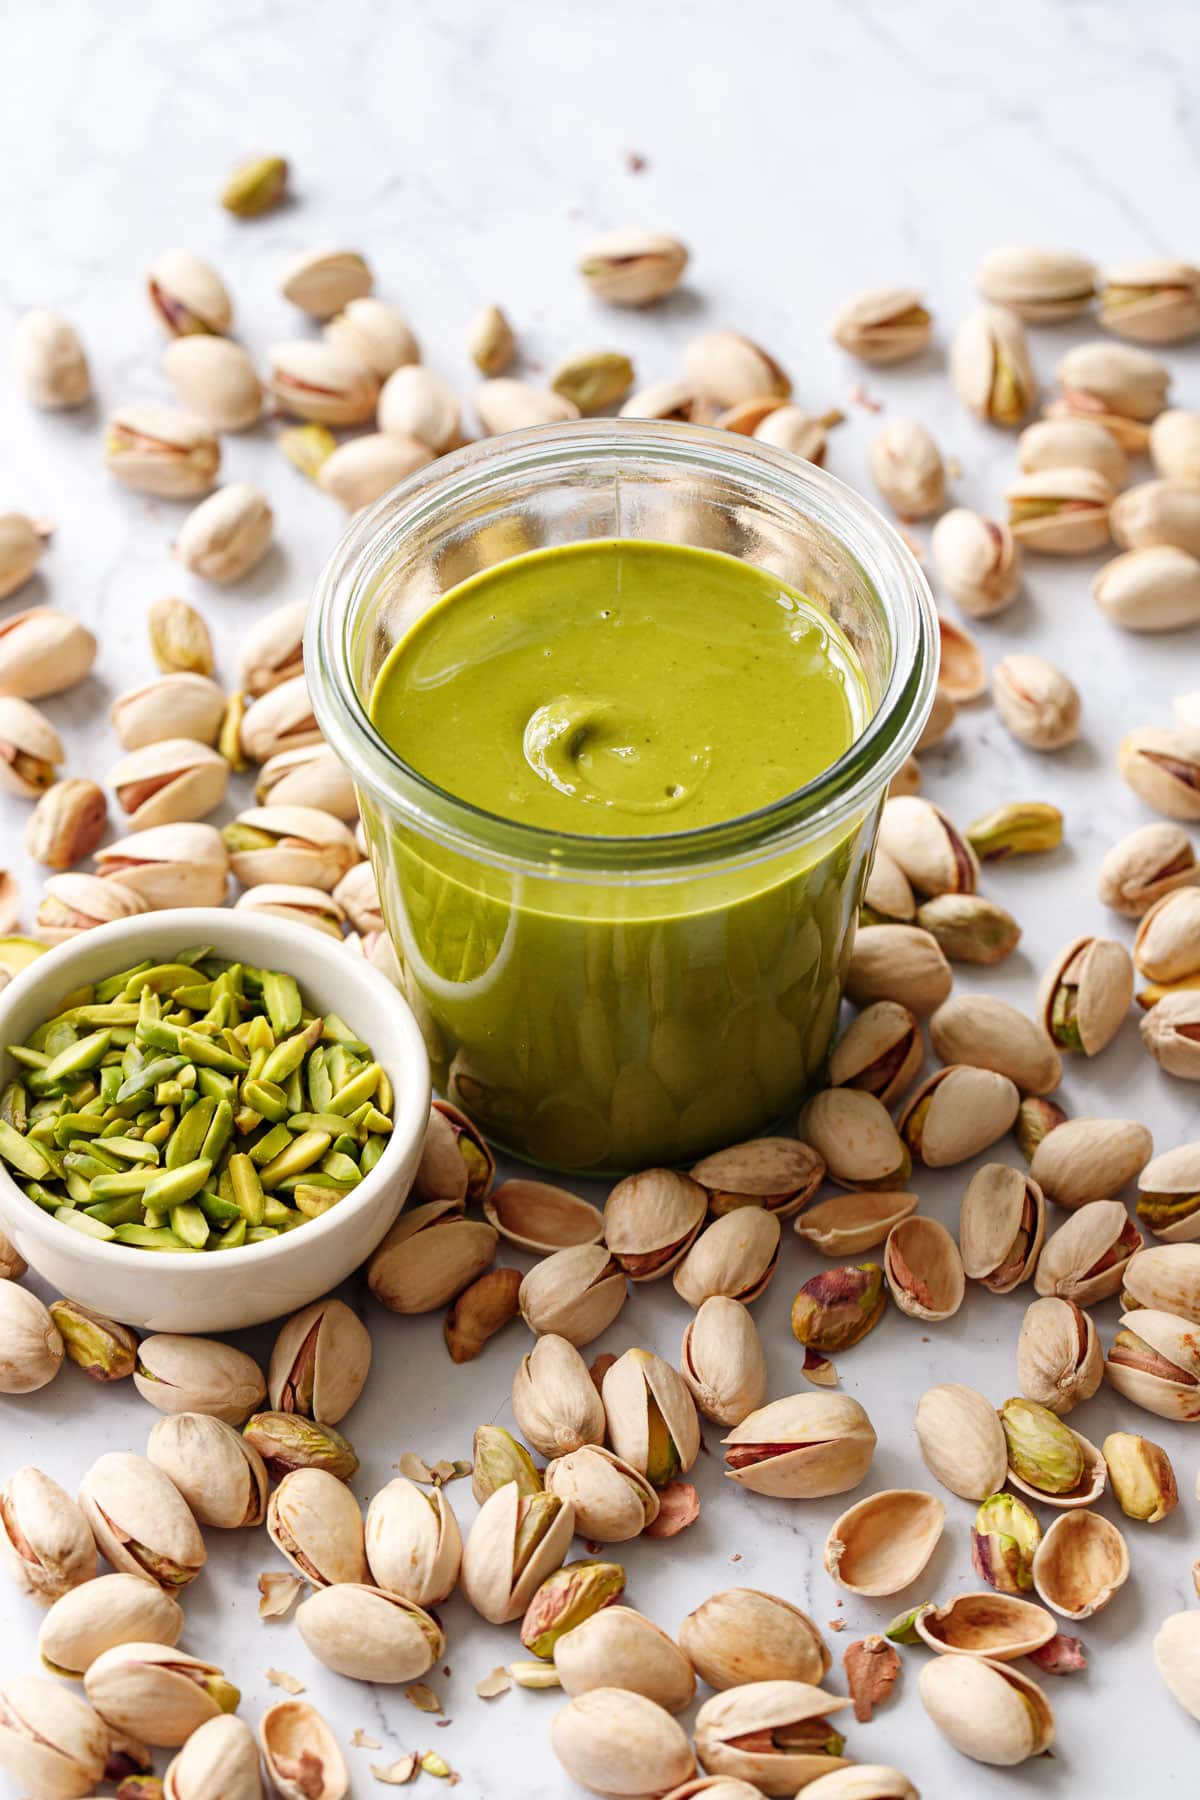
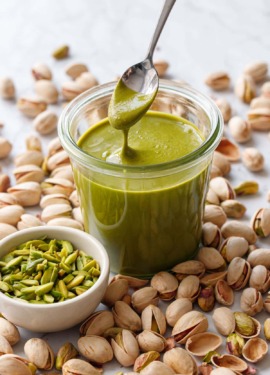
Pistachio butter may not be as ubiquitous as peanut or almond butter, but it is by far my favorite of all the nut butters, with its gorgeous green hue and unique nutty flavor. Making your own is surprisingly easy: all you need are pistachios and a food processor or high-powdered blender.
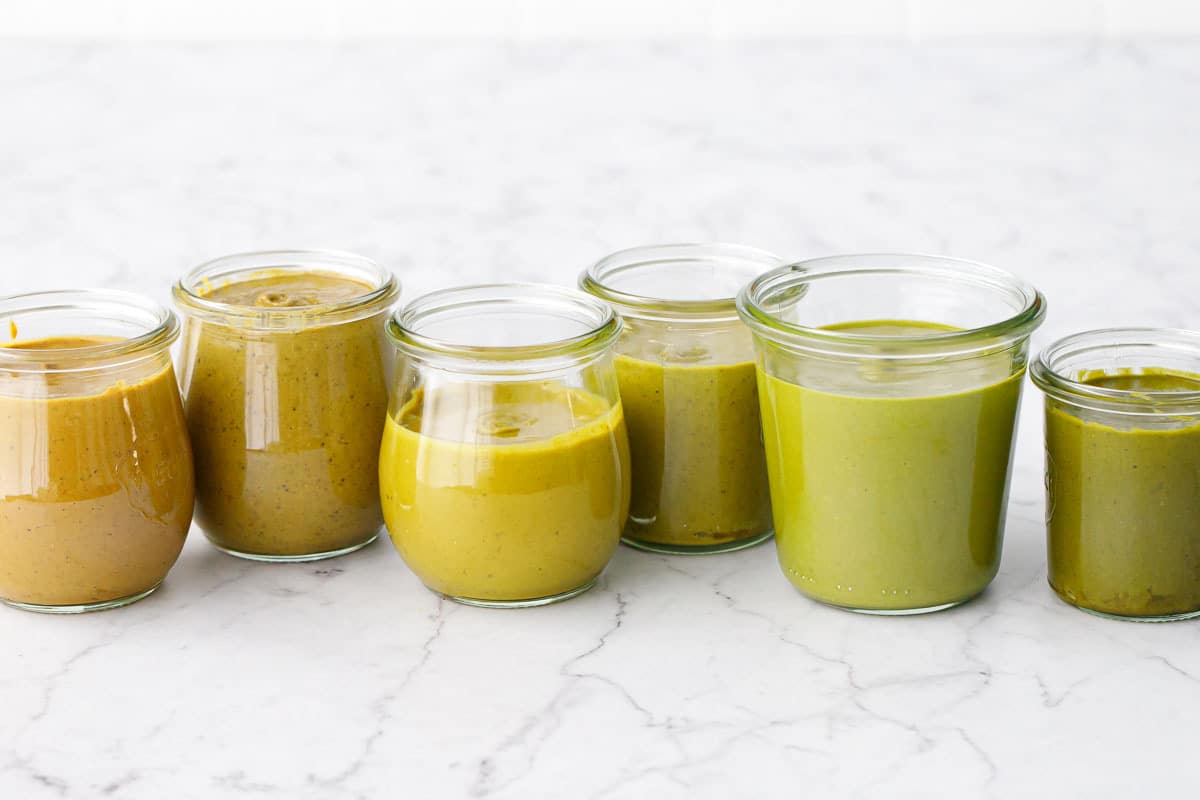
I tested half a dozen batches of homemade pistachio butter so you don’t have to! I experimented with various methods including blanching and toasting the nuts, different appliances, and a few different types of pistachios to determine the best and easiest way to make the creamiest, greenest pistachio butter ever.
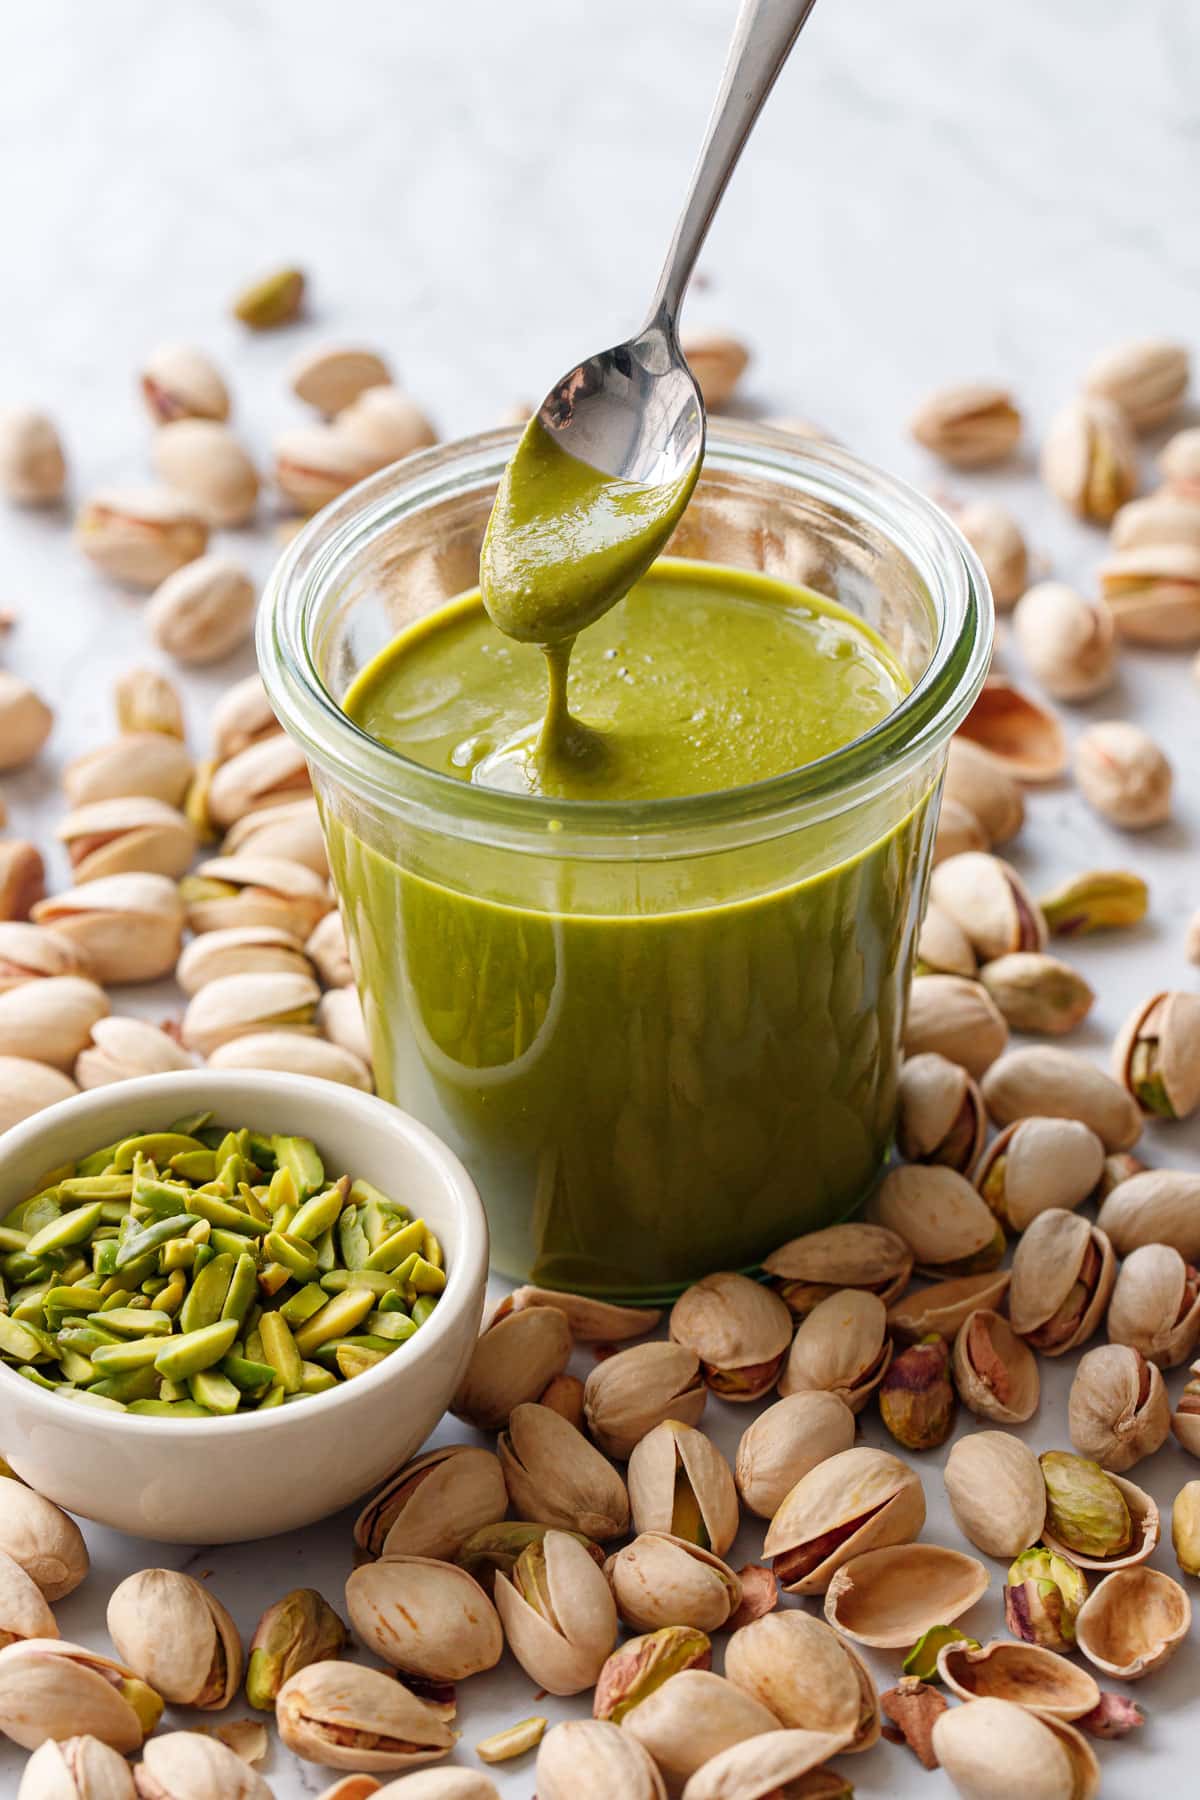
Pistachio butter has become a staple around these parts (you could say I’m going through a bit of a pistachio phase right now), and I’ve been using it regularly in recipes, some of which require multiple rounds of testing. So, needless to say, I’ve been going through a lot of pistachio butter.
I had been buying jars of pre-made pistachio butter for my recipe testing, but it’s not cheap, nor is it very consistent in terms of color (and while that might not matter to you, when I want a beautifully photographed pistachio recipe, that iconic green color is very important, we eat with our eyes first after all!)
Assuming you’re able to source reasonably priced green pistachios, making my own pistachio butter was the easiest way to have control over the final product. I can also control the salt, sweetness, and consistency by making it myself, so I can essentially tailor each batch to best suit the recipe in which it will be used. So yes, making pistachio butter from scratch made a lot of sense for me.
Now that I’ve got so many jars in my fridge, I imagine I’ll start using it in place of peanut or almond butter as a tasty snack. I’ve never truly loved almond butter (as much as I love almonds), but pistachio butter is so much better.
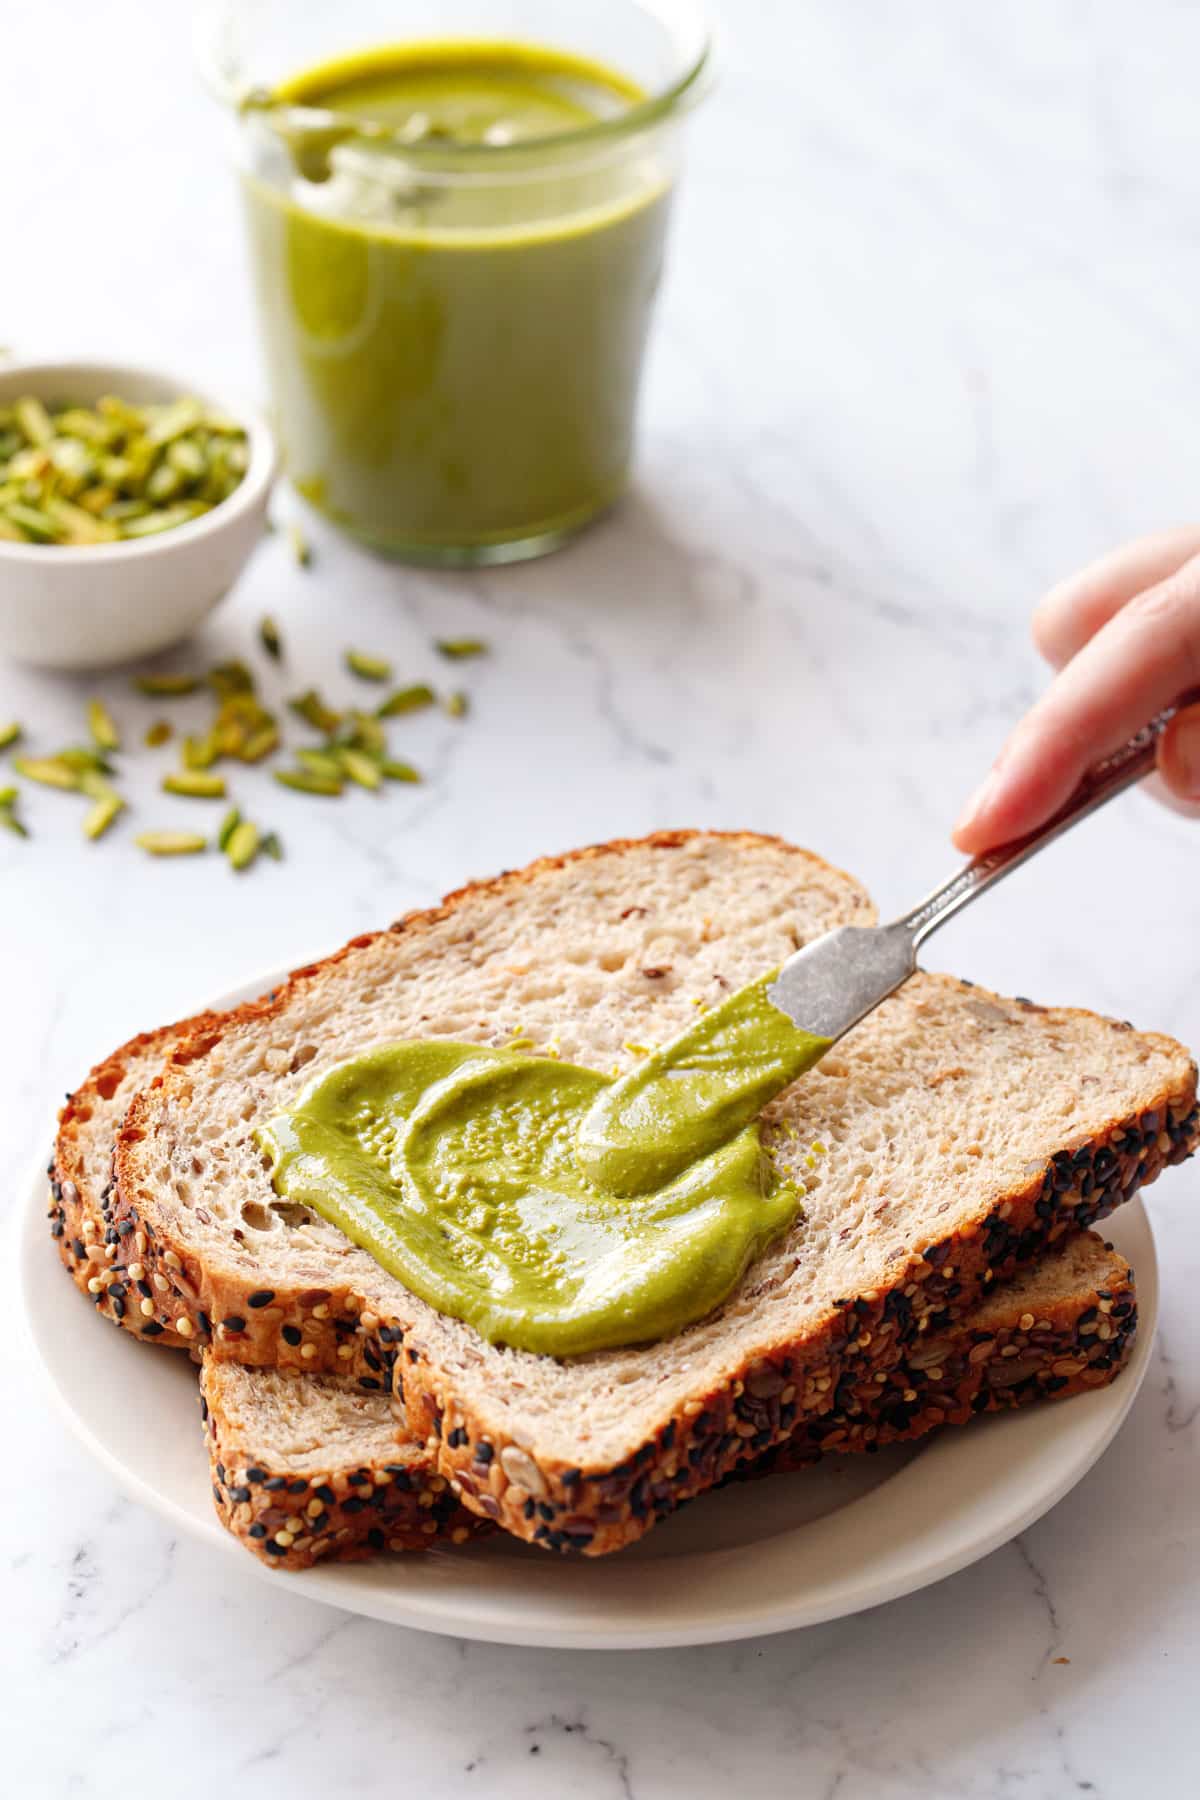
Also, can I just say, you haven’t lived until you’ve had a pistachio butter and raspberry jam sandwich. 😍😍😍
Pistachio butter is one of those things that can be surprisingly quick and easy, or maddeningly time-consuming depending on the state your pistachios are in. If you buy already shelled pistachios, or even better, slivered pistachios, all you need to do is lightly toast them, then pop them in the blender or food processor and blitz away. Like I said, surprisingly easy.
However, if you buy whole in-shell pistachios (or if you accidentally buy some pistachios that are not only in their shells but also the outer skin, and yes I speak from experience here) you may be cursing my name by the time you’re done, or at least your thumbs will be (ouch). Once you’ve skinned, shelled, blanched and peeled a pound of pistachios, you will realize why they are among the most expensive of nuts.
In general, if you buy whole, in-shell pistachios, you’ll end up with half as many once they are shelled. In other words, a 1 pound bag will yield 8 ounces, or about 2 cups of shelled pistachios (enough for a scant 1 cup of pistachio butter). Just keep that in mind when you’re pricing things out, whether or not it is worth your time to shell them yourself.
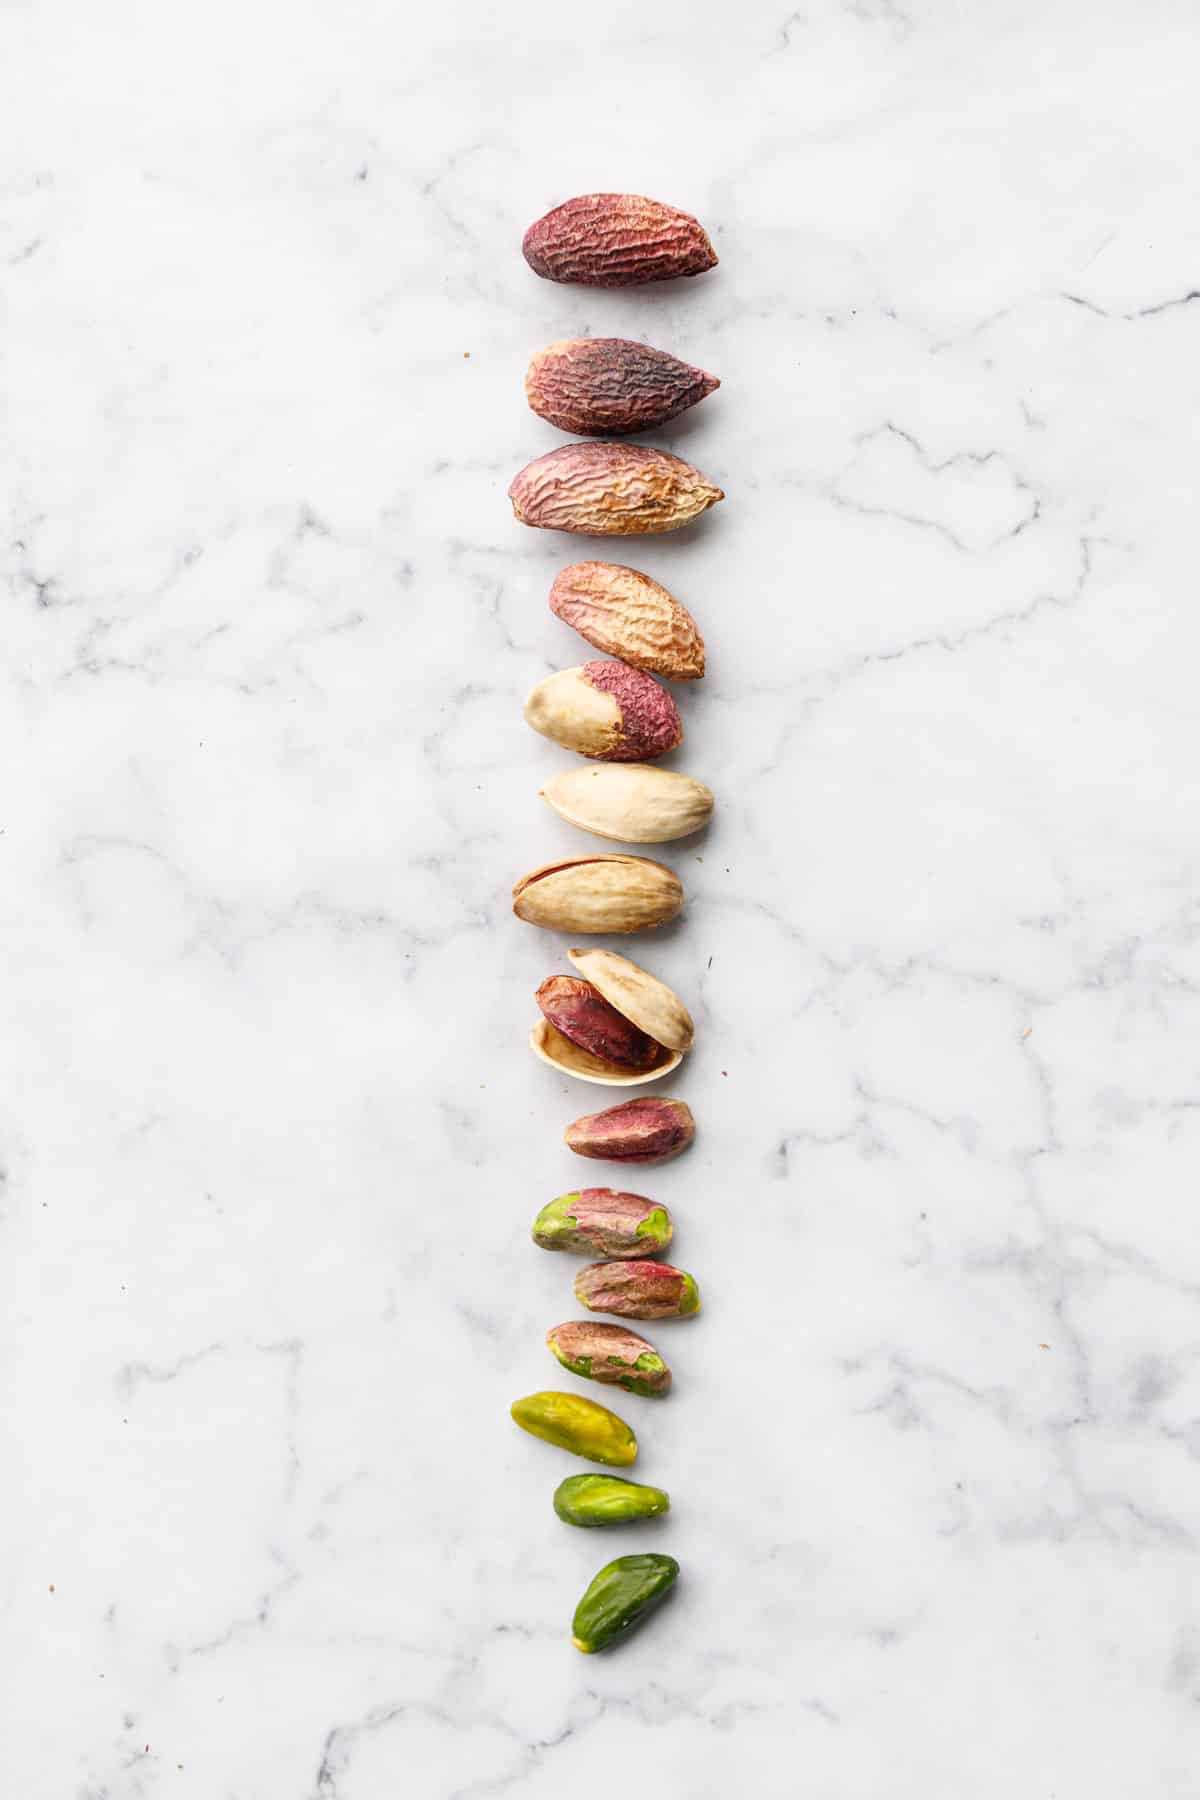
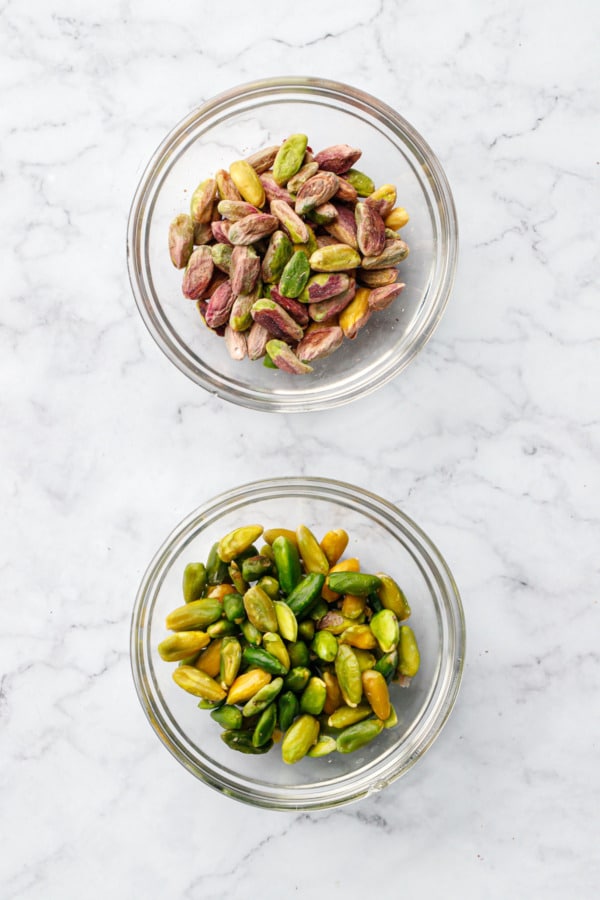
That said, I generally find that shelling my own pistachios results in a greener final product than buying pre-shelled (though this greatly depends on the source; the pre-shelled nuts I bought from a Turkish importer were significantly greener than the ones I bought at Trader Joe’s).
The pistachio is always greener…
I’ve been trying to find super green pistachios for years. It’s very hard to find a reliable source for this kind of thing in the US.
Pistachios vary greatly in color and quality, and the final appearance of your pistachio butter will, for the most part, depend on the raw pistachios you use (though there is one trick you can use to enhance the green of your nuts, more on that below).
In general (though this definitely varies depending on the source and batch) I find that Turkish or Sicilian pistachios are much greener than California pistachios, and pistachios that you buy whole and shell yourself will be greener than buying a bag of already shelled nuts.
Also, stick to raw pistachios for this recipe, do not buy pre-roasted or salted pistachios (keep those for snacking). While the recipe does call for lightly toasting the nuts, it’s a very, very light toast; roasted pistachios that you buy are much toastier and also much less vibrant in color.
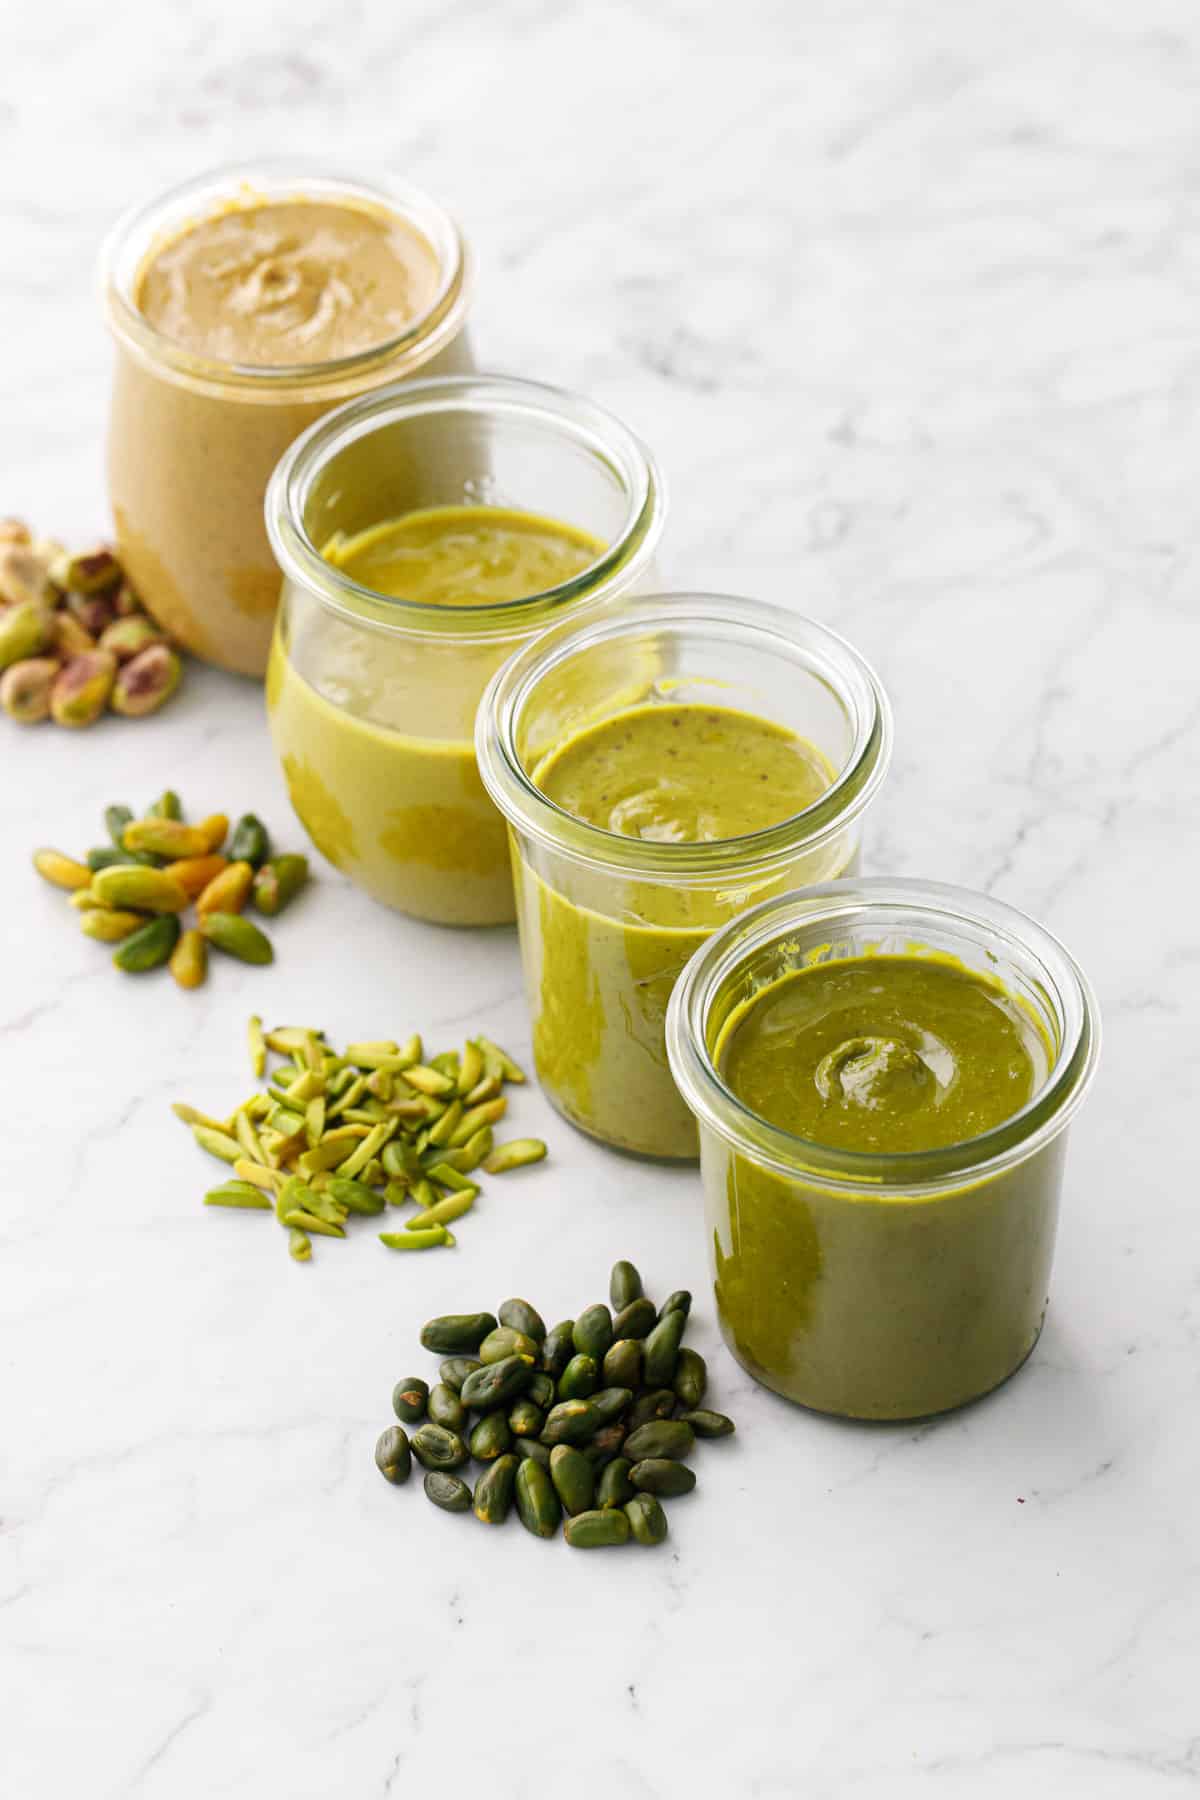
At the moment, my favorite pistachios come from a few different places. For the pistachios pictured here, I got the slivered pistachios from Tavazo (based in Canada, so the shipping to the US is a bit pricey unless you meet their minimum). I really loved working with these slivered pistachios and will probably buy a big bag to have on hand (stored in the freezer, of course) for future recipes.
The raw, in-shell pistachios and raw, shelled Turkish pistachios from Nuts.com are also great quality options. The Turkish ones have very dark skins and definitely need to be blanched and peeled, but will produce a beautiful bright green nut butter. The regular in-shell nuts are pleasingly green, and while it takes a little more work to shell them yourself, the results are much greener than buying pre-shelled nuts.
I’ve also purchased Italian pistachios (the brand is Brontedolci, there are a number of Italian import sites that sell them if you google it). The pistachio flour is beautifully green. The chopped ones are too (this is what I used for my Pistachio Lemon Mousse Cakes), but they do still contain the skins so the final pistachio butter would be more speckled.
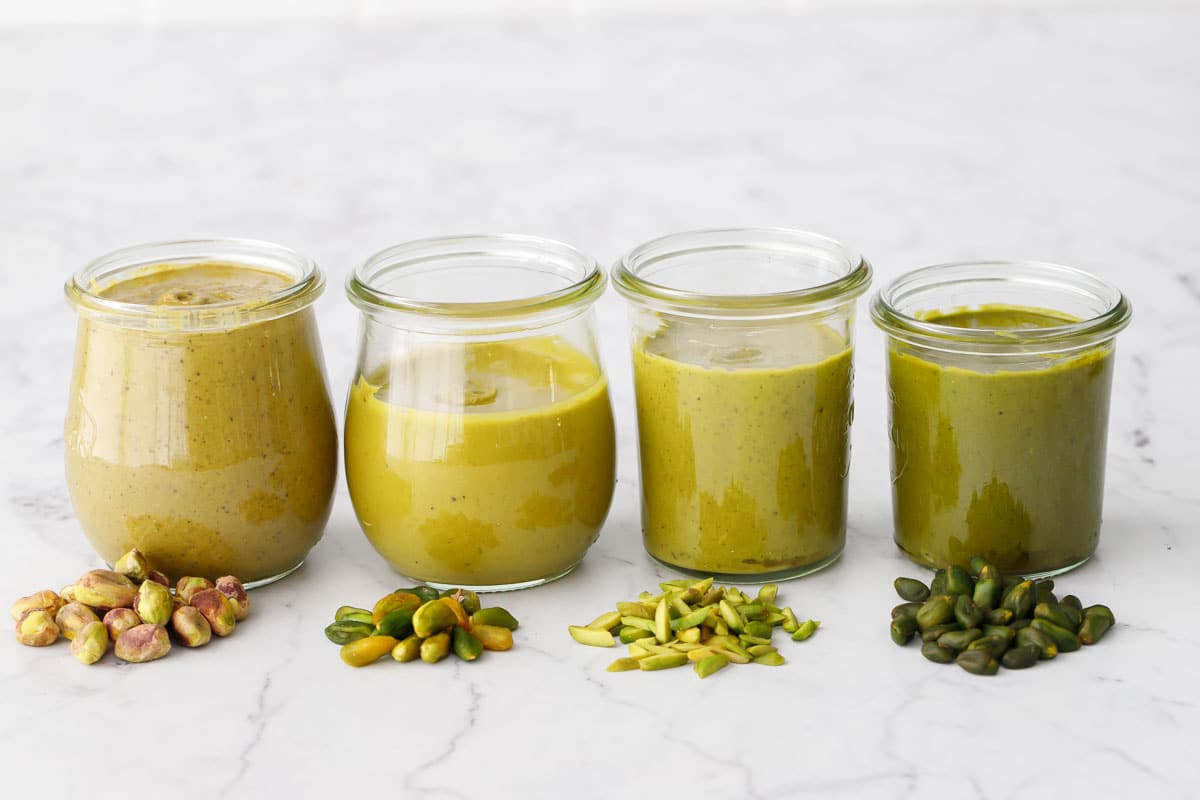
A note about the dark green pistachios in the photos: while I was excited to find these, and while they produced a gorgeous deep green pistachio butter, they were actually my least favorite taste-wise out of all the batches I made. That deep green color translates into a more piney, grassy flavor that’s a bit bitter and not quite as sweet or toasty as the other varieties. I think it’d definitely be improved with a little bit of sugar.

Carte Blanch
For greener pistachio butter, blanch your pistachios first.
Blanching brings out the natural green of the pistachio, and also allows you to peel off the papery skins easily, which will result in a brighter, smoother pistachio butter without all those little brown specs.
For Turkish pistachios particularly (which have darker skins), blanching and peeling the pistachios will make for a much more uniform, brighter green final appearance.
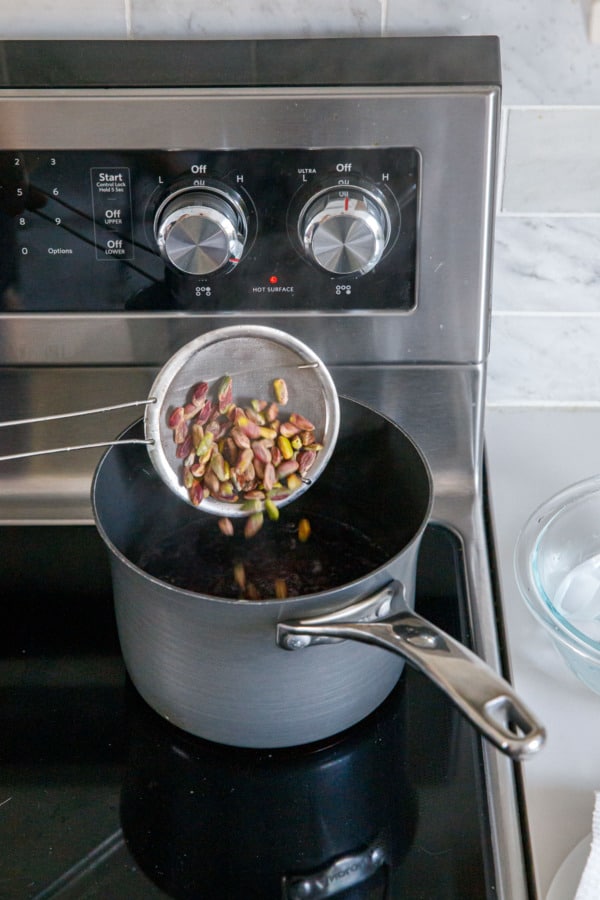
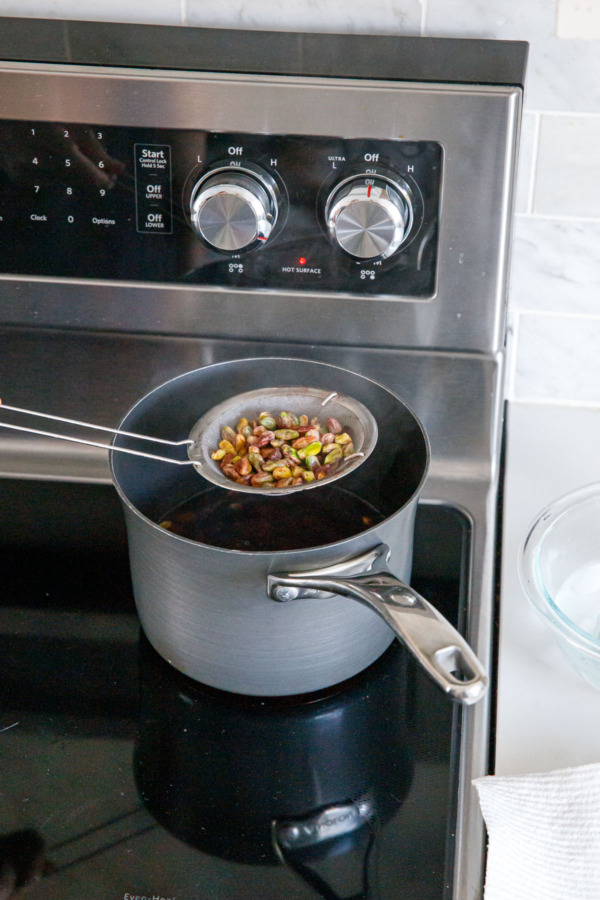
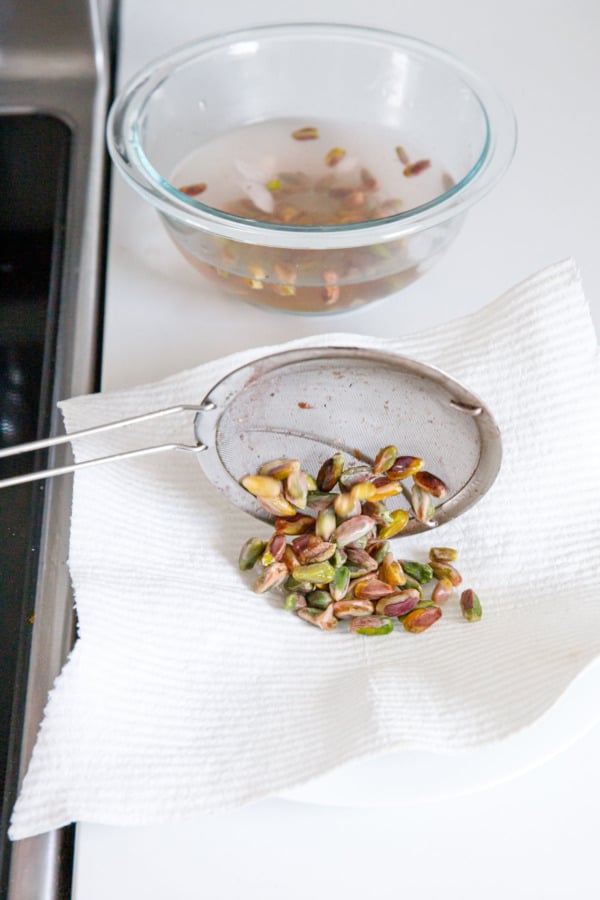
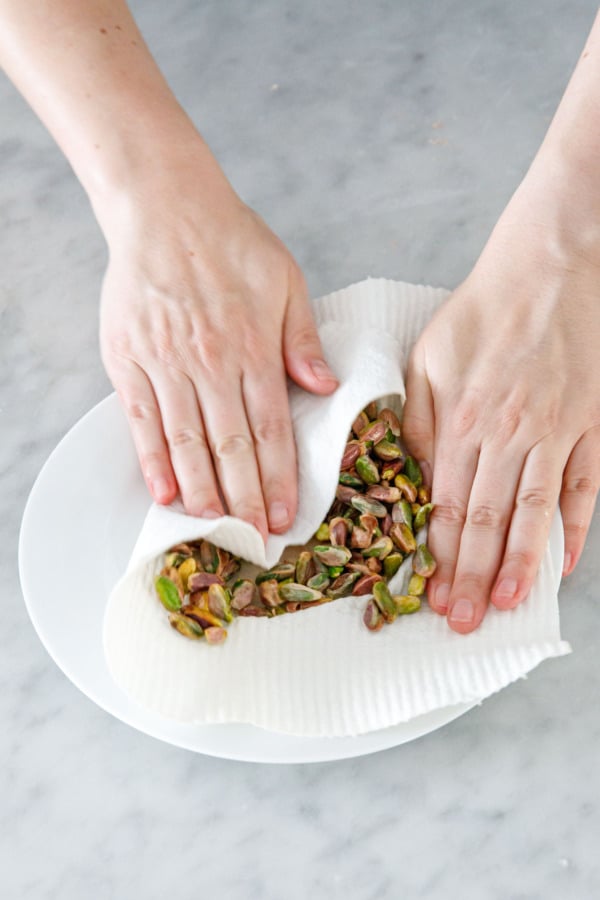
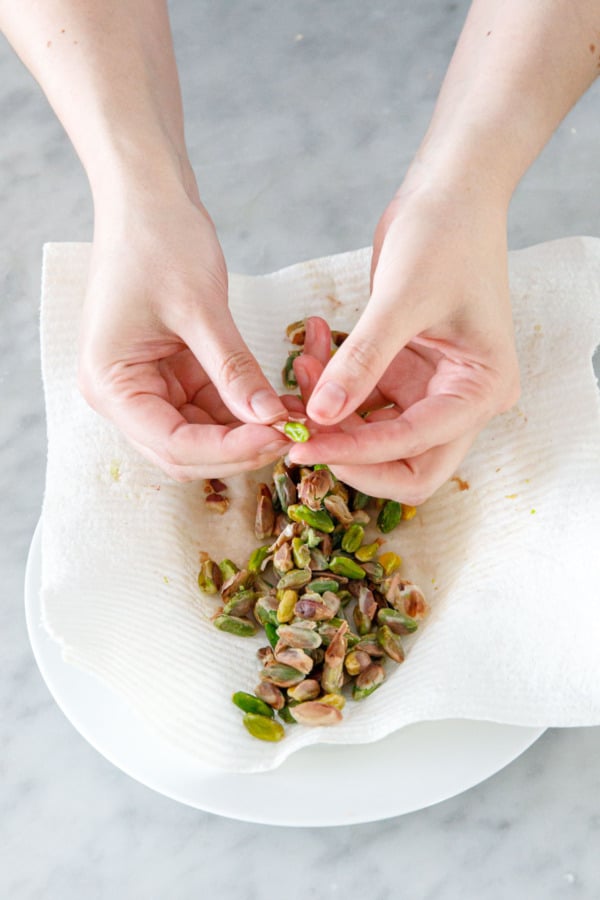
To blanch pistachios, boil shelled pistachios in boiling water for 30 seconds. Drain and dunk in an ice bath to stop them from cooking any further. Drain onto paper towels, then rub vigorously between two thick paper towels or clean dish towels (I like to use reusable paper towels as they don’t tear like regular paper towels but I don’t have to worry about staining my nice kitchen towels). This extra friction will help remove or loosen the pistachio skins. You’ll still need to pick through and peel off many of the skins by hand, but they should come off fairly easily (though this depends on the variety and batch of pistachios, I’ve found that some are easier to peel than others).
Blanched pistachios are softer than raw pistachios, which actually makes them easier to blend into a smooth and creamy nut butter. That said, you’ll still need to toast them (and give them an extra minute or two vs unblanched nuts to account for the extra moisture).
I’d like to propose a toast.
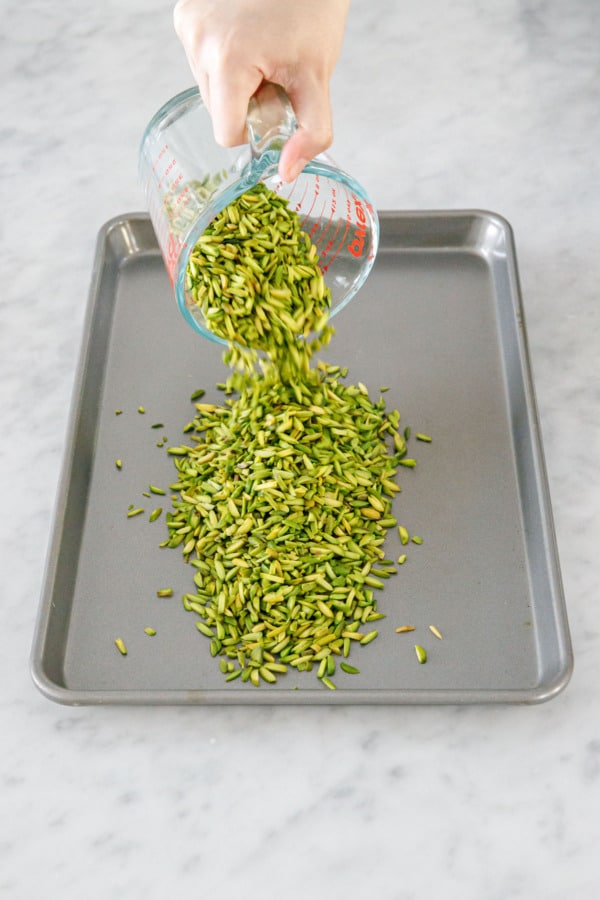
Before making your pistachio butter, lightly toast the nuts in a 325ºF/160ºC oven for 5 to 10 minutes until fragrant and the oils start to release. You don’t want them to brown at all, so keep a close eye on the oven.
Toasting the pistachios before grinding them into butter is an optional step, however I find it improves the overall flavor of the butter, making it taste more toasty and nutty instead of grassy.
Toasting the nuts also helps release the natural oils so it blends more easily into a creamy, spreadable nut butter.
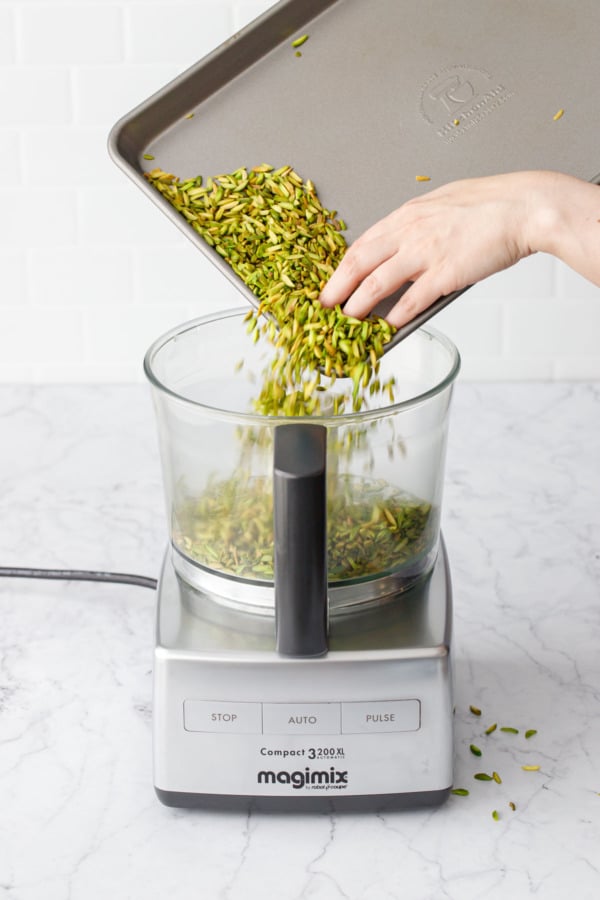
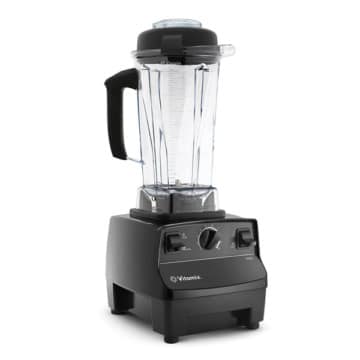
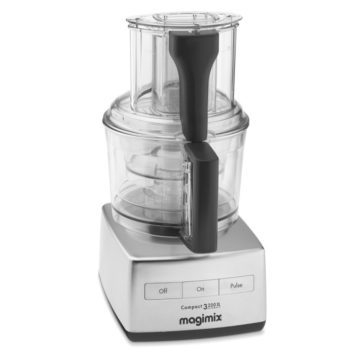
Once you’ve toasted your pistachios, let them cool slightly, then transfer to your food processor or blender. You do need a high-powered appliance for this recipe, unfortunately regular blenders will have a very hard time with this and you risk burning out your motor. Food processors are better suited to this task in general, and is my preferred appliance for making homemade nut butter. That said, if you use a blender, you’ll need the tamper to keep the thick mixture moving.

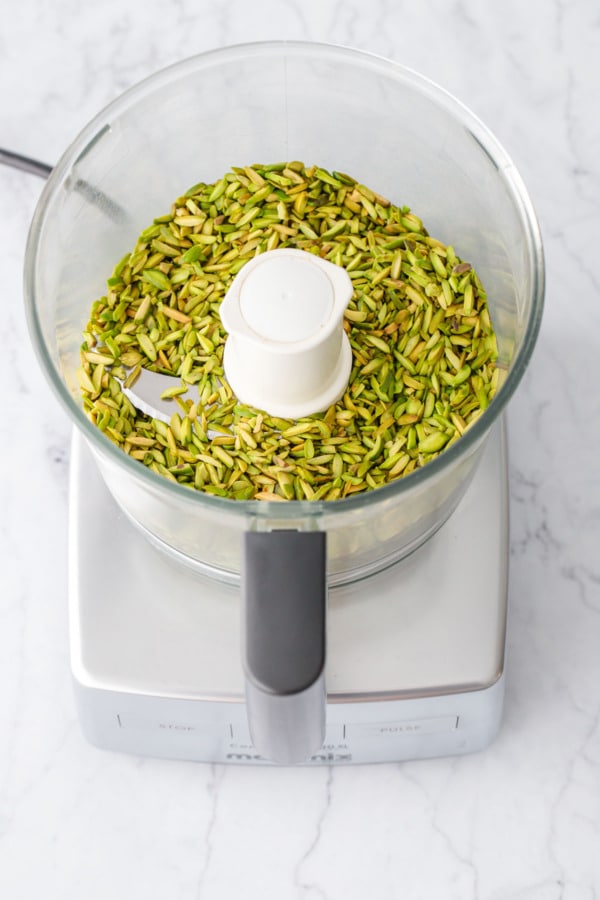
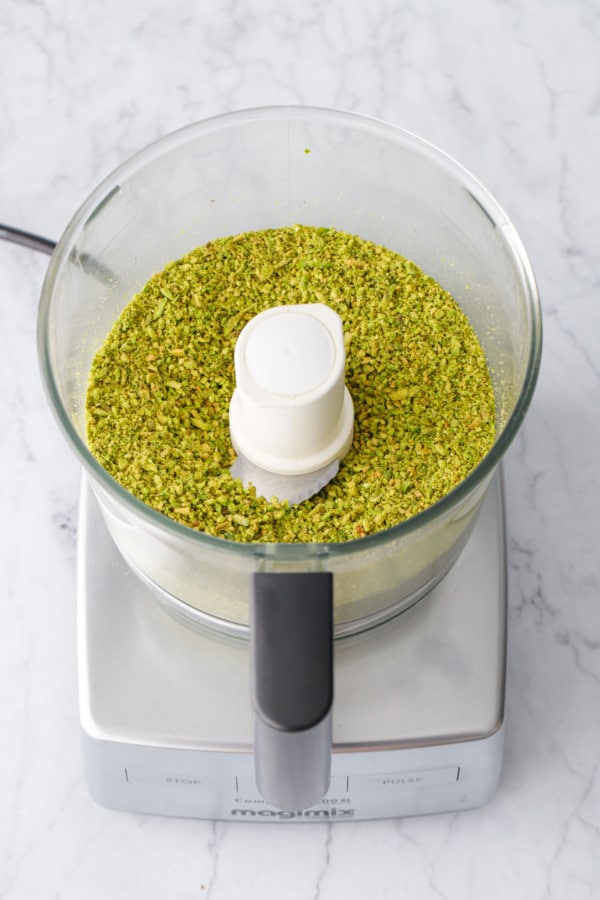

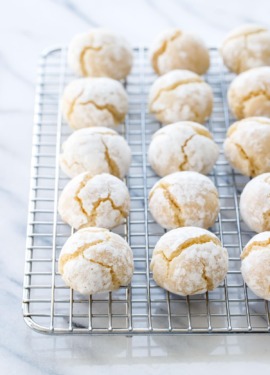
As you start processing the nuts, first they will turn into a finely ground powder. Stop here and you’ve got pistachio flour (perfect for pistachio amaretti!)
But if you keep going, and the flour will eventually start to clump together, then thicken into a stiff dough. Mine balled up into one big clump that kept spinning around the bowl at one point, if that happens just break it up and then continue processing. If you’re using a blender this is the trickiest part; you’ll really need to use the tamper to keep the nuts moving. But don’t worry, even if it seems like won’t work, keep going and it will get there eventually!
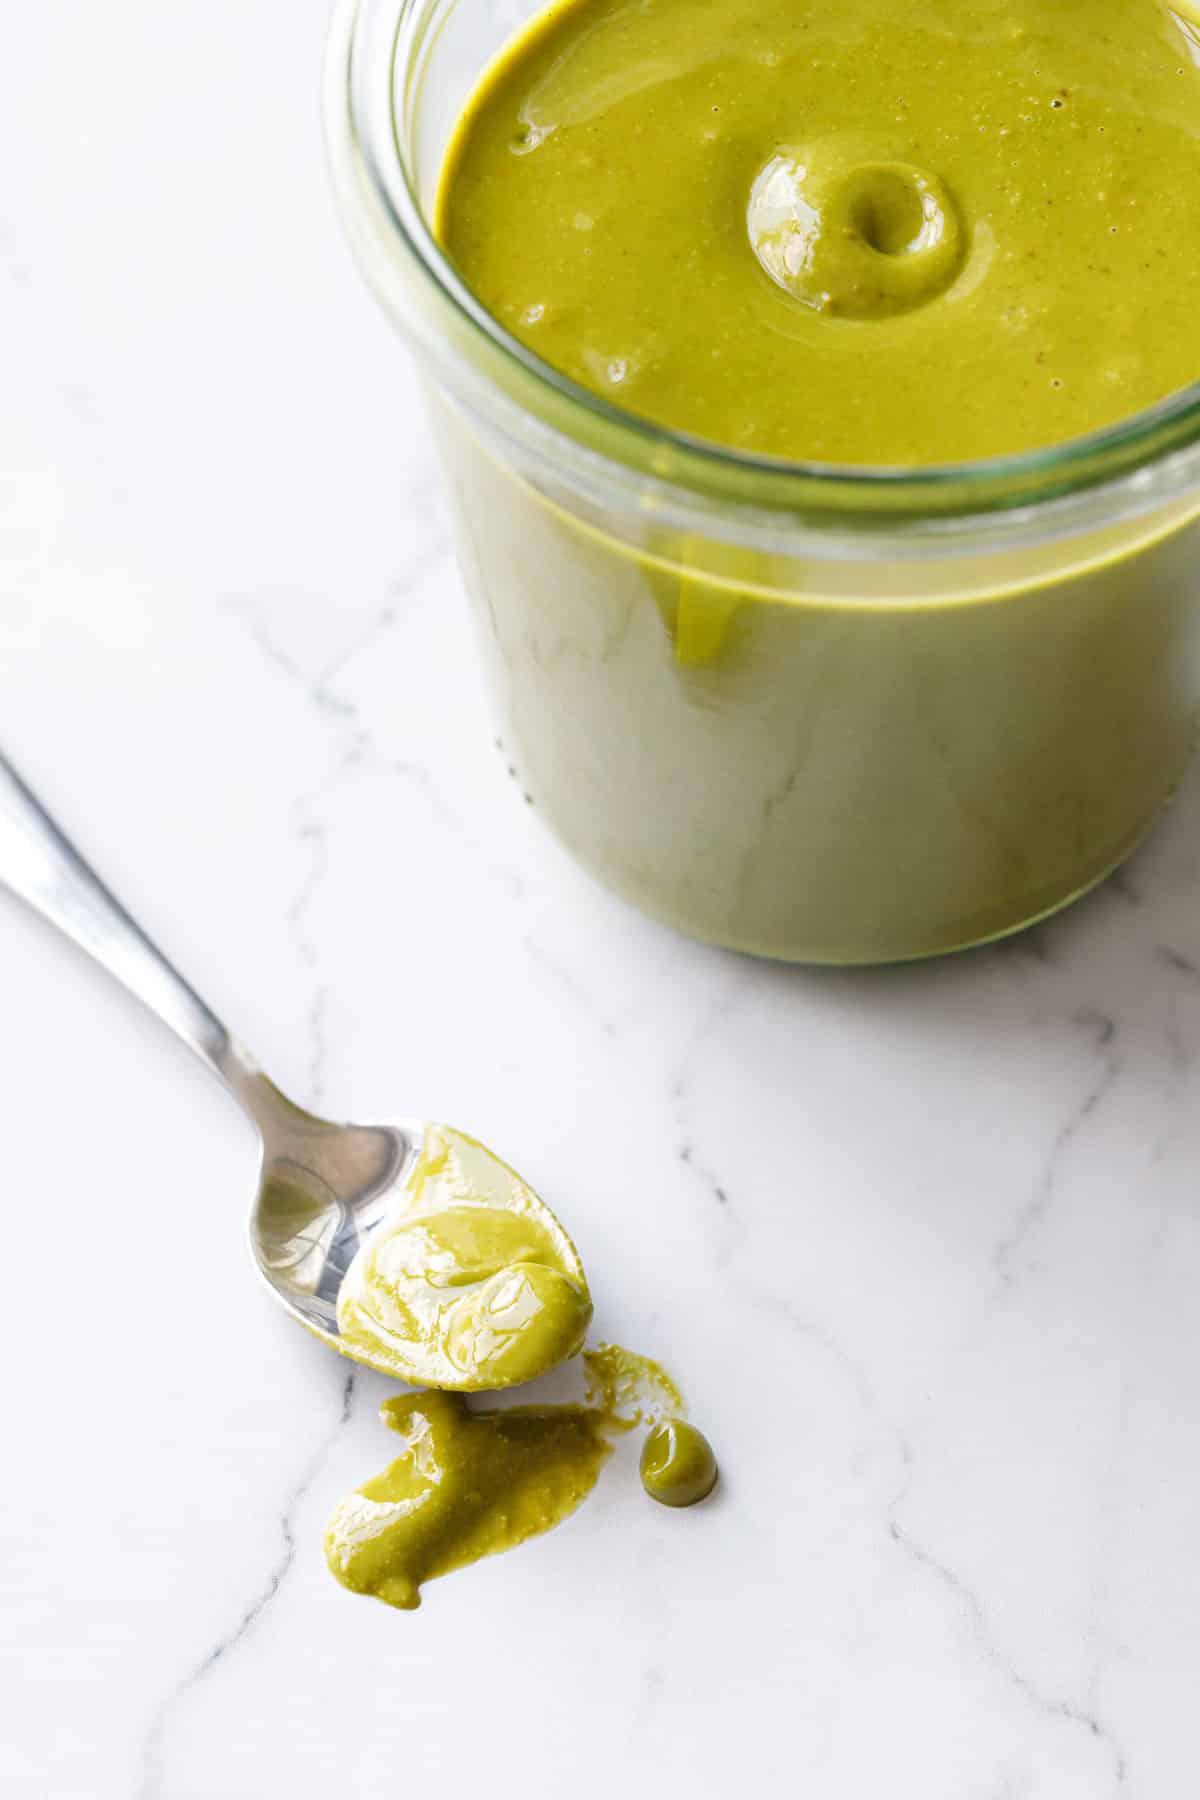
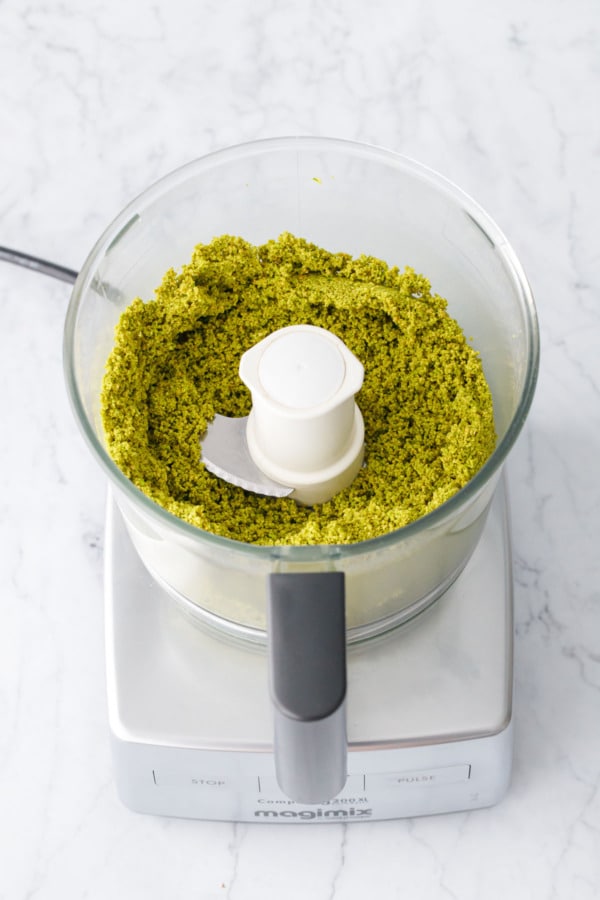
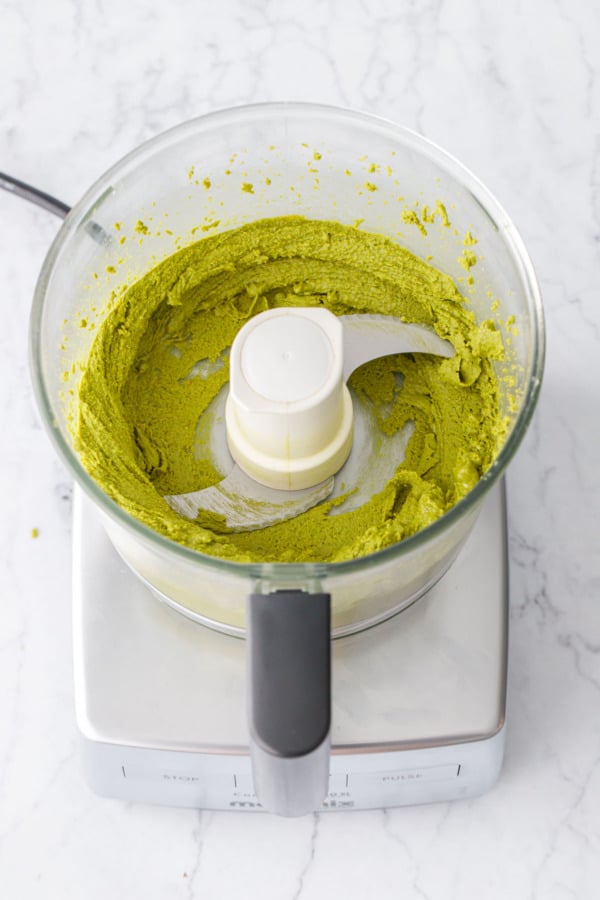
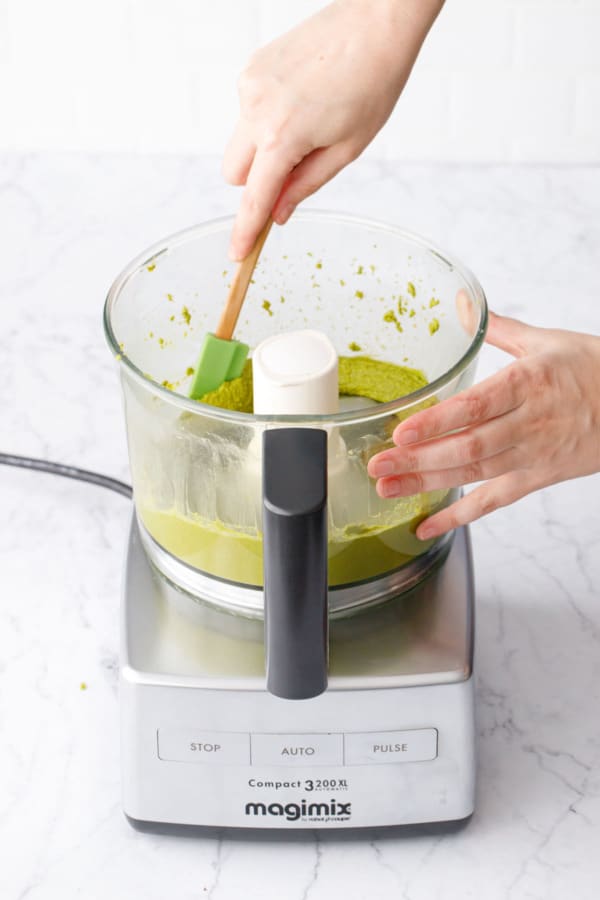
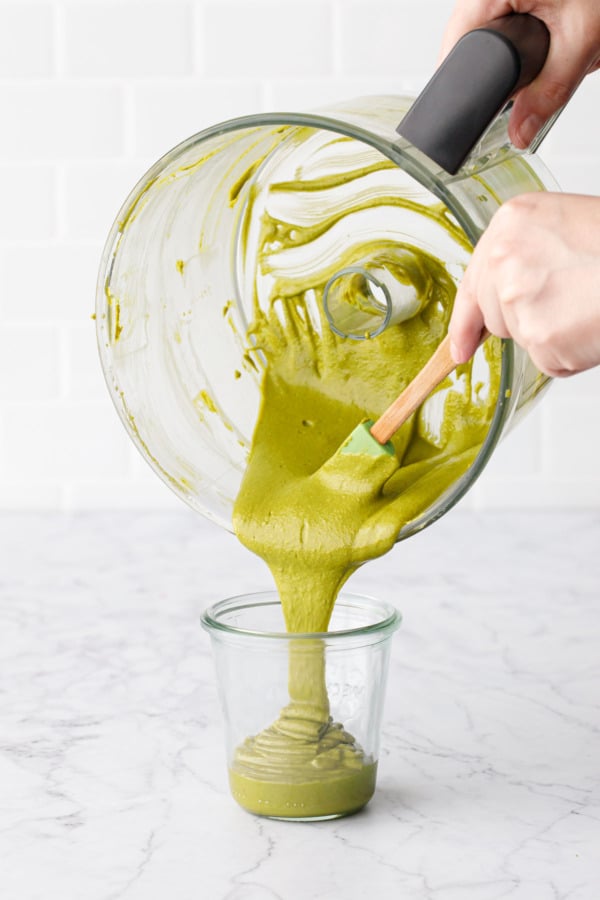
Once it starts to turn paste-like (a few minutes in), start scraping down the bottom, sides, and especially the corners regularly, just to be sure everything blends together smoothly and evenly.
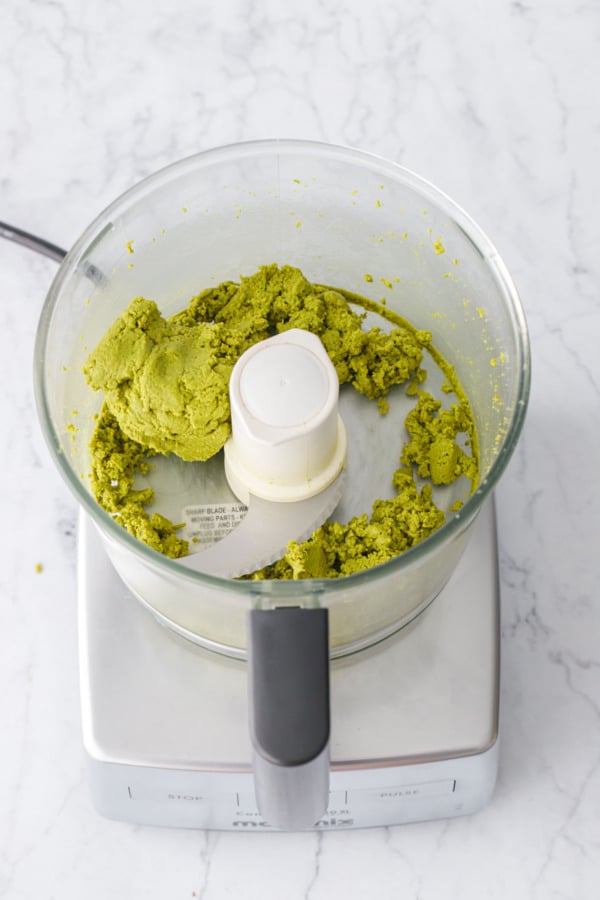
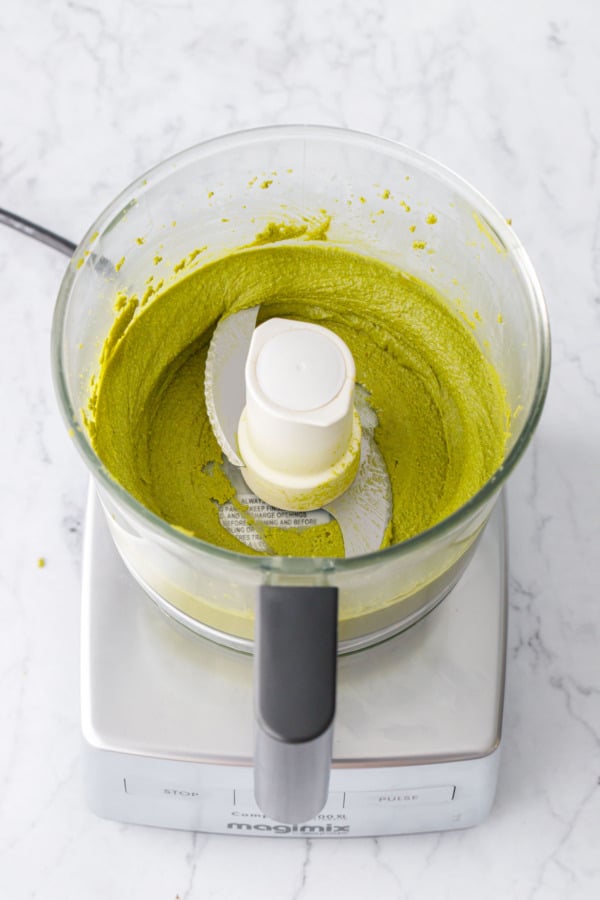
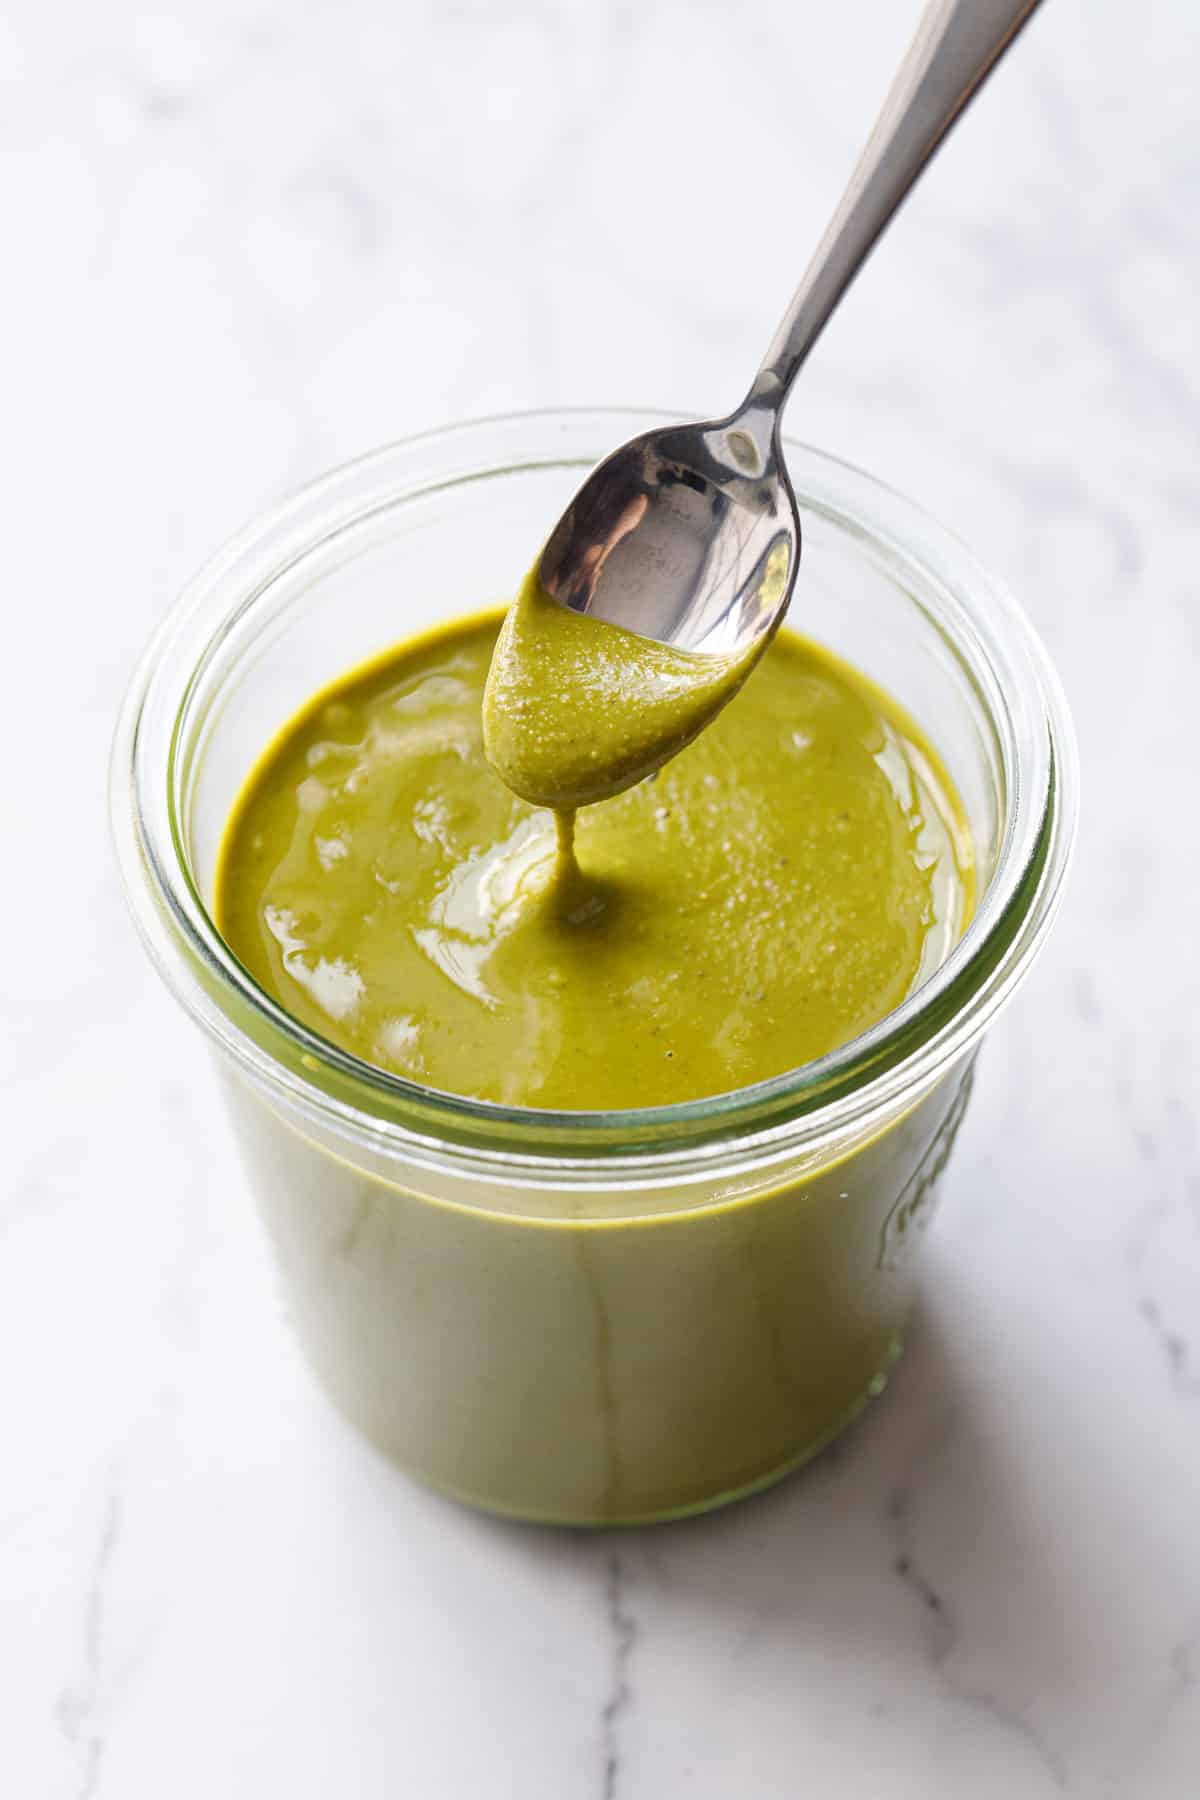
At this point you can stop whenever you’ve achieved your desired consistency. If you prefer a thicker, more rustic nut butter, stop as soon as it turns into a paste. If you want something smoother and creamier, keep going for 5 or even 10 minutes more. If you need to stop and let your food processor or blender cool off for a few minutes that’s definitely a smart idea (you’ll notice the pistachio butter gets quite hot the longer it processes.)
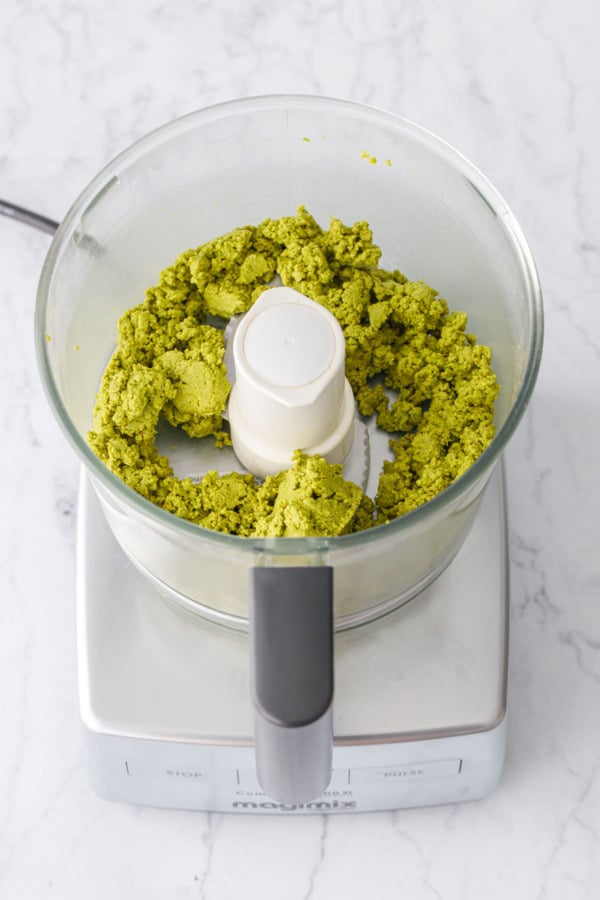
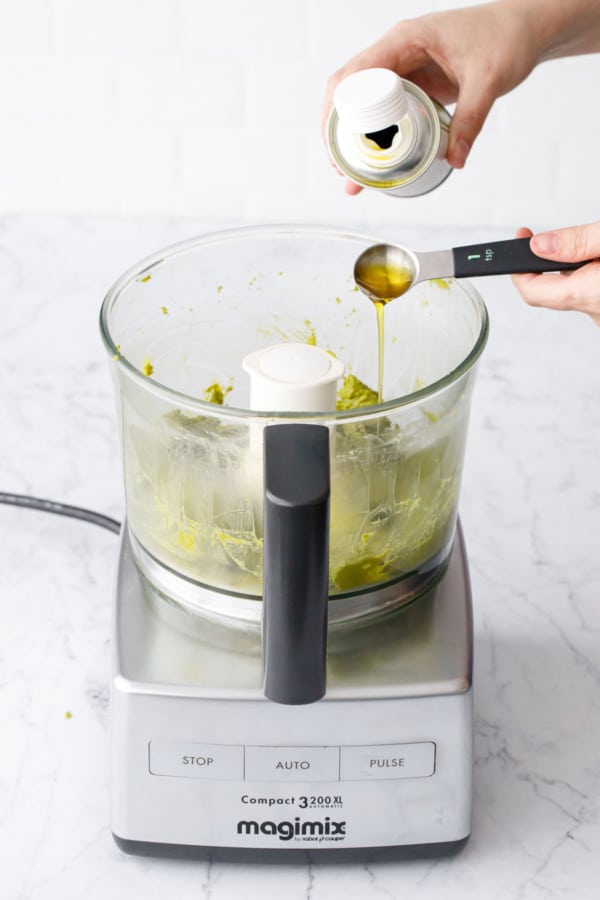
If you’d like, you can add a teaspoon of toasted pistachio oil, almond oil, or other neutral-flavored vegetable oil after the pistachios turn into paste. I find adding a teaspoon or so when the pistachios are in the thick dough stage helps ease the process along, resulting in a smoother final product.
You can also add a pinch of salt and/or sugar at the end to improve the final flavor (this is totally optional).
TIP: Before you clean out your blender/food processor, add a cup of filtered water and blitz it a few times. This will dissolve the pistachio butter stuck to the sides and blades (making it easier to clean), and you’ll end up with a glass of nutty pistachio milk as an added bonus!
Want a crunchy pistachio butter instead of smooth? Blitz the pistachios once or twice to coarsely chop, then take about 1/3 of the nuts out of the food processor before continuing to process. Once you’ve gotten a relatively smooth butter, add back the chopped pistachios at the very end.
Small Batch, Please.
Being that I was testing five or six different variables, I wanted to make the smallest batch possible. I was able to process 1 cup of nuts at a time using the smaller bowl of my Magimix food processor. With the larger bowl, I needed at least 2 cups of nuts. And while the Vitamix blender worked with 2 cups, I think it’d work even better with 3 cups. (If anyone has one of those little ninja blender things, please let me know how this works for you and how many nuts it can reasonably handle!)
If you want to make a lot of pistachio butter at once, just be sure you don’t overwhelm your machine. I think I could easily do 4 cups of pistachios in my food processor or Vitamix blender, but more than that would burn out my machine.
In terms of quantity and yield, in general you can expect that 4 cups (1 pound) of in-shell pistachios equals 2 cups (8oz) of shelled pistachios equals 1 cup of pistachio butter.
I tested a lot of variables here, and depending on what your final goal is here are the best methods:
For the Easiest pistachio butter: use slivered pistachios in a food processor. Slivered pistachios are already blanched and peeled, so you can skip that tedious step. The smaller pieces of nuts also toast quicker and process quicker than whole nuts.
For the Greenest pistachio butter: use slivered pistachios, or blanched/peeled Turkish pistachios, or deep green pistachios (although the later was not my favorite as far as taste).
For the Smoothest pistachio butter: use blanched or slivered pistachios (no skins) in a Vitamix instead of a food processor. While the food processor does a great job, but the final result is still ever so slightly gritty. The Vitamix, while it definitely takes longer, will produce the smoothest final product.
For the ultimate, best of both worlds pistachio butter: use bright green slivered pistachios or blanched/peeled Turkish pistachios in a food processor, then finish in a Vitamix for the smoothest texture ever.
Now that I’ve found a good source for nice green slivered pistachios I will probably use those almost exclusively from now on!
Optional Additions
Oil: I found a teaspoon or so of oil really smoothed out the butter and helped it process more easily. I used Roasted Pistachio Oil, but almond oil or another neutral-flavored oil would work just as well.
Salt: A pinch of fine sea salt will make the pistachio flavor pop. If you plan to use your pistachio butter for sandwiches or as a spread, you’ll definitely want to add a pinch of salt to your final butter. If you plan to use it for baking, however, you can opt to leave the salt out (so you can better control the amount of salt in your final baked recipe).
Sugar: A little sweetness goes a long way to enhance the natural pistachio flavor. Add a teaspoon or two of sugar, honey, or maple syrup for a touch of sweetness.
Extract: Natural pistachio butter tastes nothing like the artificial pistachio flavor we’re familiar with in ice cream and baked goods. If you want a pistachio flavor more like pistachio gelato, add a few drops of almond extract.
Coloring: if your pistachios aren’t very naturally green, but you want an aesthetically pleasing pistachio butter, you can certainly add a few drops of food coloring (a drop or two of cool green would be perfect, but don’t over do it).
You can also add natural colorants, something like matcha powder (which is a flavor that goes beautifully with pistachio), or another green powder like pandan powder, spinach powder, or green spirulina (just go easy on the later as it can have a fishy flavor).
Serving & Storage
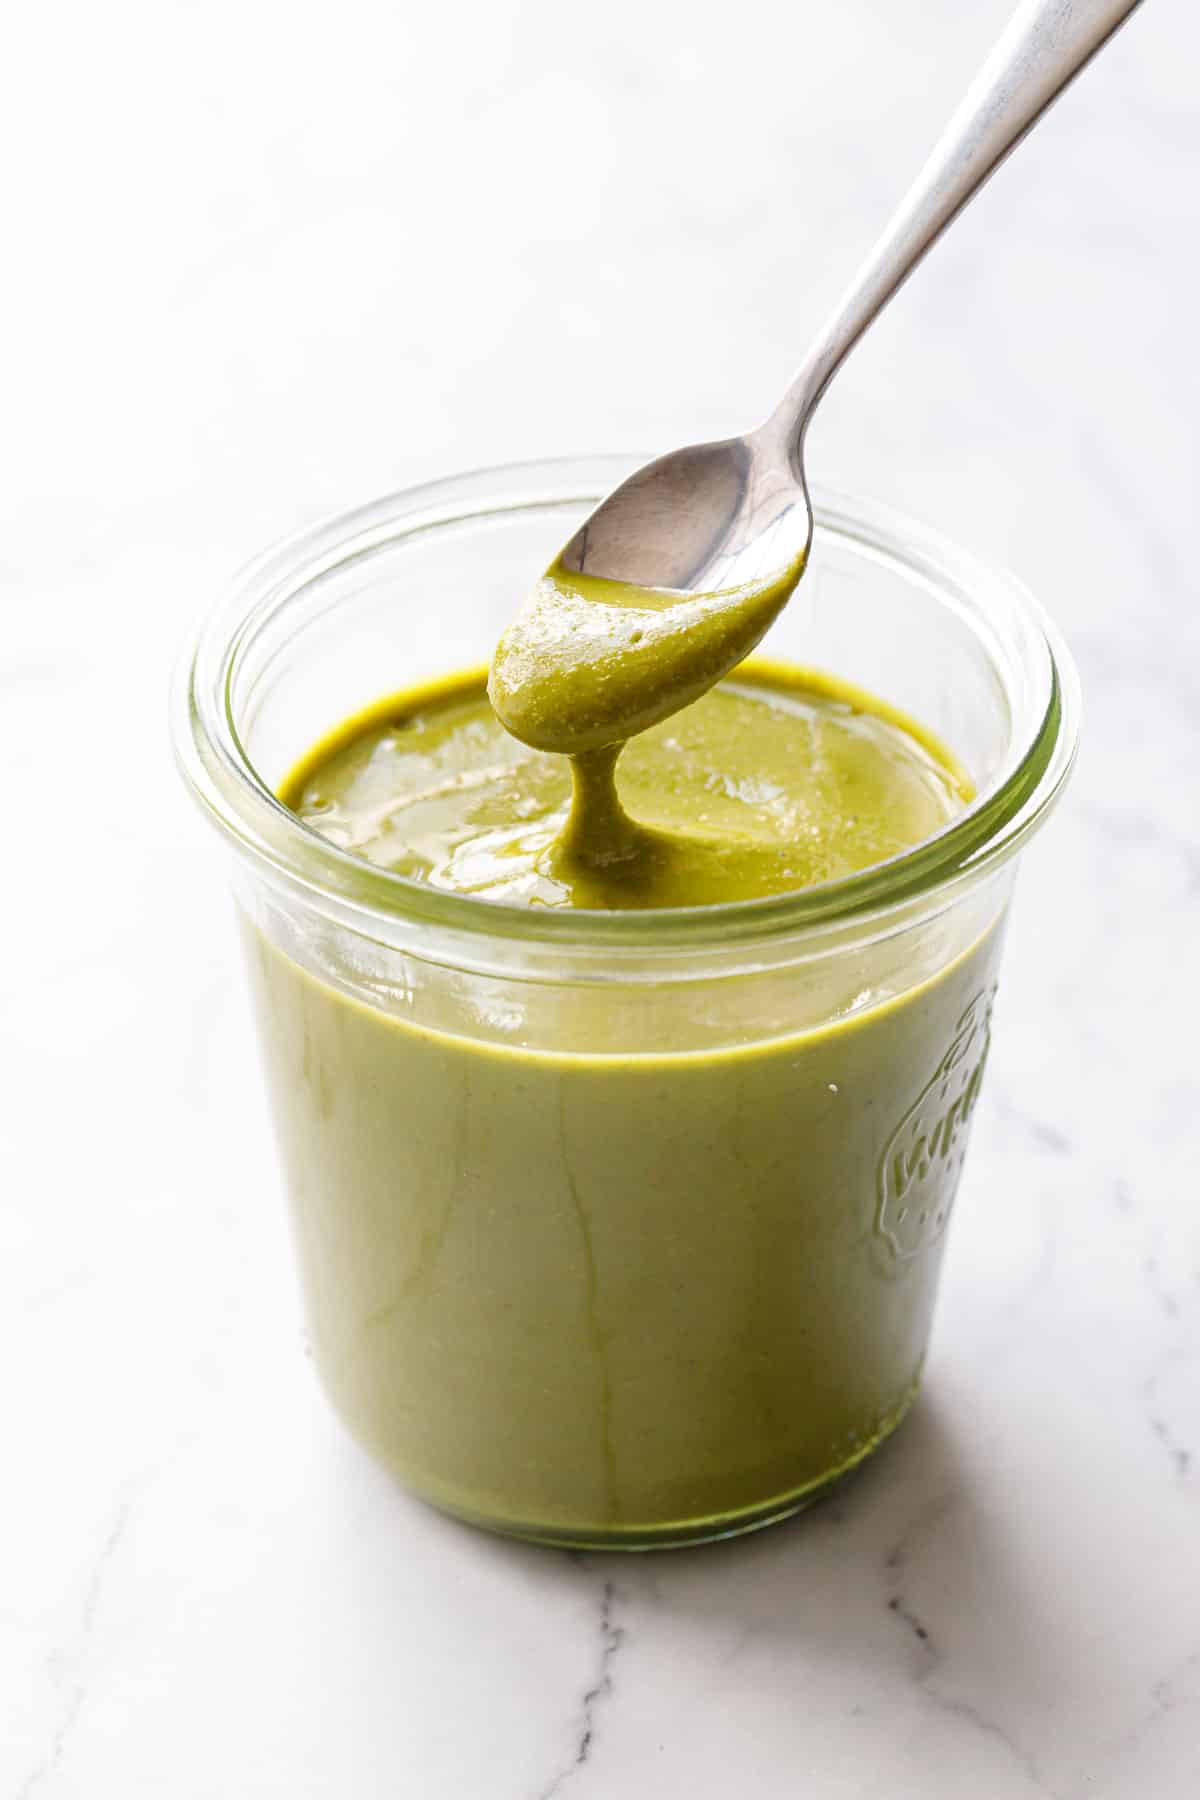
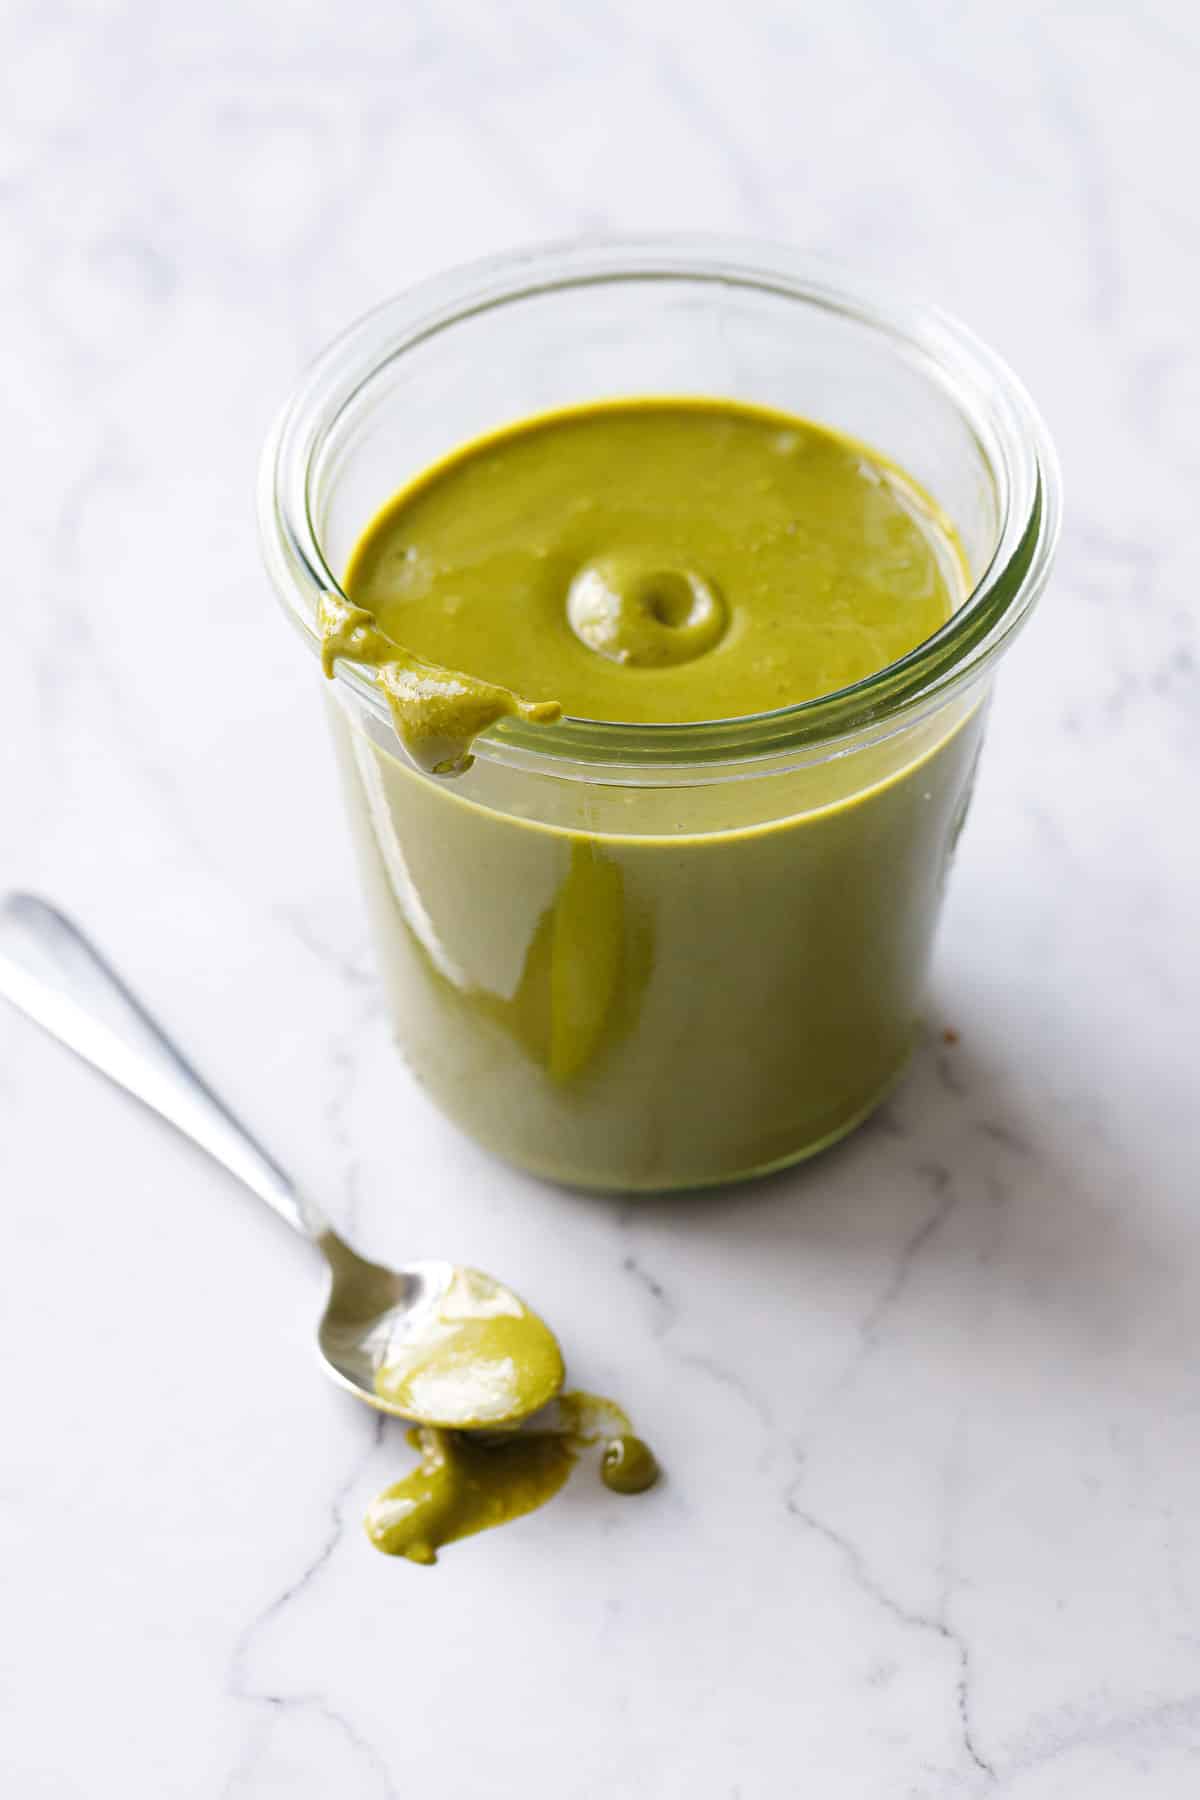
While you don’t need to refrigerate pistachio butter, I recommend it for longer shelf life. Store pistachio butter in an airtight container or jar in the refrigerator for up to a month, or in the freezer for even longer (if you made a particularly big batch for example). The oils may separate a bit (like any natural nut butter), just give it a good stir before using. While pistachio butter has a pretty long shelf life, if it starts to taste bitter or ‘off’ that probably means it’s gone rancid.
Store pistachios in a cool, dark place, or, ideally, in the freezer for the longest shelf-life. Because they are high in fats and oils, pistachios can definitely go rancid, and storing them in the freezer will ensure that they stay fresh-tasting for up to a year or more.
Now that you’ve made a batch of homemade pistachio butter (and assuming you haven’t eaten it all yet because YUM), what should you do with it?
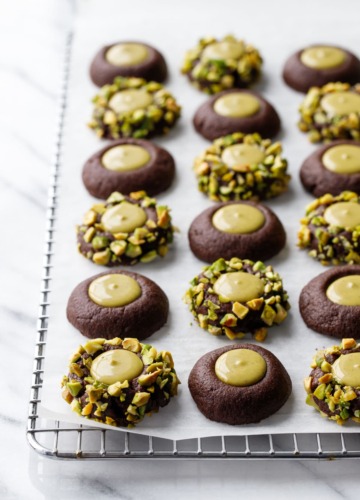
Chocolate Pistachio Thumbprints are one of my favorite cookie recipes (and yours too!) for good reason. The filling is a creamy concoction of pistachio butter and white chocolate that sets up into an almost ganache-like consistency. Seriously good.
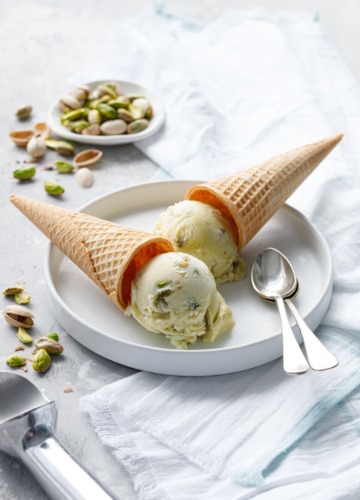
Pistachio blondie ice cream sandwiches are a hit any time of year, but particularly in the heat of summer. Creamy no-churn pistachio ice cream sandwiched between two soft and chewy blondies? I’m all in.
You can also make my Pistachio Lover’s Gelato which features a triple dose of pistachio goodness (that layer of pistachio cream on top is EVERYTHING).
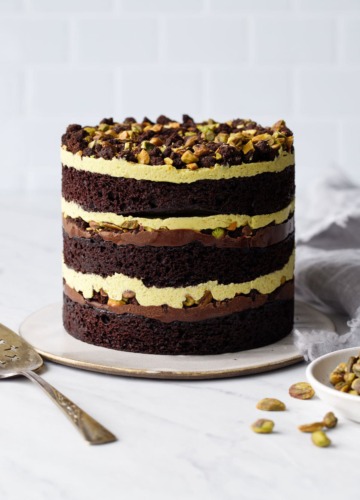
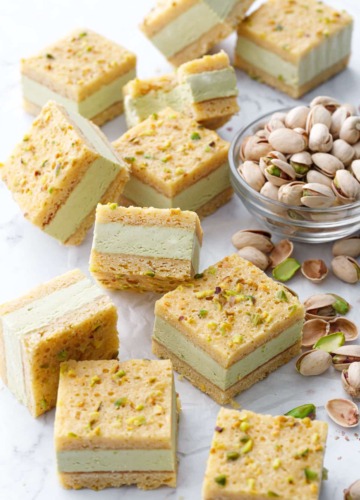
Or, for a super impressive multi-layer cake that’s surprisingly easy to assemble (no finicky frosting or piping necessary), check out this stunning Chocolate Pistachio Naked Layer Cake. The pistachio buttercream uses pistachio butter for the primary flavoring and the results are to die for.
Homemade Pistachio Butter
Ingredients
- 2 cups / 250 g shelled pistachios
- 1 teaspoon toasted pistachio oil or other neutral flavored oil, optional
- fine sea salt, optional (to taste)
Instructions
- Preheat oven to 325 degrees F. Spread shelled or slivered pistachios in an even layer on a cookie sheet. Bake for 5 to 10 minutes or until fragrant but not yet browned (slivered pistachios will need less time, blanched or whole pistachios will need a few minutes more). Remove from oven and let cool slightly.
- Transfer toasted pistachios to the bowl of a food processor or blender. Process until pistachios break down in to a fine powder. If you're using a blender, get out the tamper so you can keep the nuts moving.
- Continue to blitz the nuts for 5 to 10 minutes, scraping down the sides of the bowl as you go, until smooth and creamy. If you want, a teaspoon of pistachio oil will help the butter process more smoothly.
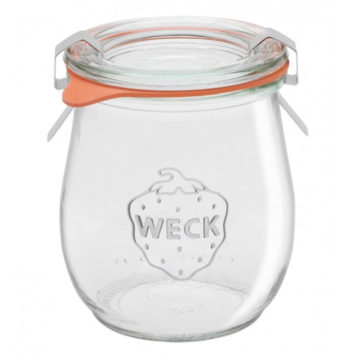
- Once the butter has achieved your desired consistency, add a pinch of salt (if desired) and pulse once or twice more to combine. Transfer to a jar or other container with an airtight lid.
- While pistachio butter does not require refrigeration, it is recommended; refrigerated in an airtight container it will keep for about a month or so. You can also freeze it for even longer.
Notes
- *Feel free to scale this recipe up or down depending on the size of your food processor or blender (I was able to do a smaller 1 cup batch in the small bowl of my food processor. However in the blender, 2 cups was barely enough. I think 3 cups would be the ideal amount.)
Wow, I thought I knew something about Pistachios until I read this amazing post. Very in-depth, covering everything you need to know. You put a lot of time testing before making this post, and it shows. Great post!!
Amazing work, Lindsay! As a fellow pistachio fan, I loved reading every word in this post! I can’t agree more how different pistachios result different shades of green. I don’t get to play with variety of pistachios at home, as my son is very allergic to pistachios, unfortunately. So it was fun see your experiment! And how did I not know about that perfect slivered pistachios?! Ordering it now!