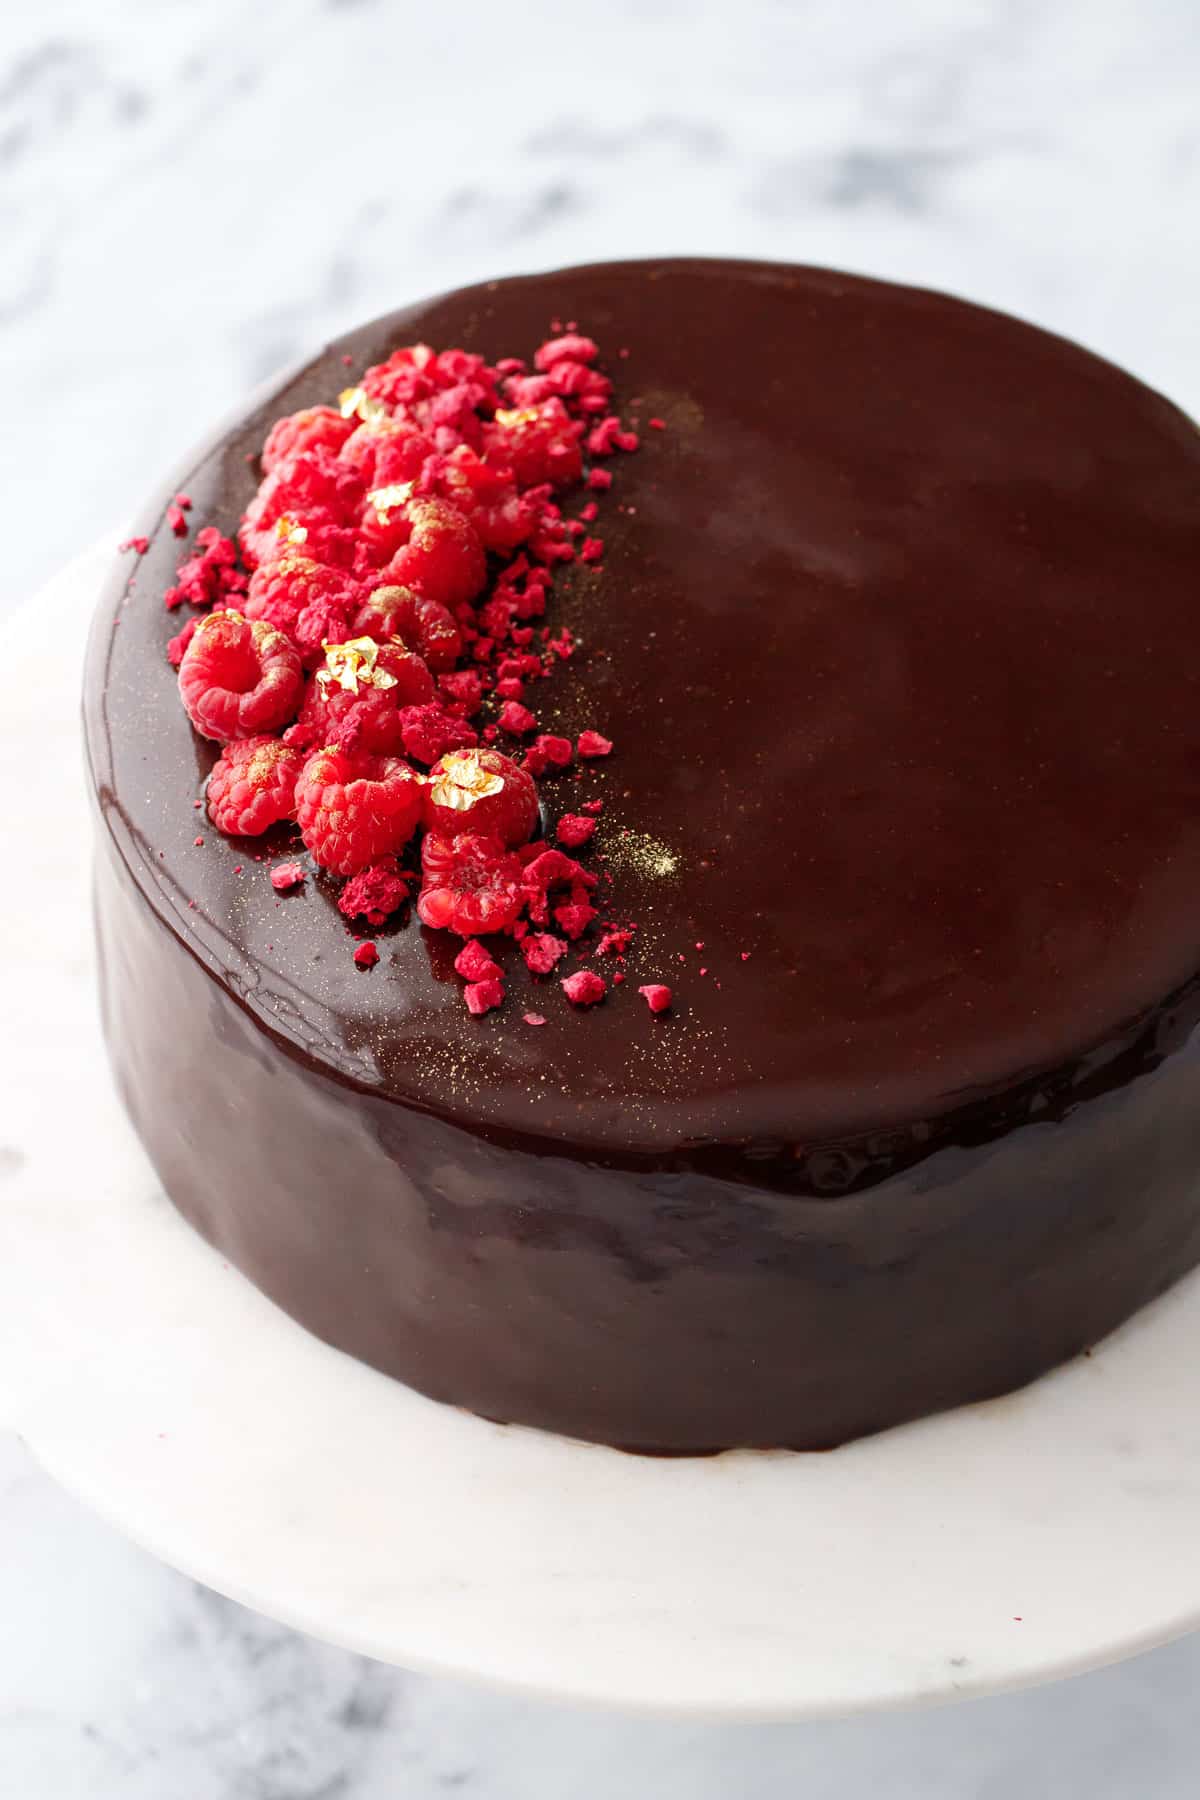
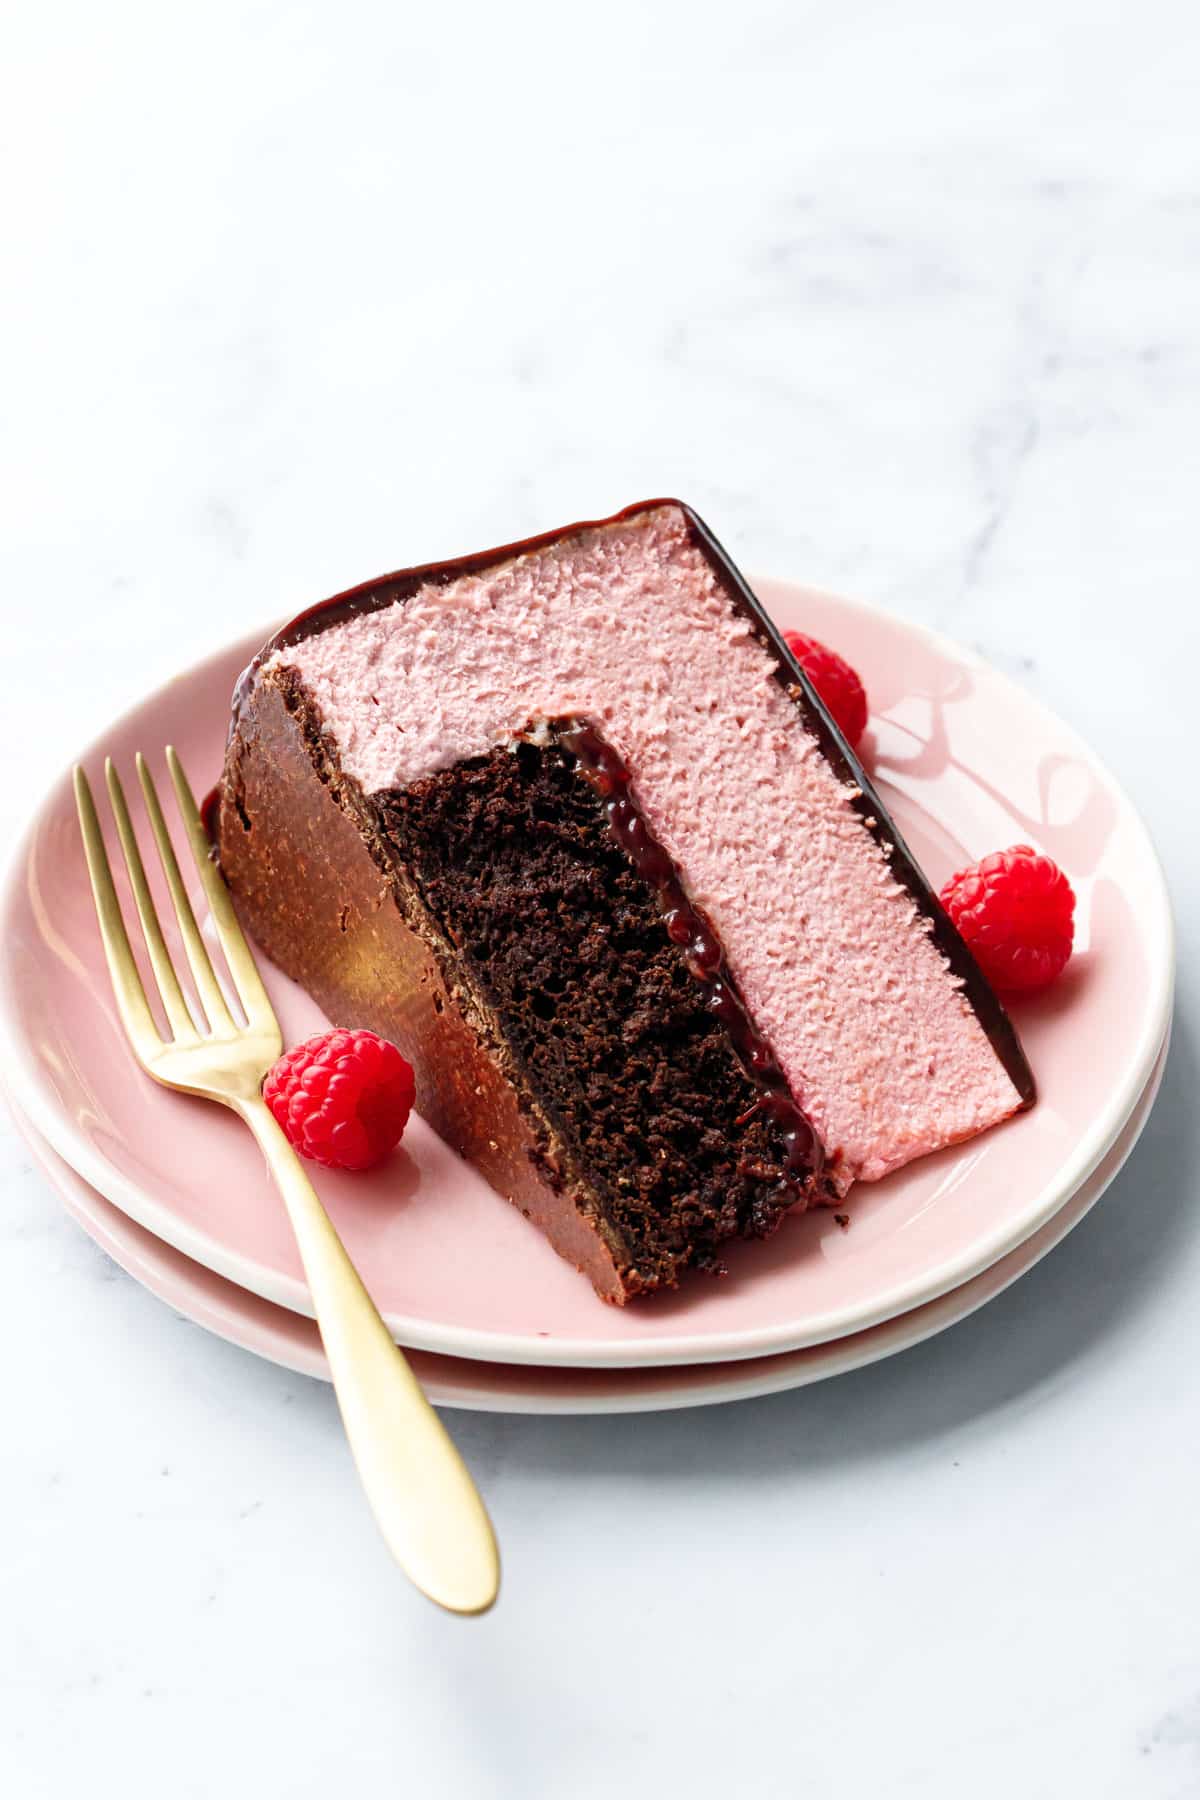
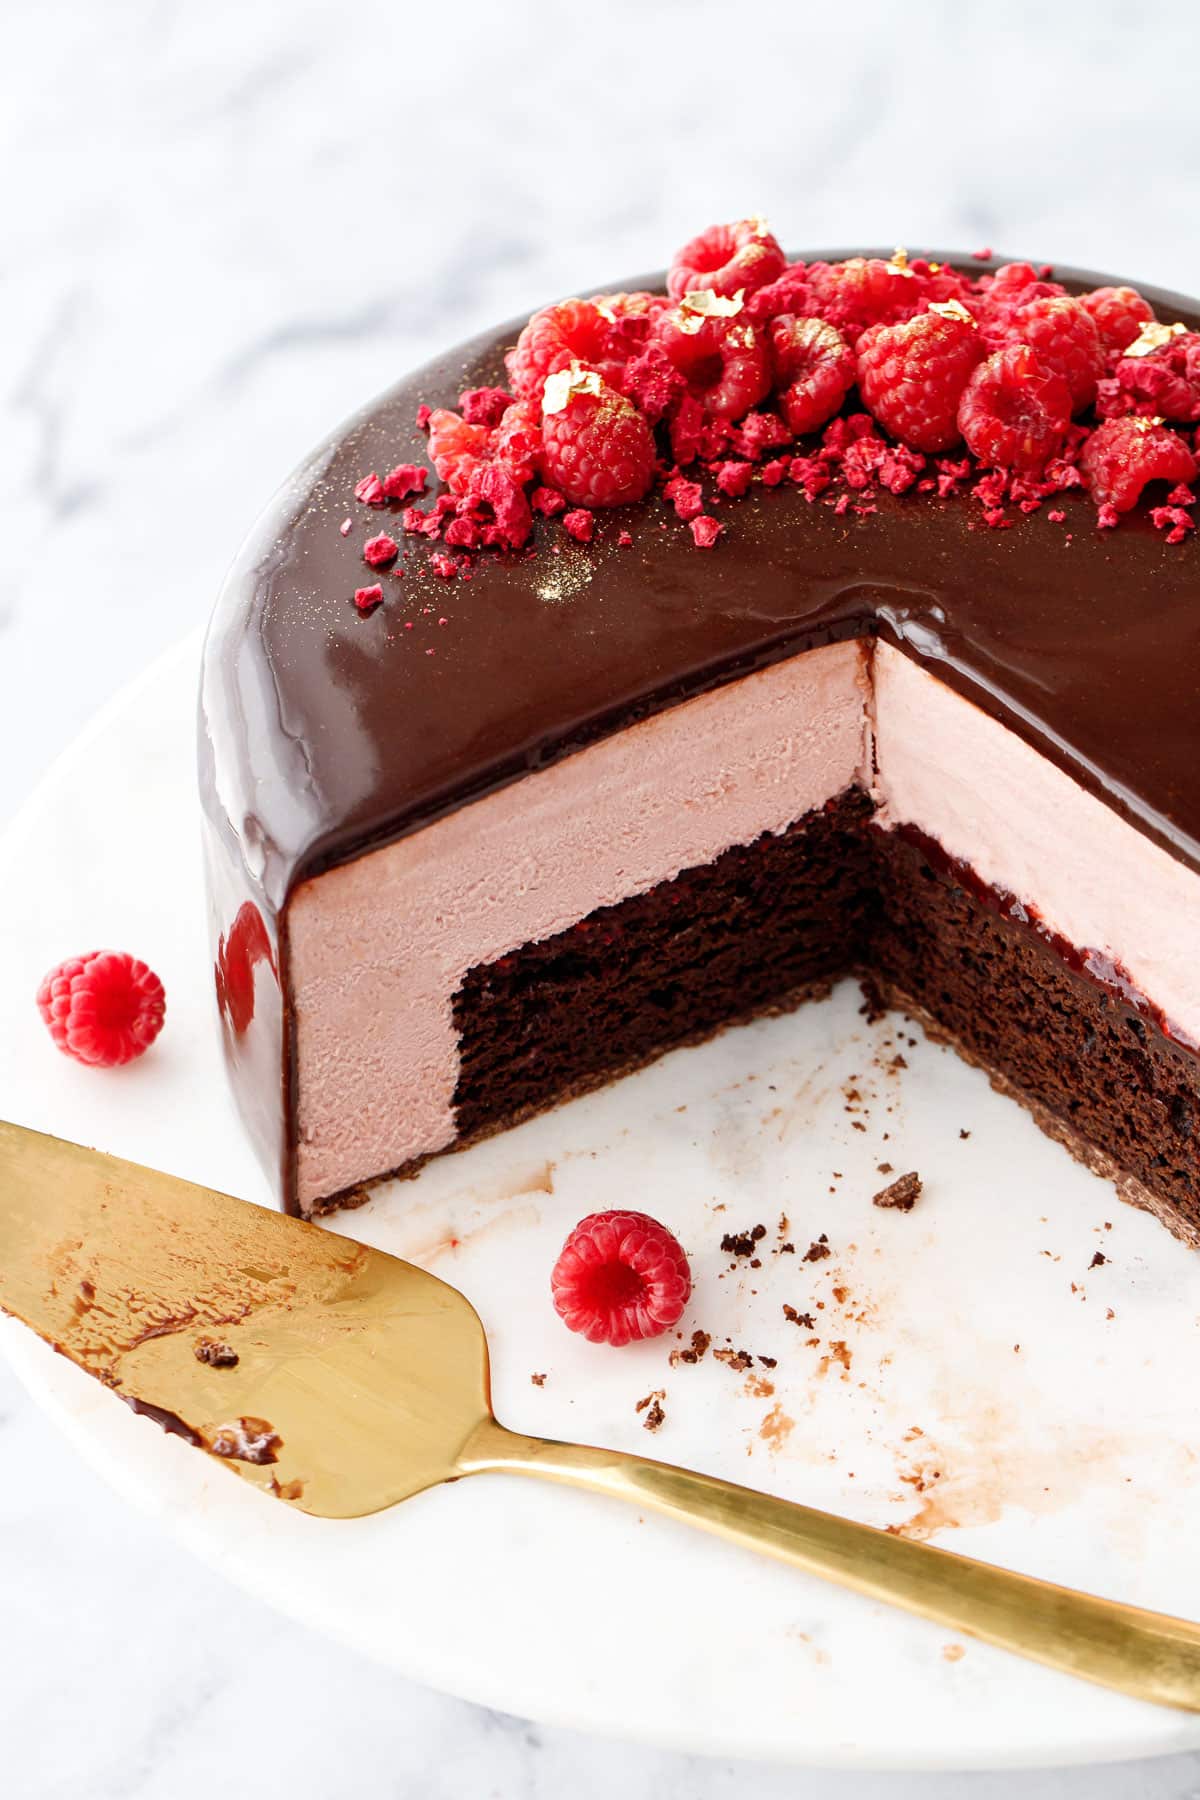
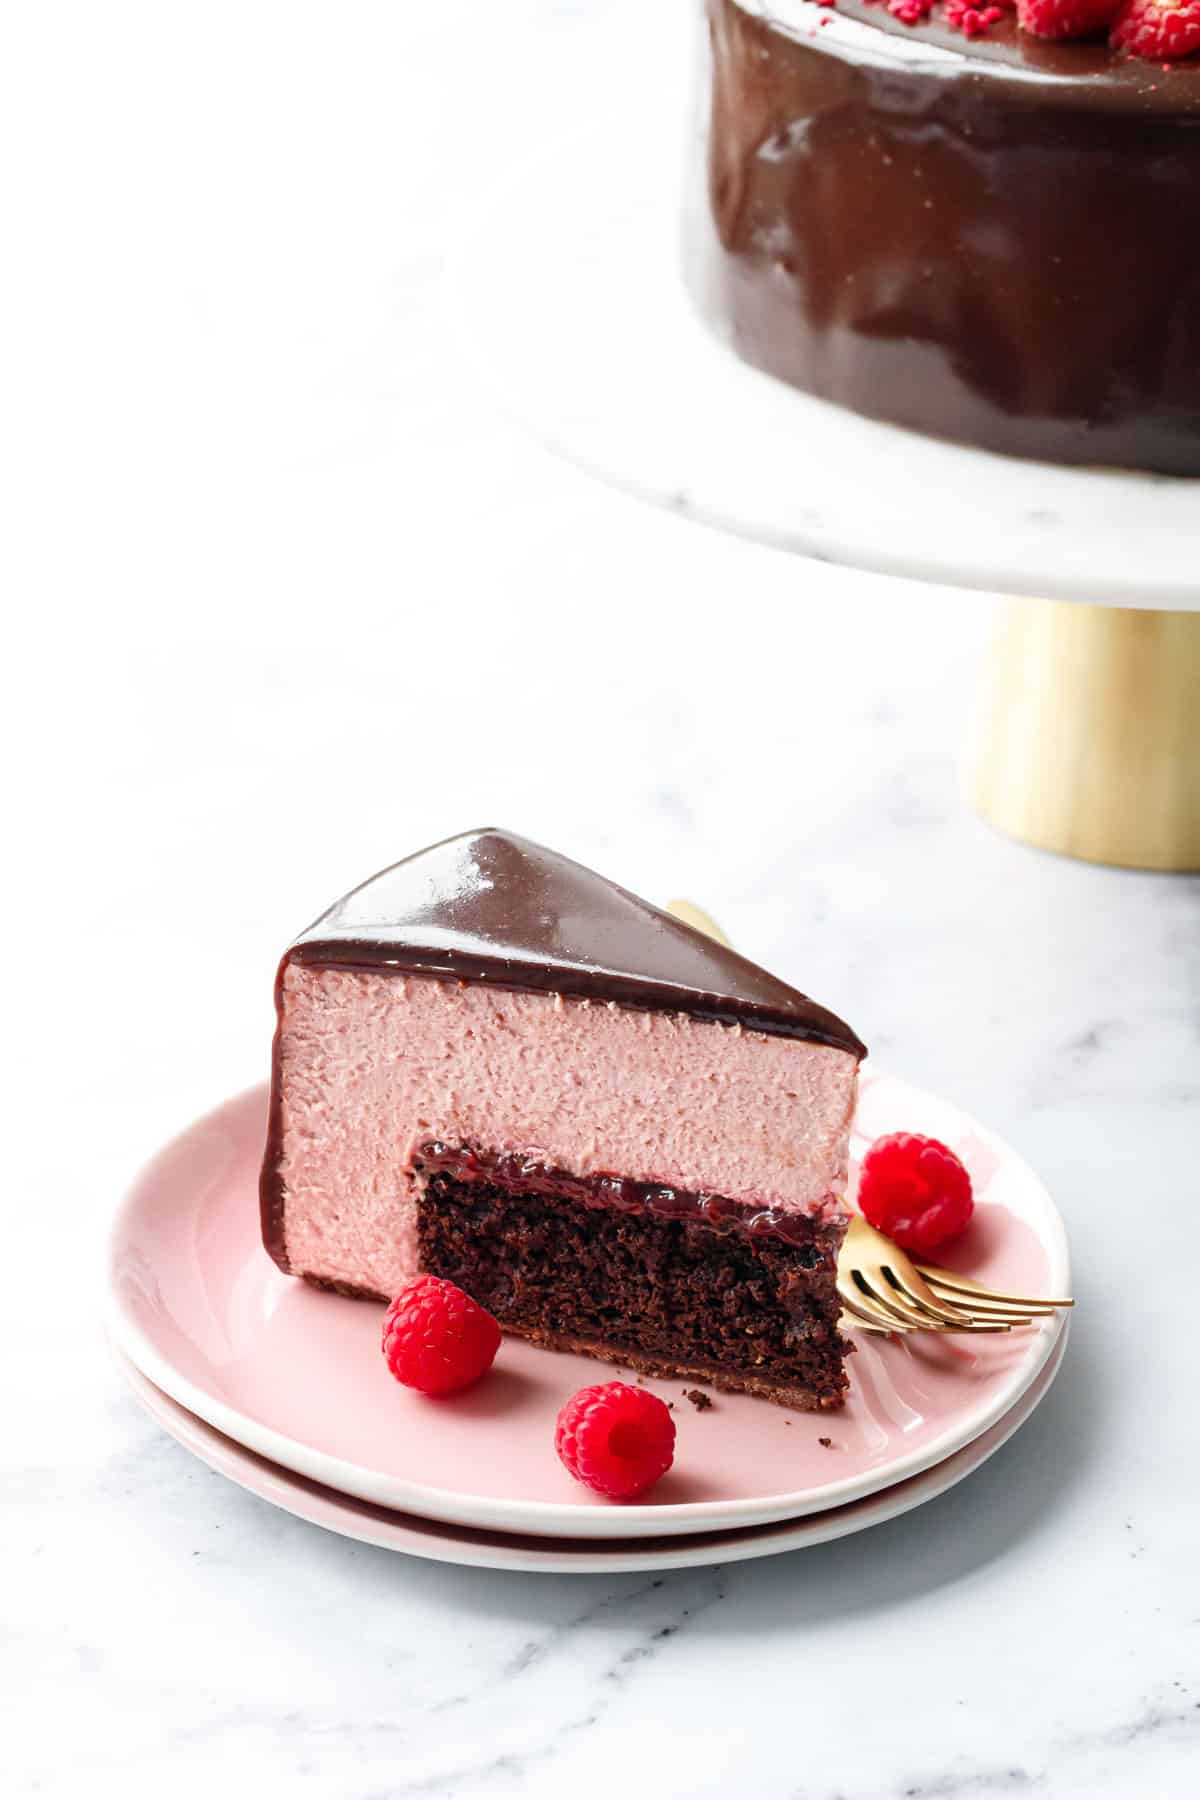
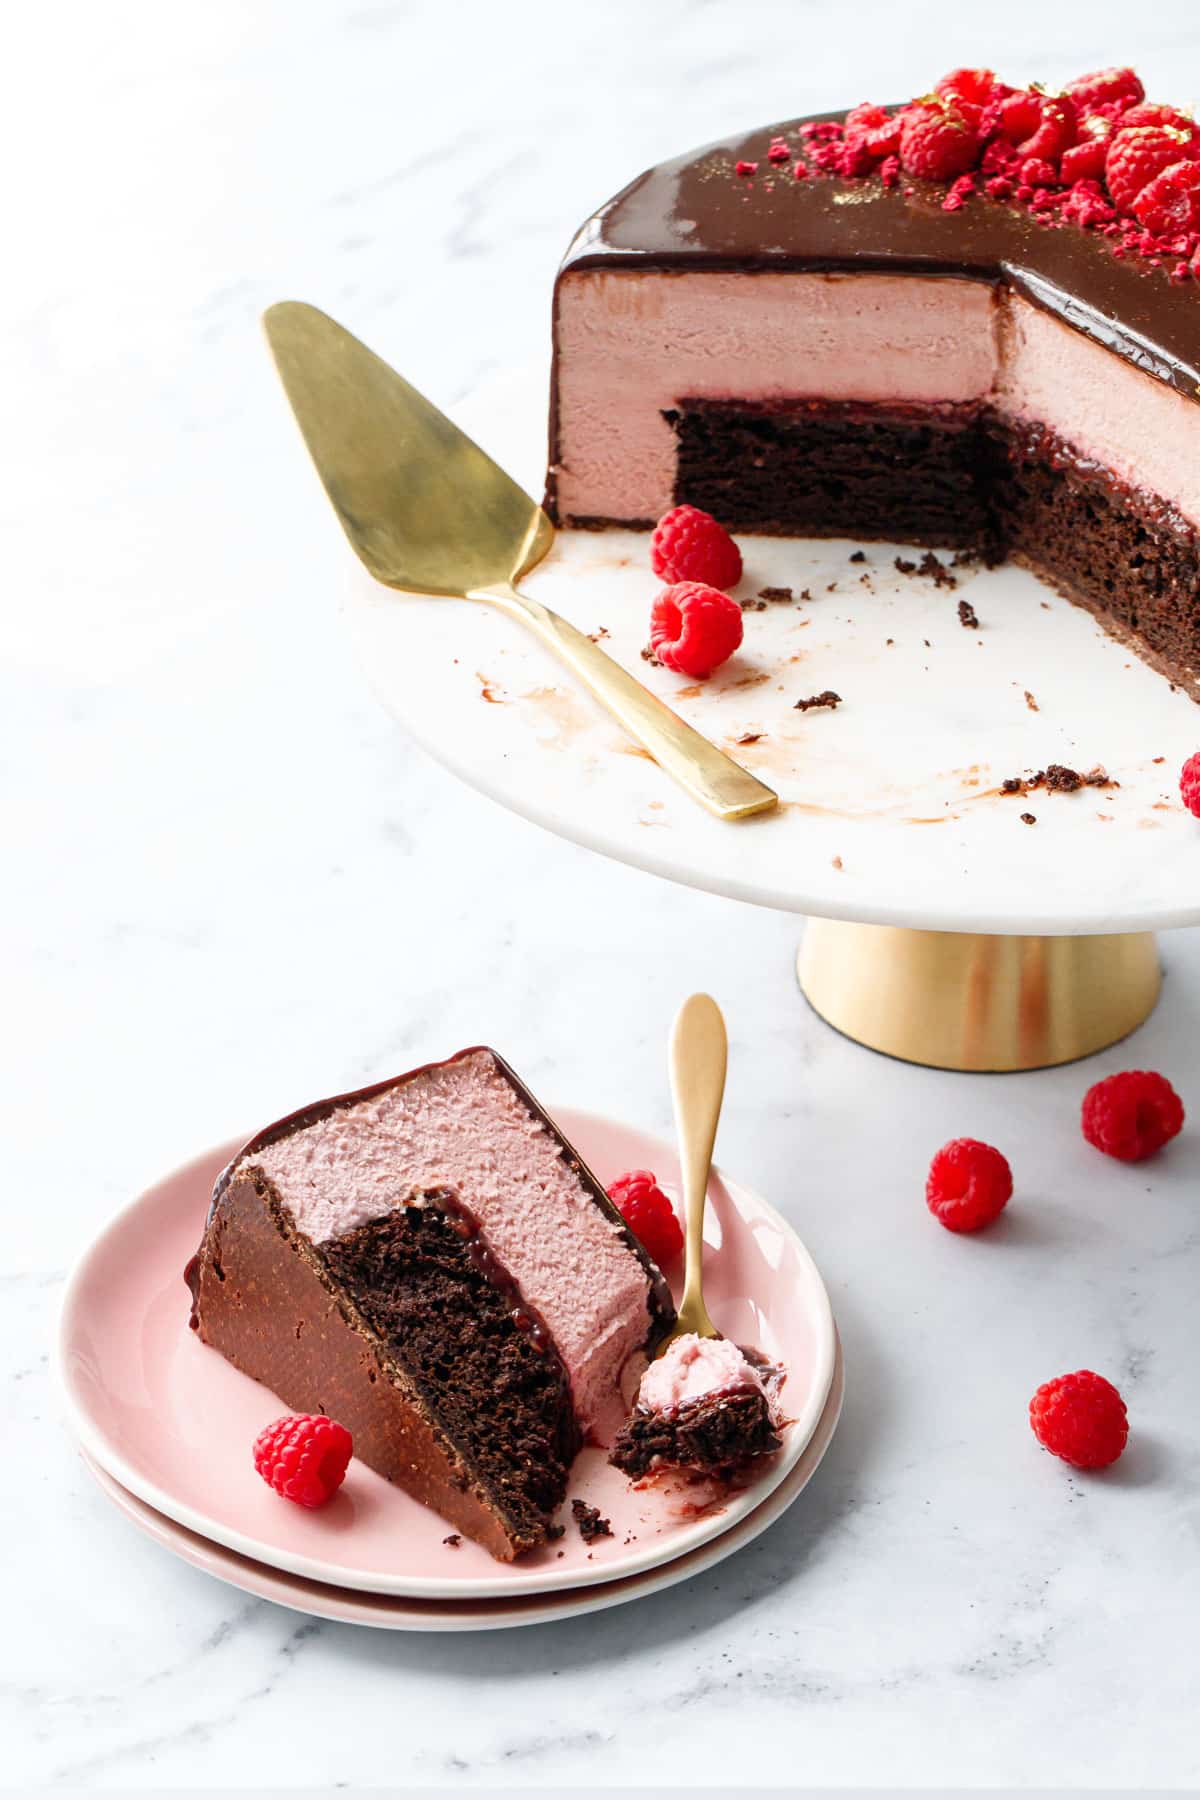
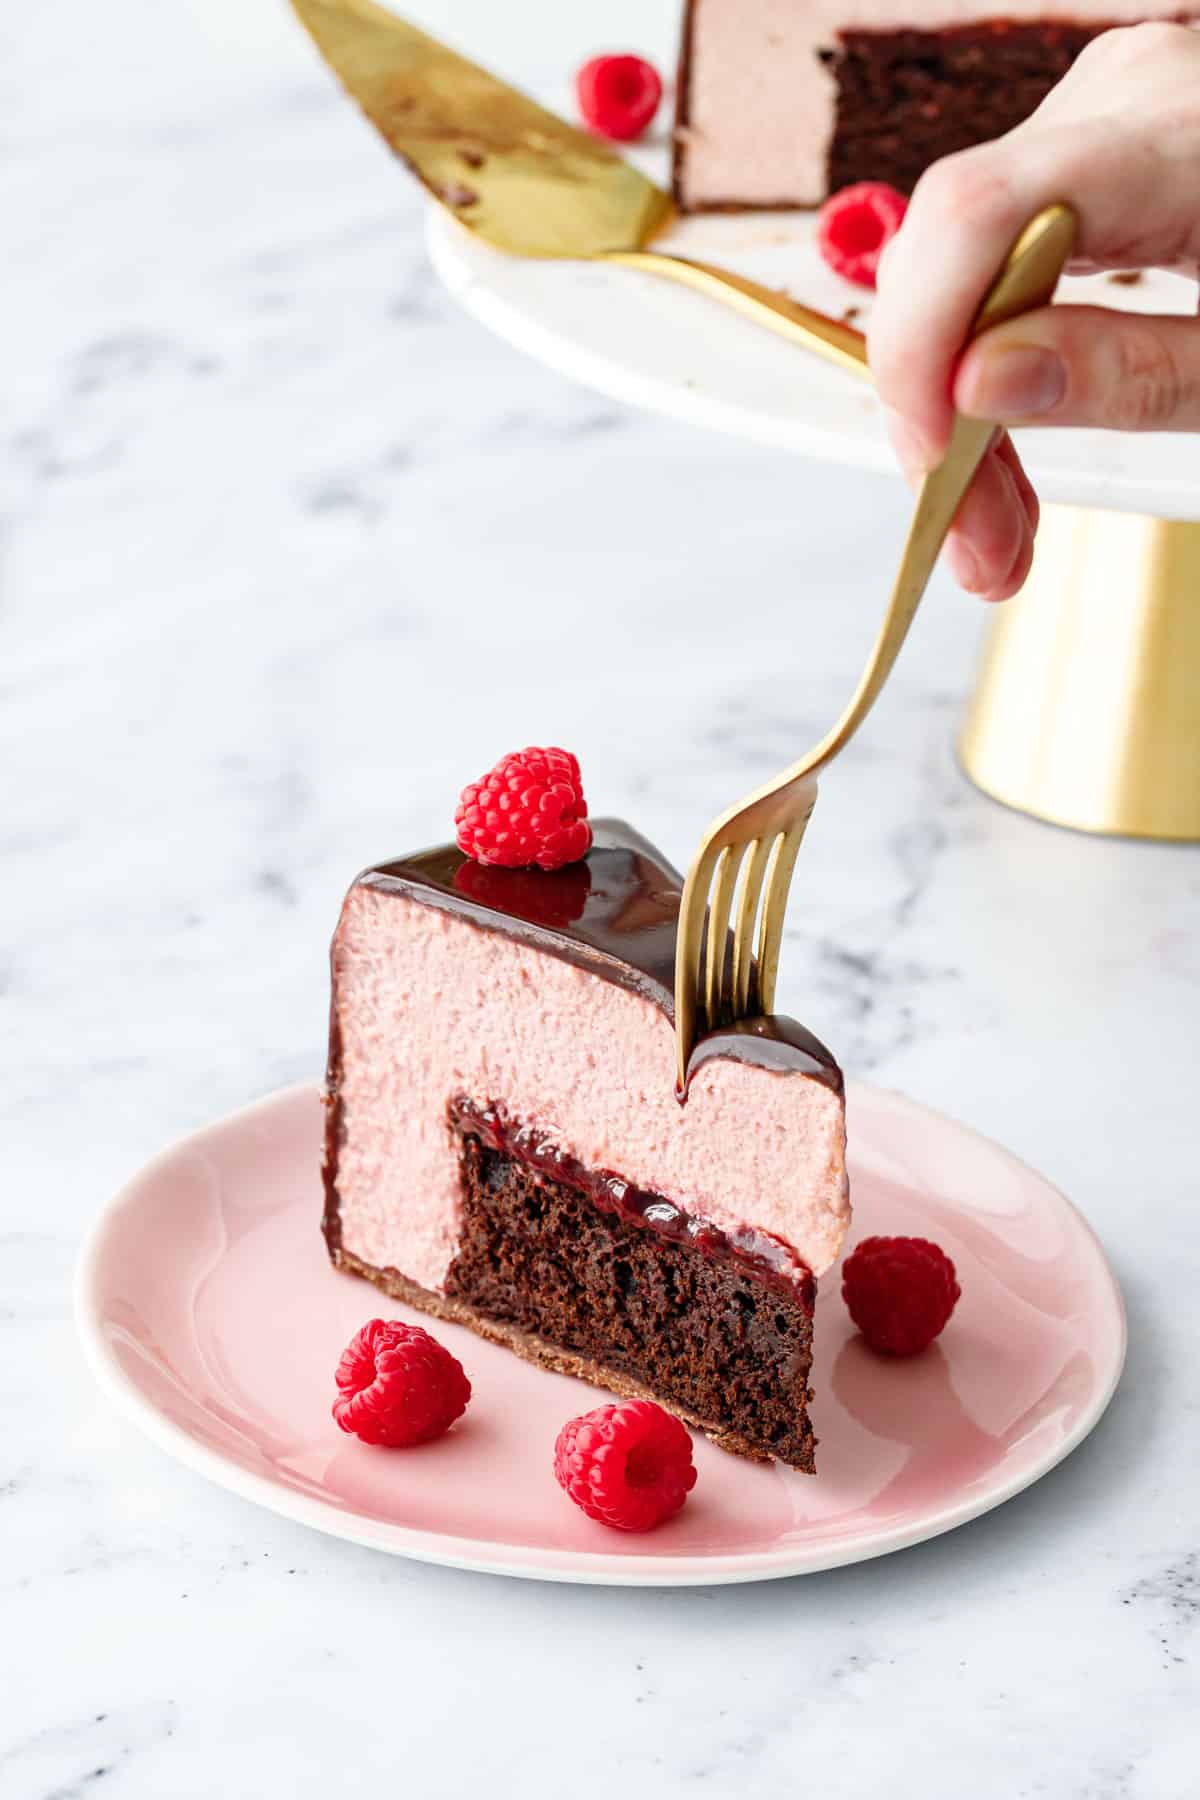
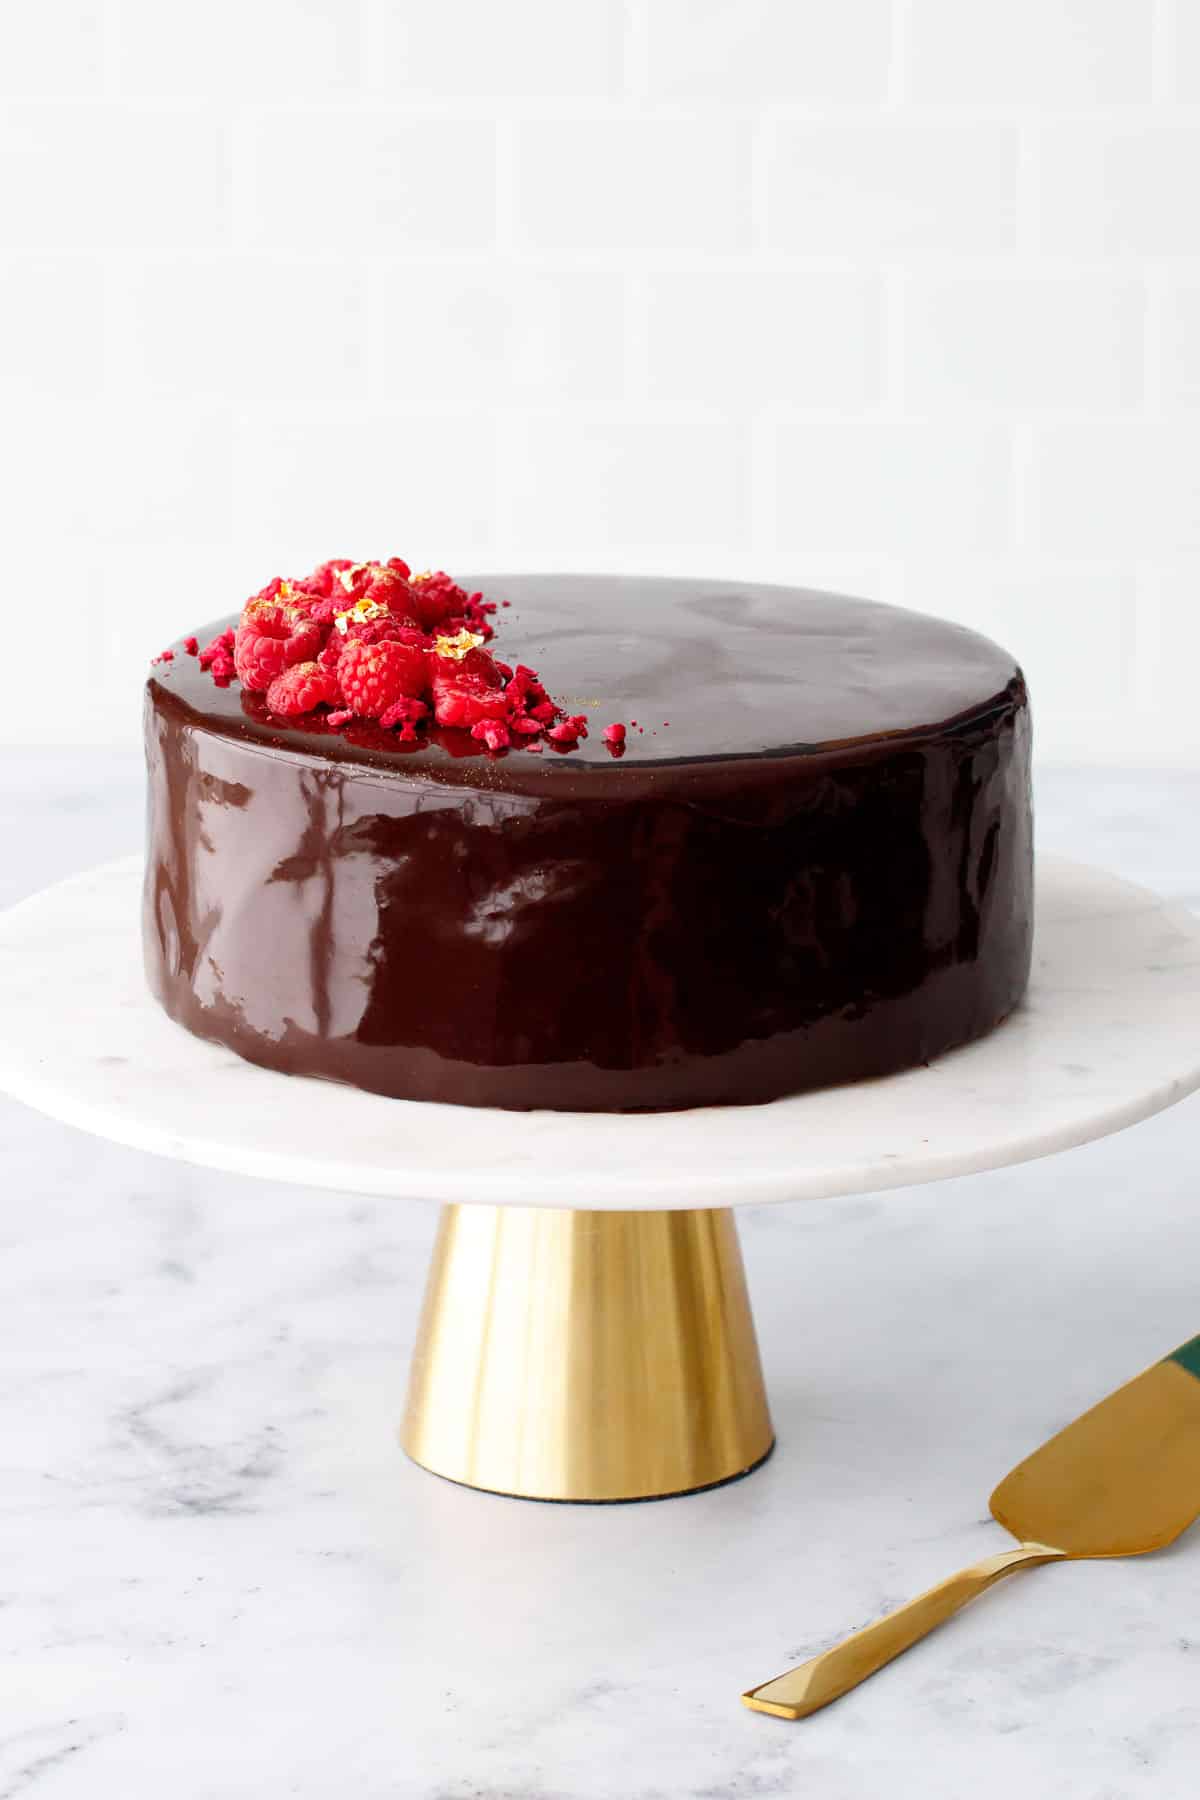
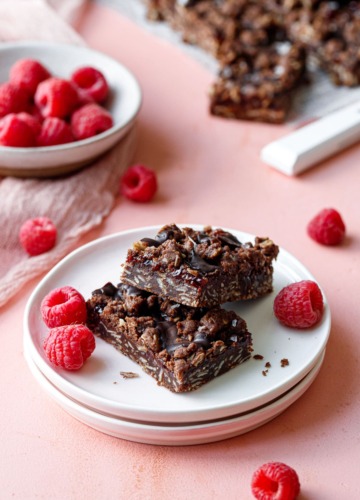
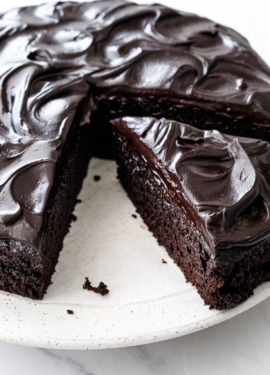
This gorgeous layered dessert features a brownie-like chocolate cake, luscious chocolate raspberry jam, and a light and fluffy raspberry and ruby chocolate mousse all enrobed in a stunningly shiny dark chocolate mirror glaze.
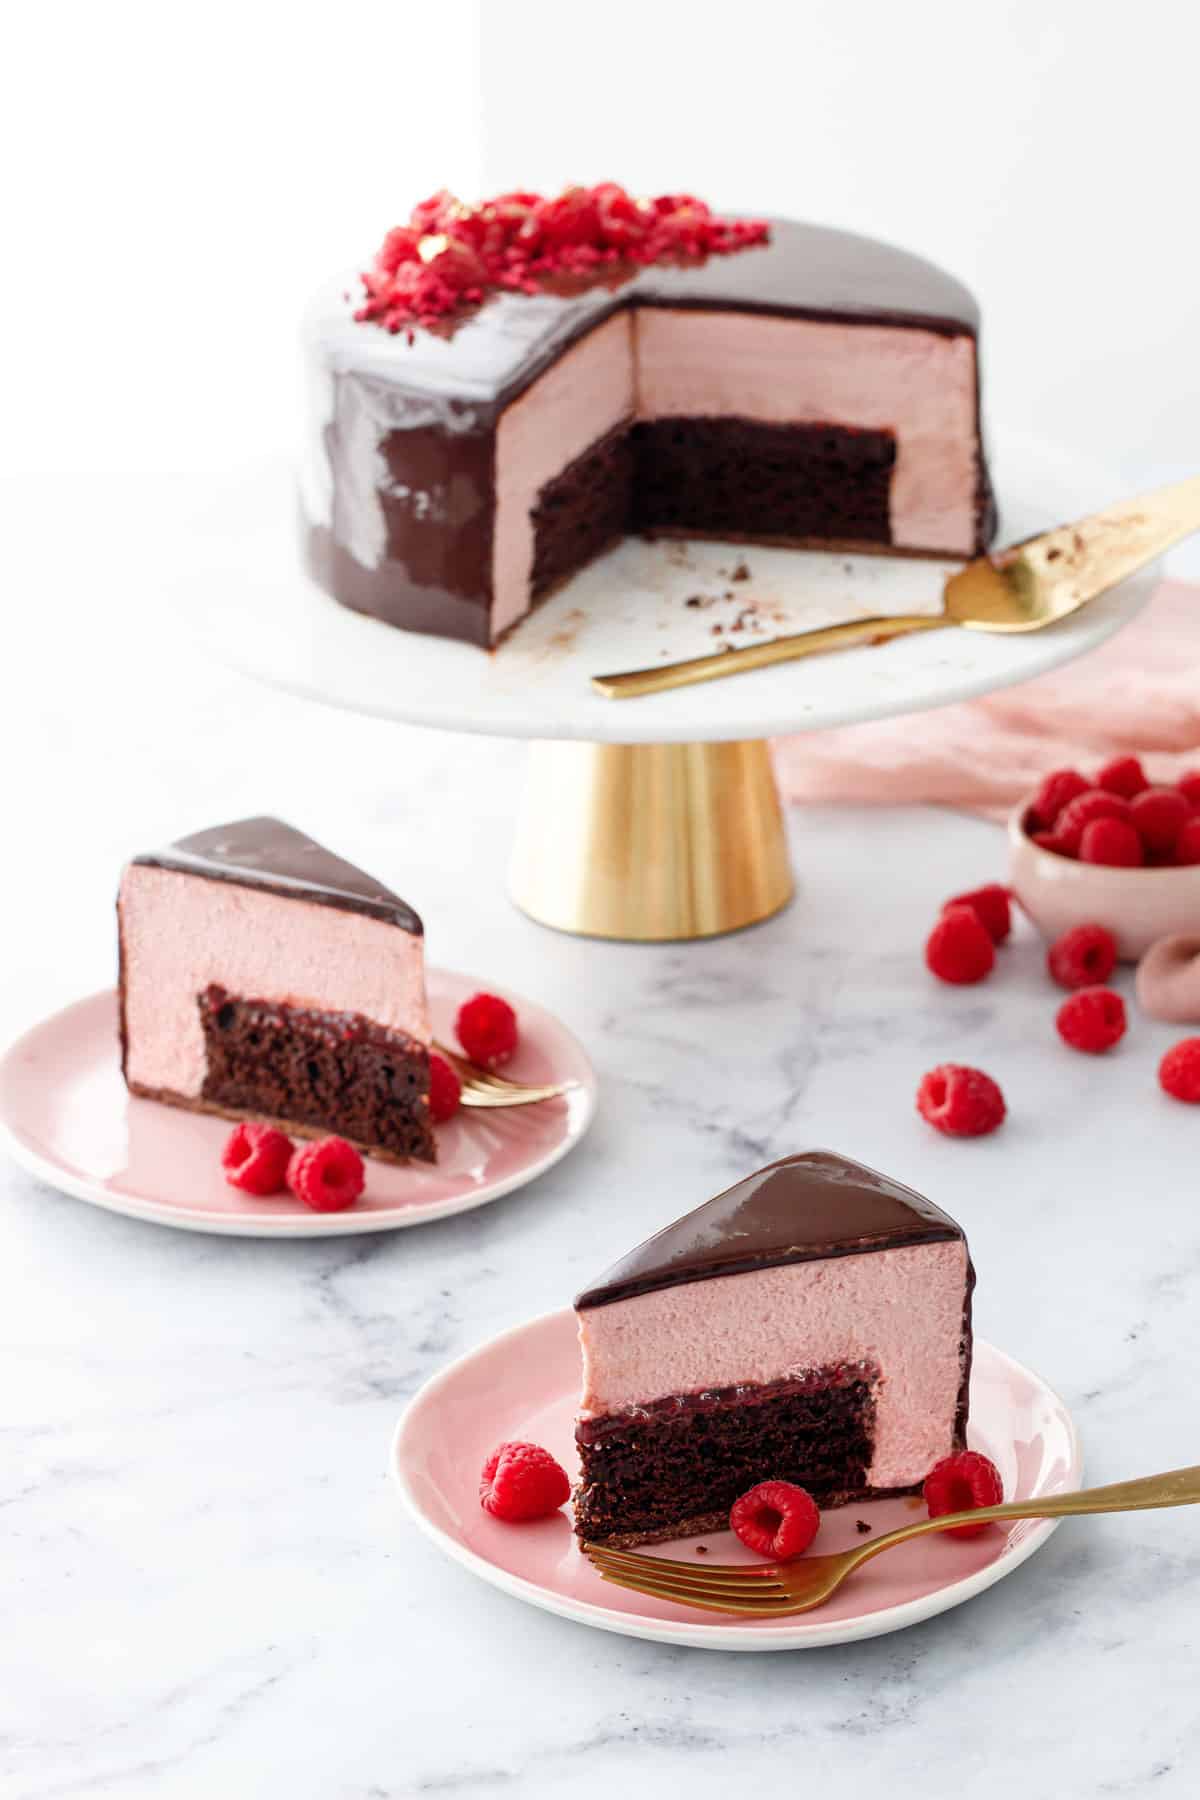
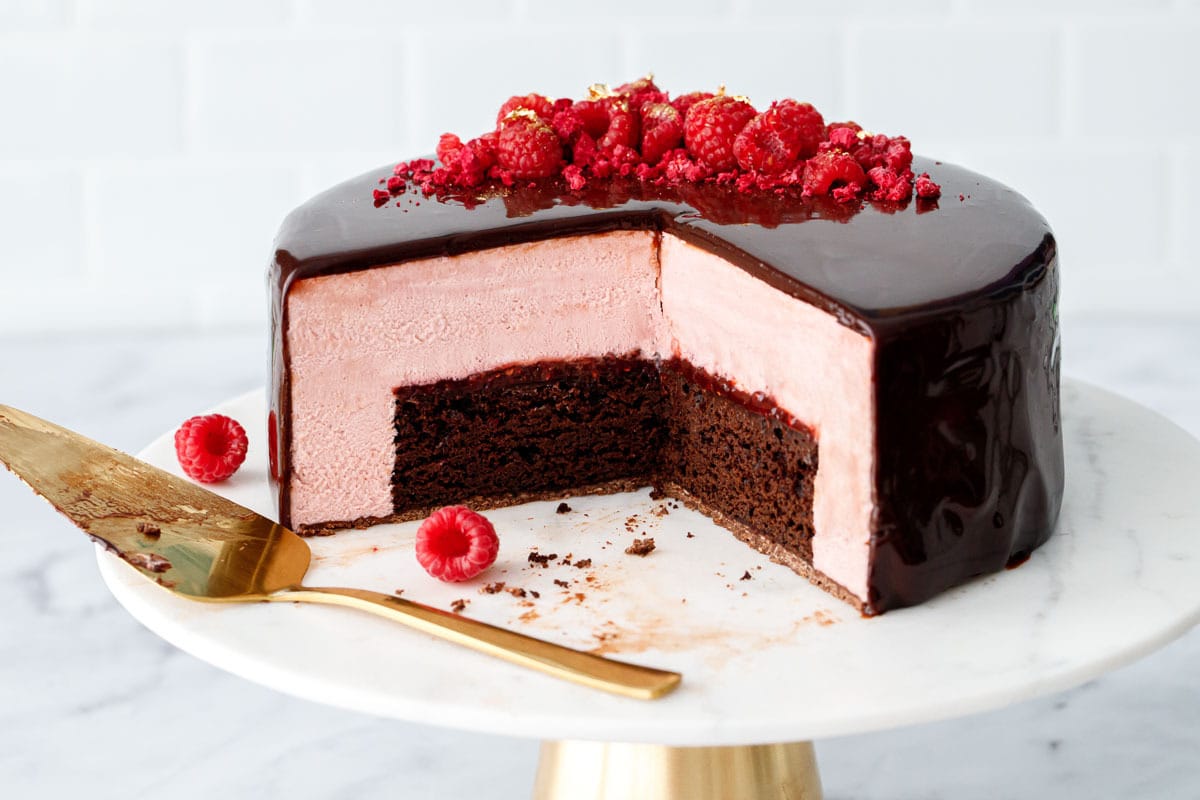
The only thing more gorgeous than the super shiny glaze are the distinct layers inside that reveal themselves with every slice. A perfect make-ahead dessert, you can spread out the various components of this recipe (all of which can be made ahead of time!) over the course of a few days.
Thank you Karo® Syrup for sponsoring this post. Celebrate sweet moments together with Karo®!
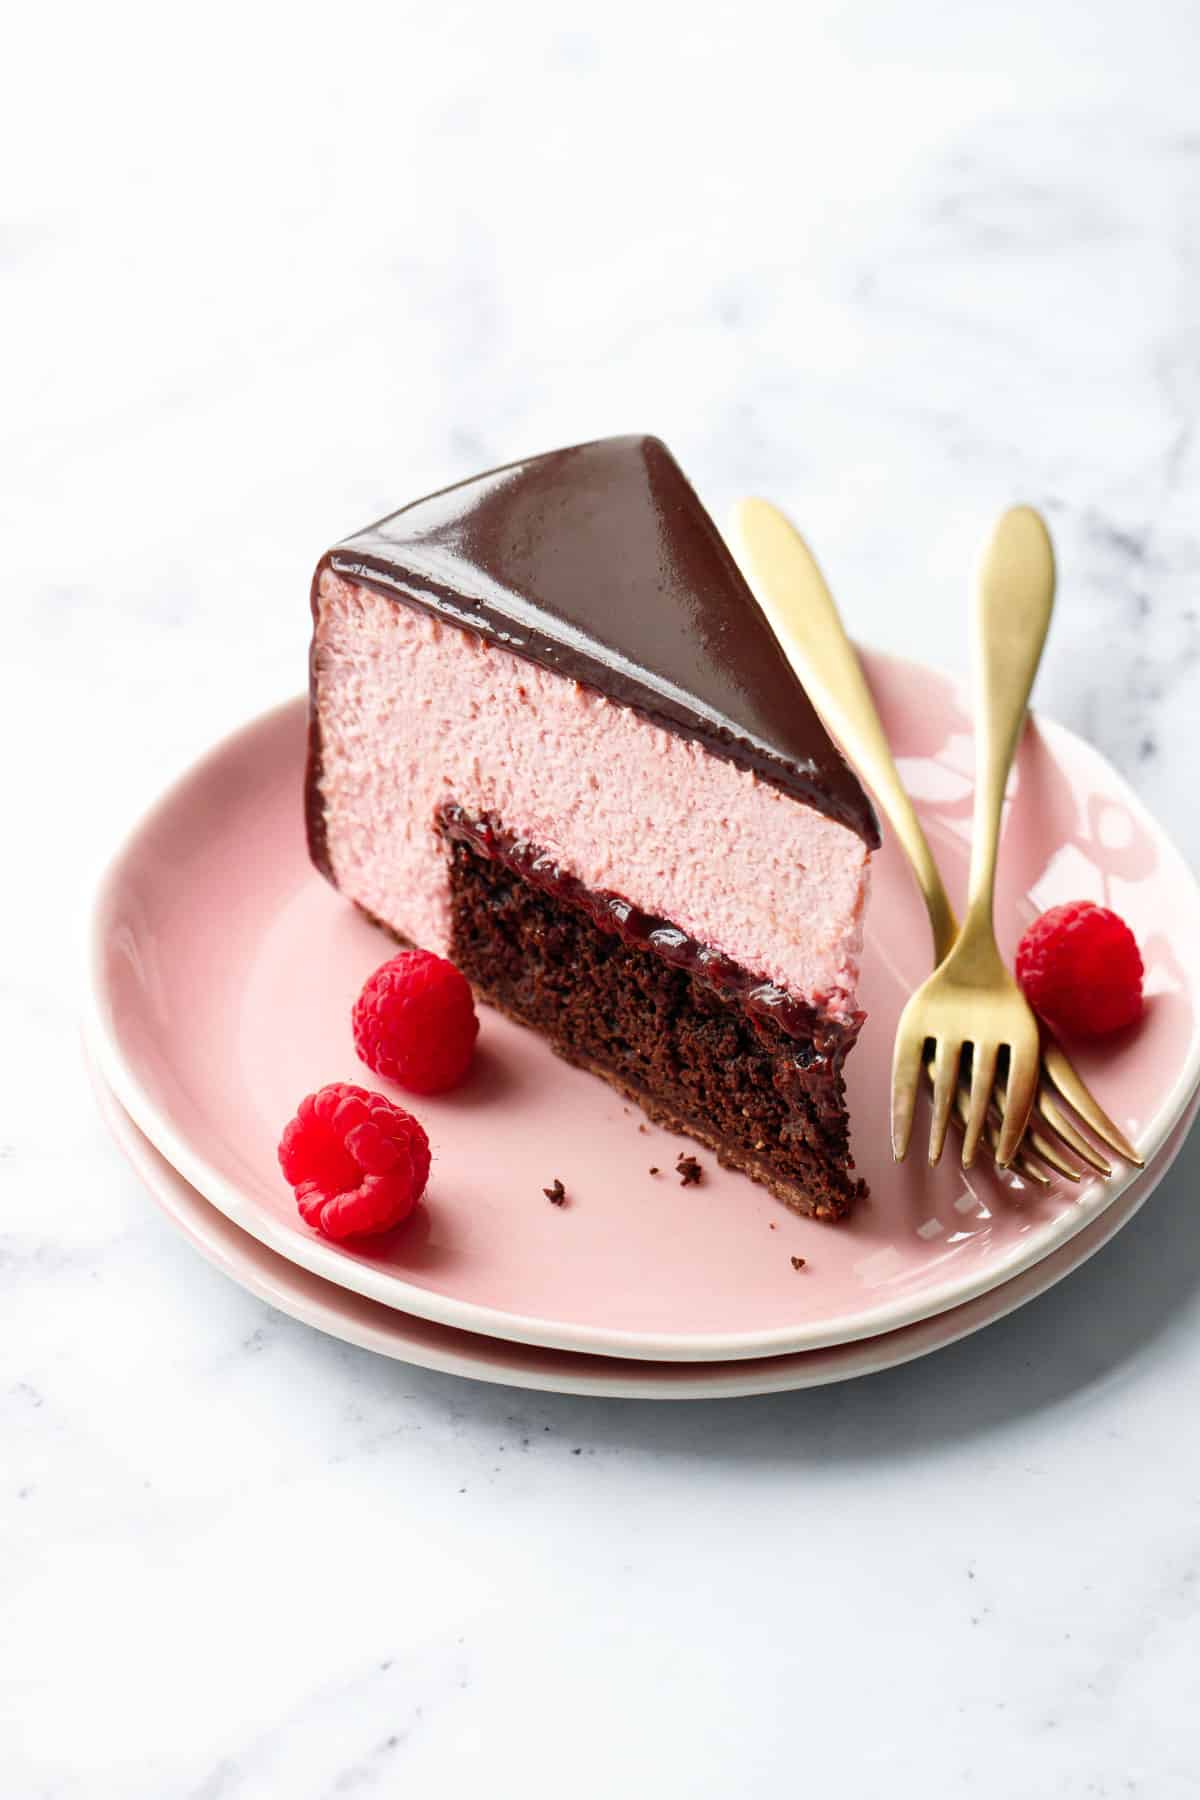
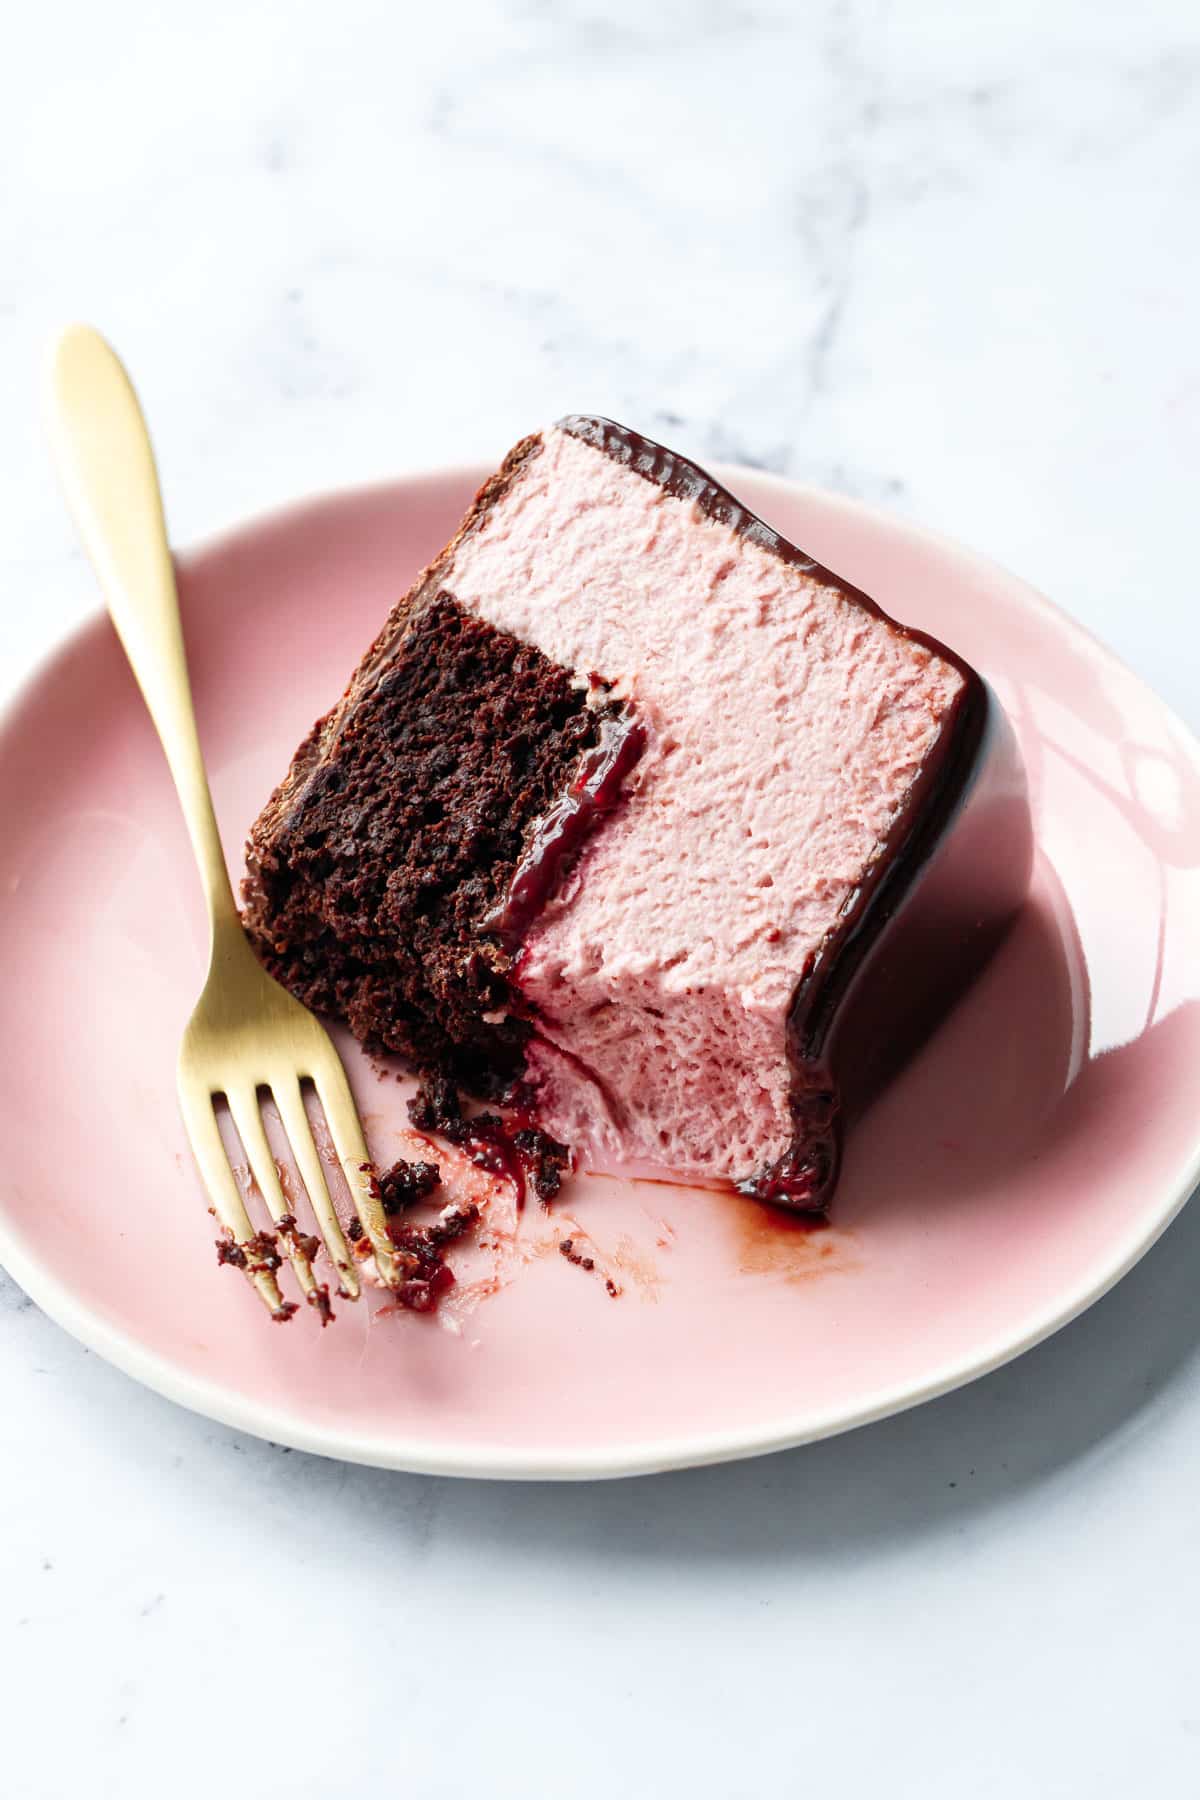
Oh, would you look at those gorgeous layers!
Delightfully crispy croustillant base made from chocolate, Nutella, and feuilletine.
Tender, fudgy, brownie-like chocolate cake.
Rich and sumptuous chocolate raspberry jam.
Light and fruity raspberry and ruby chocolate mousse.
Gorgeous, ultra-shiny dark chocolate mirror glaze.
Separately each component is good, but together, they become one heck of an impressive dessert.
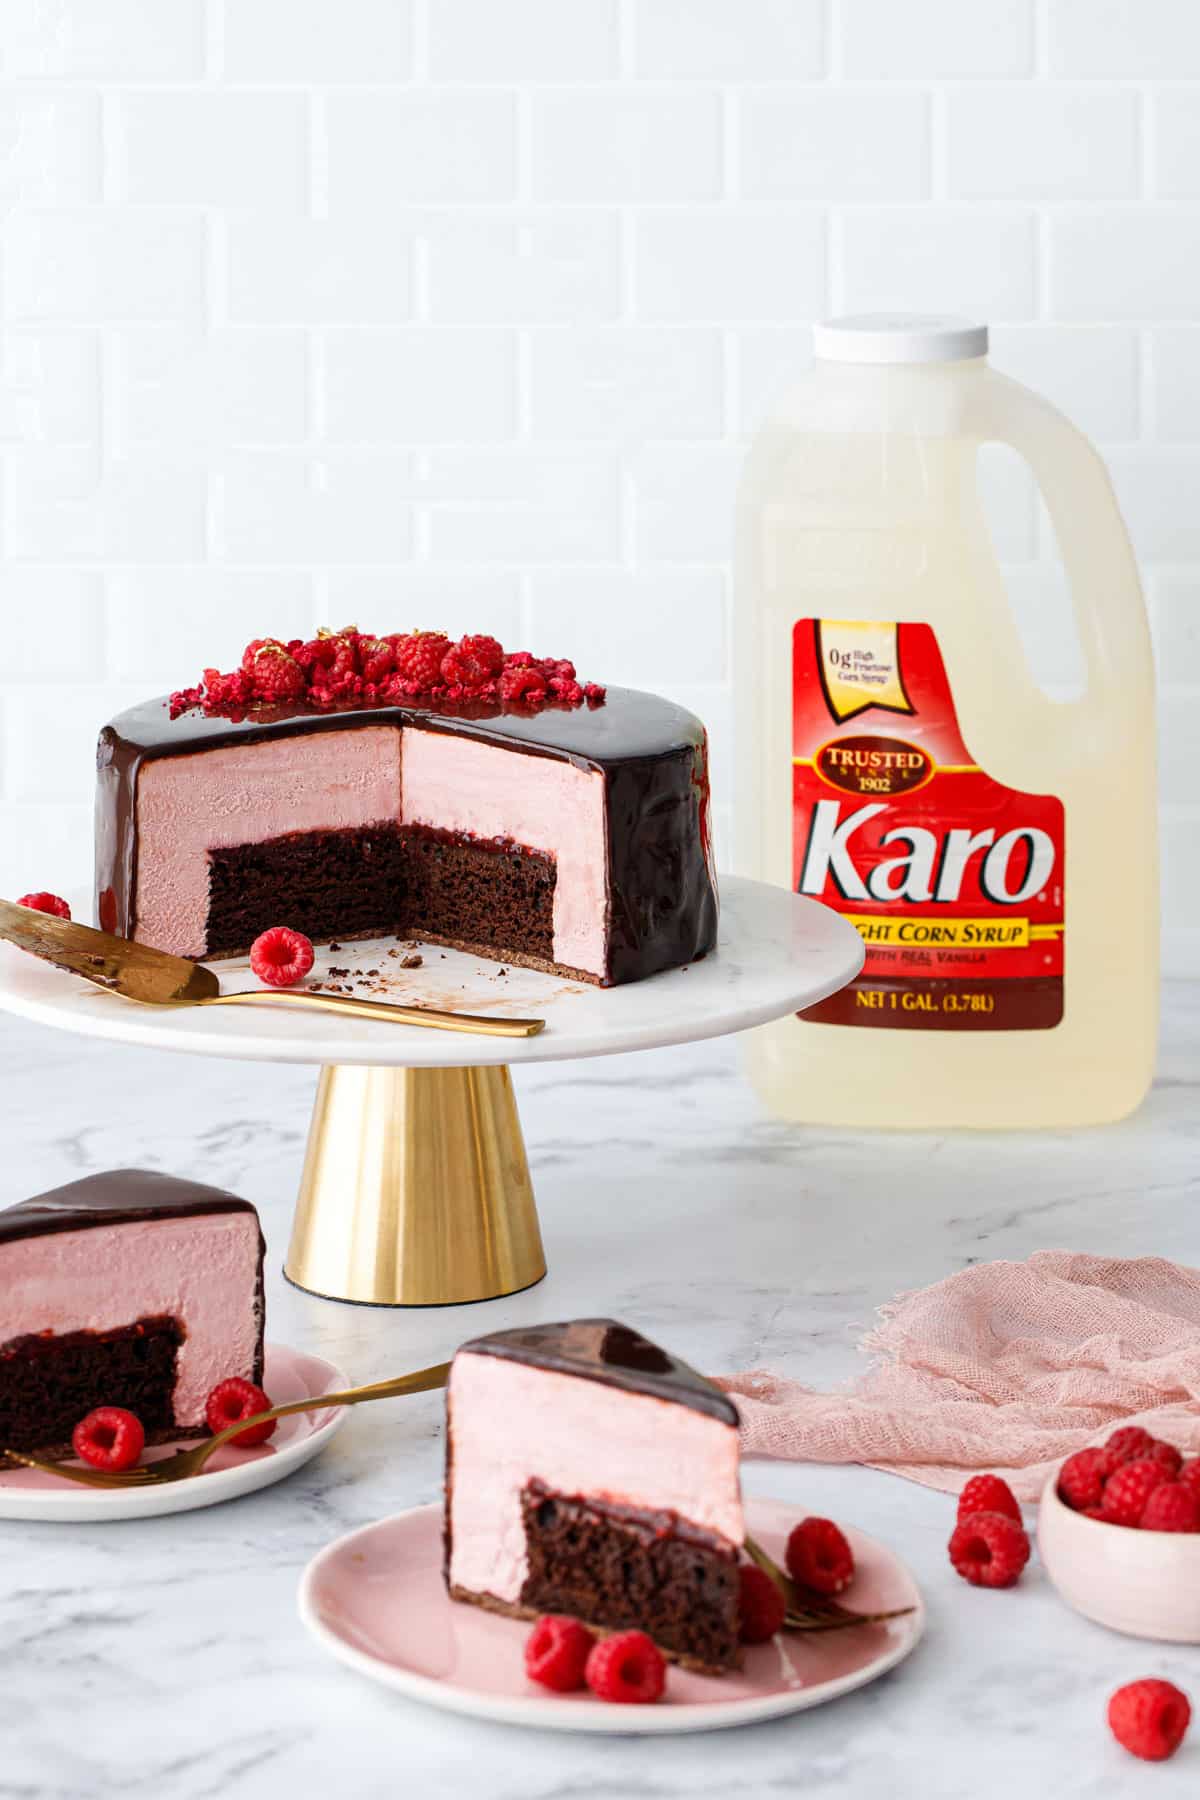
We’ve partnered with Karo® Syrup for this stunning example of confection perfection.
Combining chocolate and raspberry in an entremet-style mousse cake with a glossy mirror glaze is an idea I’ve had knocking around my head for quite some time now.
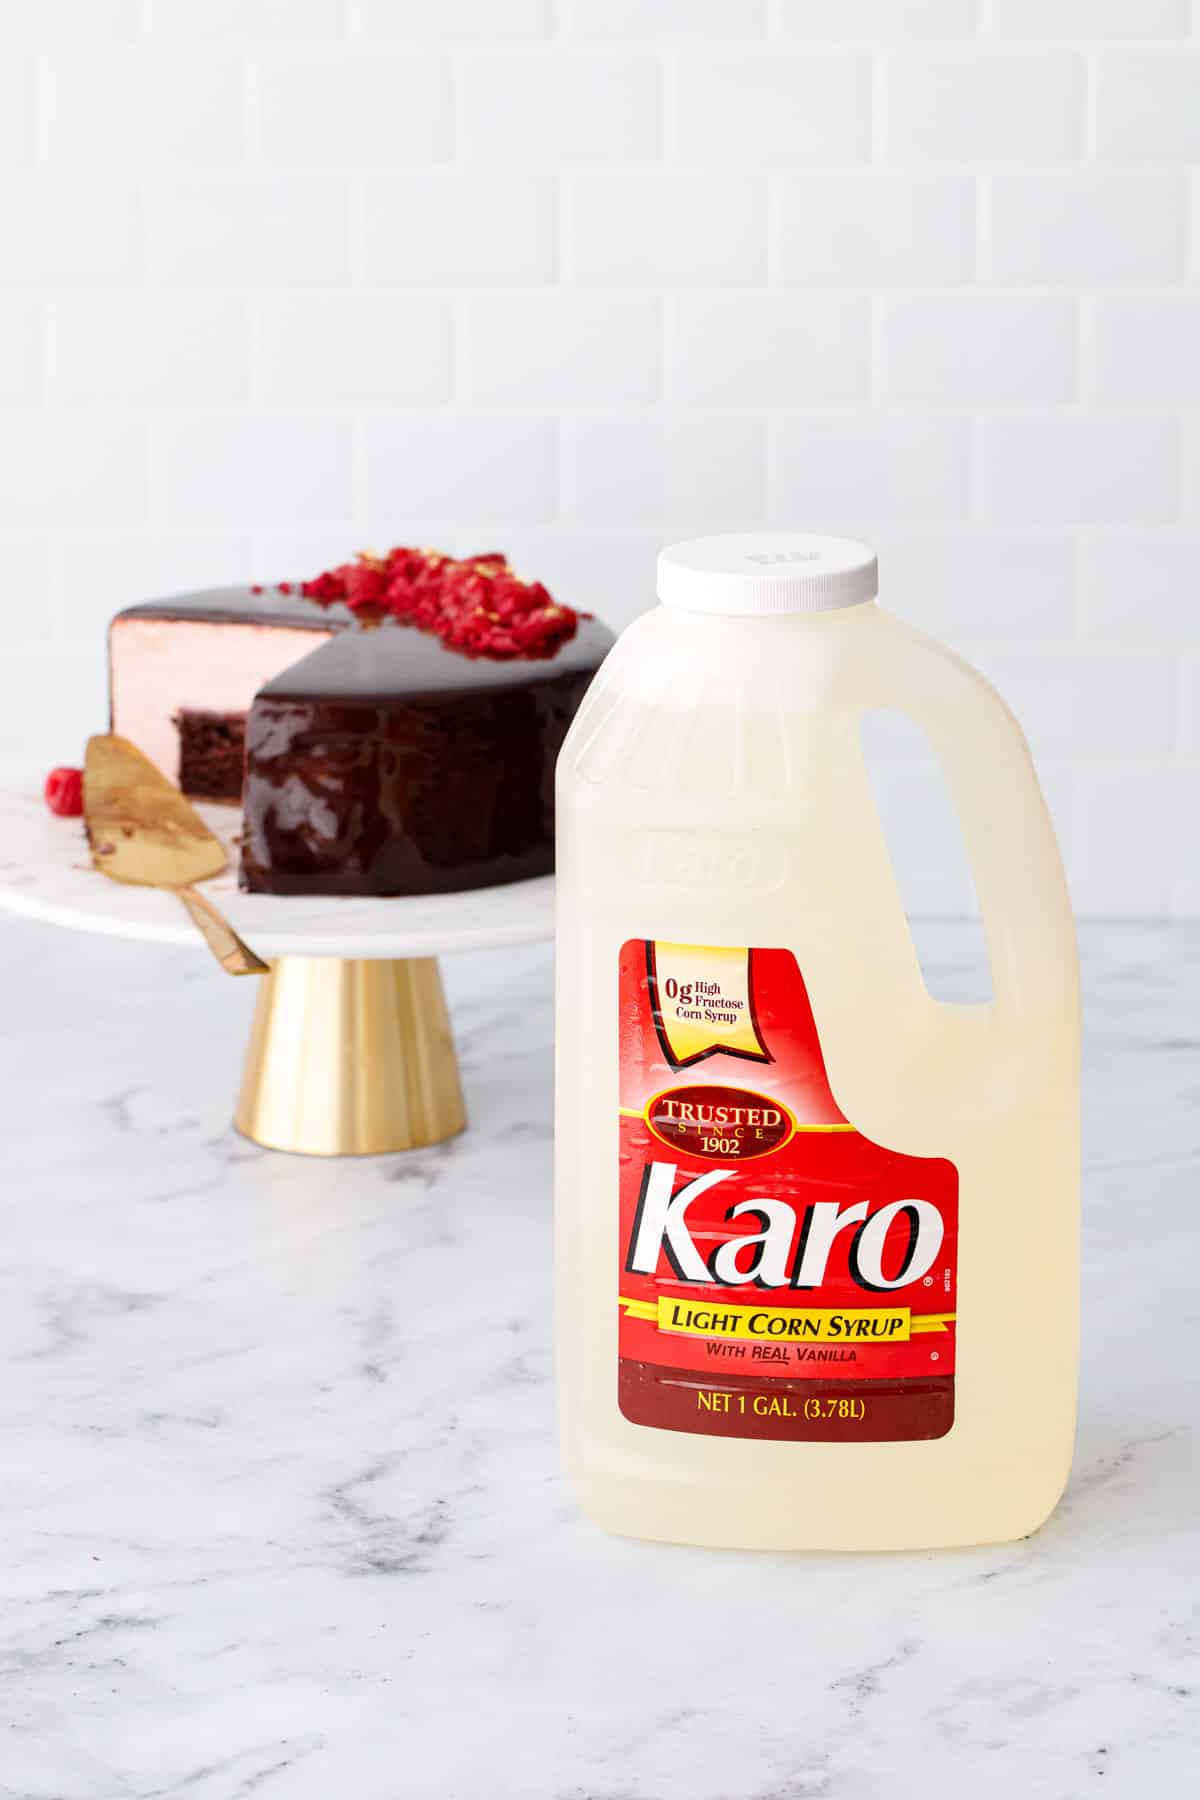
So when Karo® reached out, it seemed like the perfect opportunity to make that idea a reality, since mirror glaze relies on the unique qualities of corn syrup to produce an ultra shiny glaze (the reason it’s called mirror glaze, after all, is that it is so shiny you can basically see your reflection in it).
Corn syrup is a moderately sweet invert sugar derived from corn; an invert sugar being made by breaking the bonds between the glucose and fructose. This unique structure helps to prevent crystallization in any recipe involving cooked sugar, including things like caramel sauce, homemade marshmallows, and—you guessed it—mirror glaze.
Glucose syrup is another example of an invert sugar sometimes called for in mirror glaze recipes, however it’s not something you can get at your neighborhood grocery store and special ordering it can be costly, especially since you need quite a bit of it. For this recipe, Karo® Syrup produces an equally delicious and shiny final product and is much more accessible to the home chef.
Karo® Syrup is known for its quality and consistent performance so you know your mirror glaze will turn out perfectly every time. The hint of real vanilla adds to the overall flavor and mild sweetness of the mirror glaze itself.
Don’t confuse regular corn syrup with high-fructose corn syrup as it is NOT the same thing. HFCS is ultra-processed specifically to produce a higher ratio of fructose to glucose. Regular corn syrup like Karo® Syrup, on the other hand, is the same sweetness as table sugar with a 1:1 ratio of fructose to glucose. It has been and always will be a staple ingredient in my kitchen (I don’t dare attempt caramel sauce without it).
All About that Base
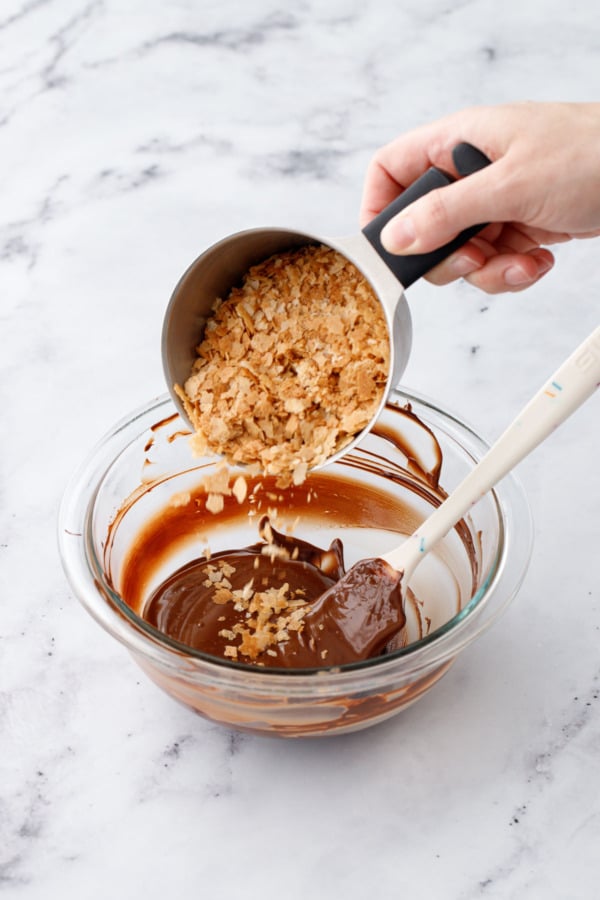
The base of this cake is what’s called a croustillant (or crispy layer) featuring melted chocolate, Nutella, and feuilletine.
The croustillant layer provides a lovely little crunch in each bite, but also serves as a solid foundation for the whole mousse cake, making it easier to glaze and to move once it is glazed (you don’t need to worry about having a firm base under the soft chocolate cake when you’re glazing it, for example).
You can buy feuilletine from pastry supply stores, or make your own (it’s basically a very thin crepe that’s cooked until crispy and then crumbled). You can also use puffed rice, cornflakes, or crushed up fortune cookies (which have a similar flavor profile to feuilletine).
If you like, you can skip the croustillant layer entirely and just have the cake and the mousse. Just be sure you have a nice stable base for glazing, like a wire rack or cake board for example.
What do you get when you cross a brownie and cake?
A brake? A crownie? Not sure I’m keen on either of those mashup terms but I am most certainly keen on the cake itself: is a deeply chocolate, brownie-like cake rather than a cake-like brownie. In reality, it’s somewhere in between my favorite sour cream chocolate cake and the brownie I used for the Nutella Mousse Cake—dense enough so that it has enough structure to support the layers above but not so dense that it doesn’t still melt in your mouth.
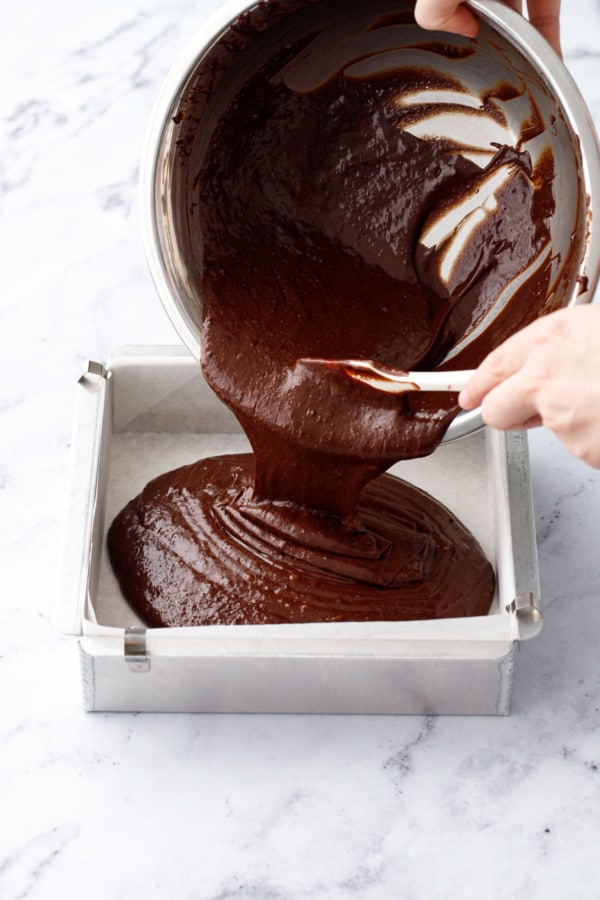
I baked the cake in an 8-inch square pan (a 9-inch round would work too as it holds nearly identical volume). If you’re using a shorter mold that’s only 2″ tall instead of 3″, you can bake the brownie in a 9-inch-square pan for a slightly thinner layer, or just don’t put all the batter in the pan.
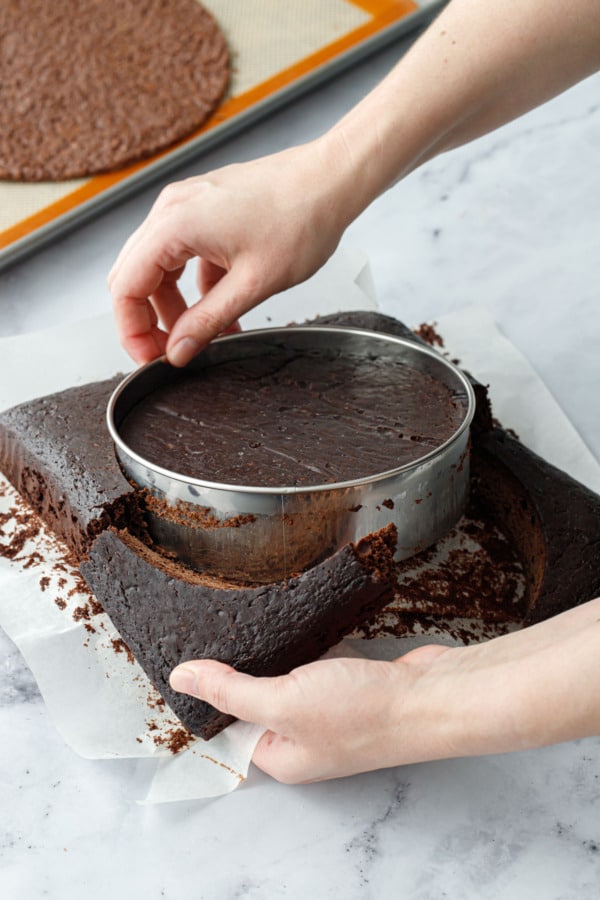
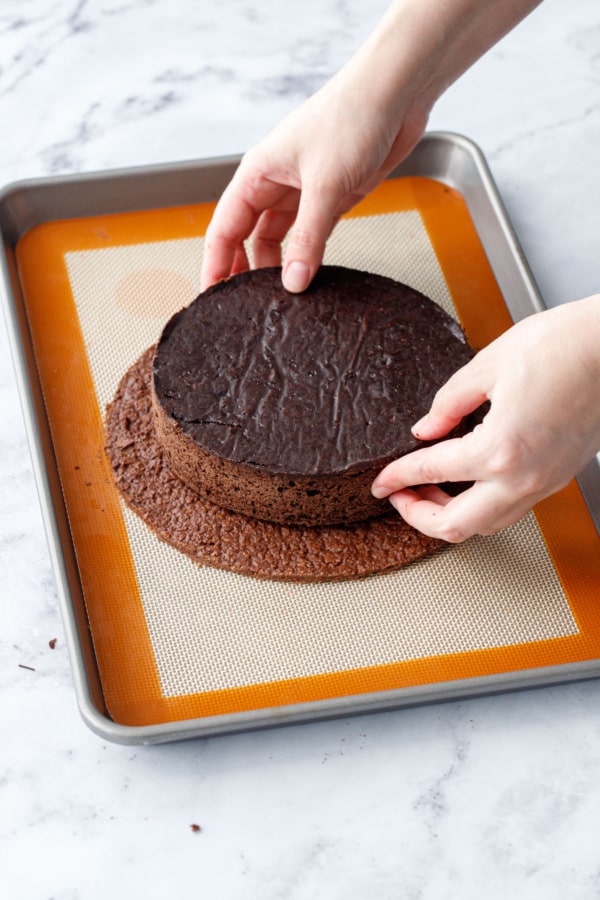
From there I cut the cake into a 6-inch circle with a 6-inch circle cutter or pastry ring if you have one, or find something roughly 6-inches in size and then trace that with a knife around the cake. I find it easier to cut the cake when it’s chilled. Although if it’s completely frozen it was very hard to get my cutter through (I had to put all my body weight on it), but it did produce really nice crisp sides this way.
I wouldn’t recommend actually baking the cake in a 6-inch square pan as it’d be much too thick and your final mousse cake would be disproportionally cake to mousse (it’s not quite the right proportions to halve it either).
So yes, you do find yourself with cake scraps, but I don’t think you’ll have any trouble finding a use for them, if they even last that long.
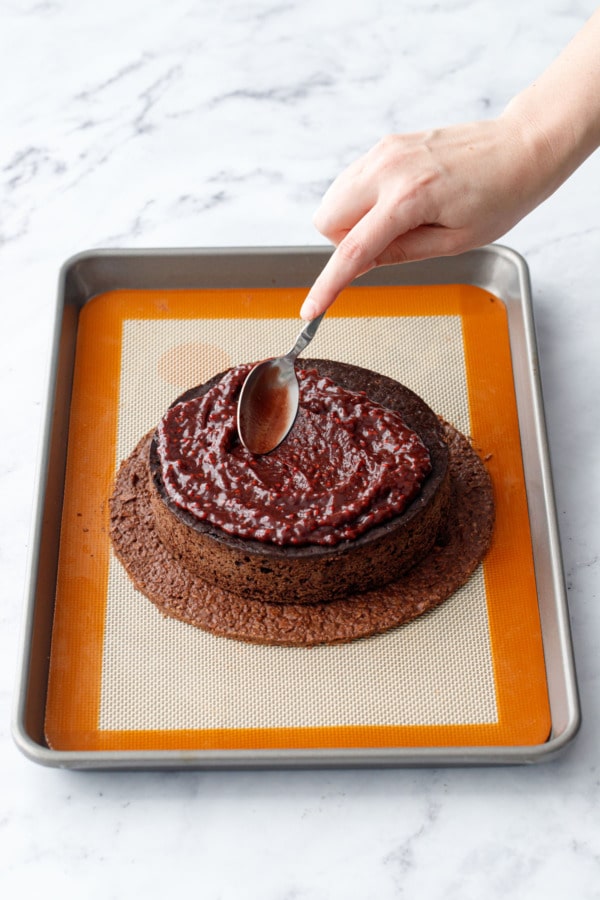
I spread a thin layer of chocolate raspberry jam on top of the cake layer for an extra hit of punchy raspberry flavor. You can use also plain raspberry jam, or even some balsamic raspberry jam perhaps? The recipe for that can be found in my book.
You can spread the jam on top of the cake before or after placing it into your cake pan or ring mold, whichever is easiest (it’ll depend if you have a ring mold with no bottom or a pan with a removable bottom). I like to freeze or at least chill the layers again briefly before I pour in the mousse just to keep everything in place.
Raspberry & Ruby Chocolate Mousse
The mousse features raspberry puree and ruby chocolate, a naturally pink-colored chocolate product that tastes like a tangy white chocolate with fruity undertones. I find it less cloying than regular white chocolate. The fruity notes also pair perfectly with tart raspberries, so it seemed like an obvious combination to me.
You can substitute plain white chocolate in the mousse, or even milk or dark chocolate if you want to go all in on the chocolate.

The raspberry puree is made by pureeing raspberries in a food processor or blender and then straining through a fine mesh sieve to remove the seeds. You’ll need a full pint (300g) of raspberries to give you the 3/4 cup of puree you’ll need for the mousse. Fresh or frozen raspberries can be used here (thaw the frozen ones first in a saucepan and then puree and strain).
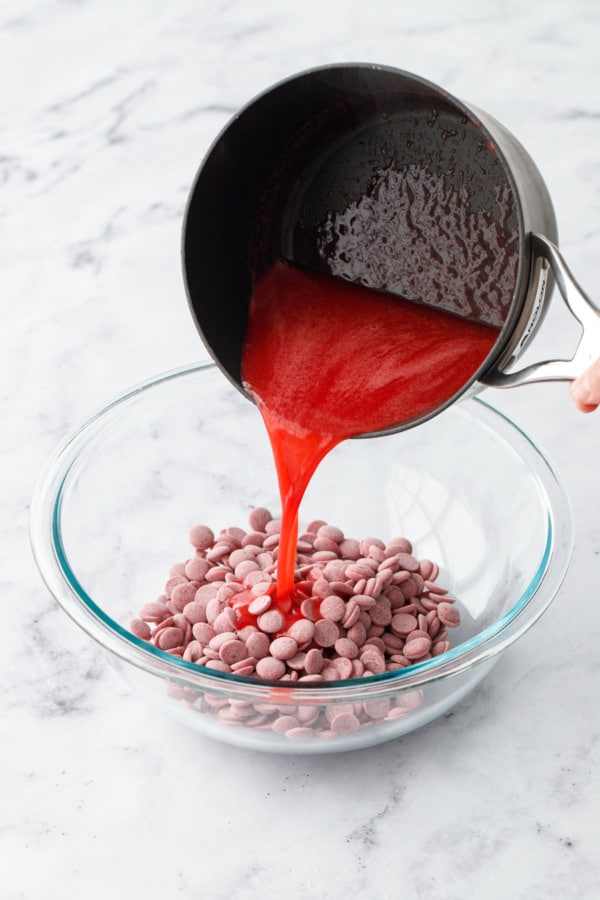
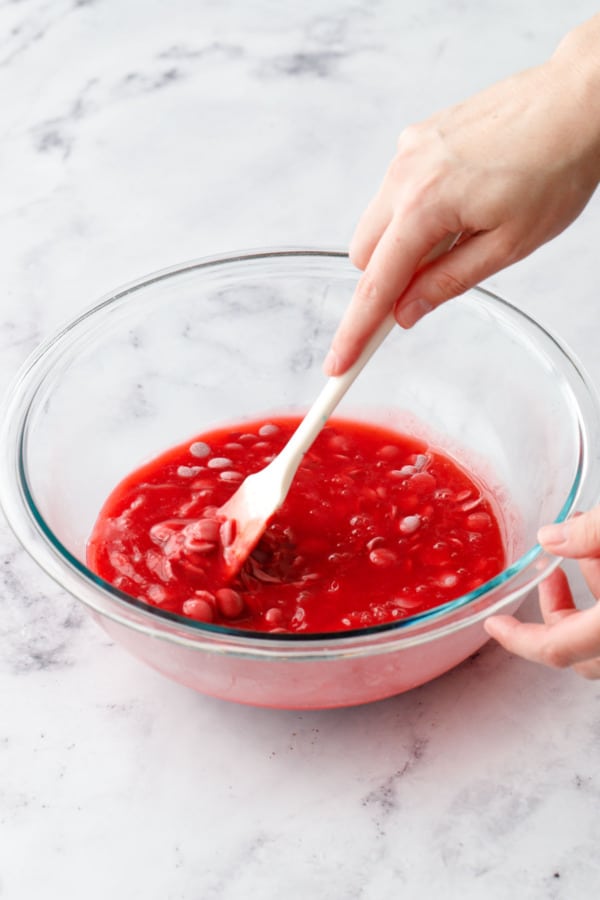
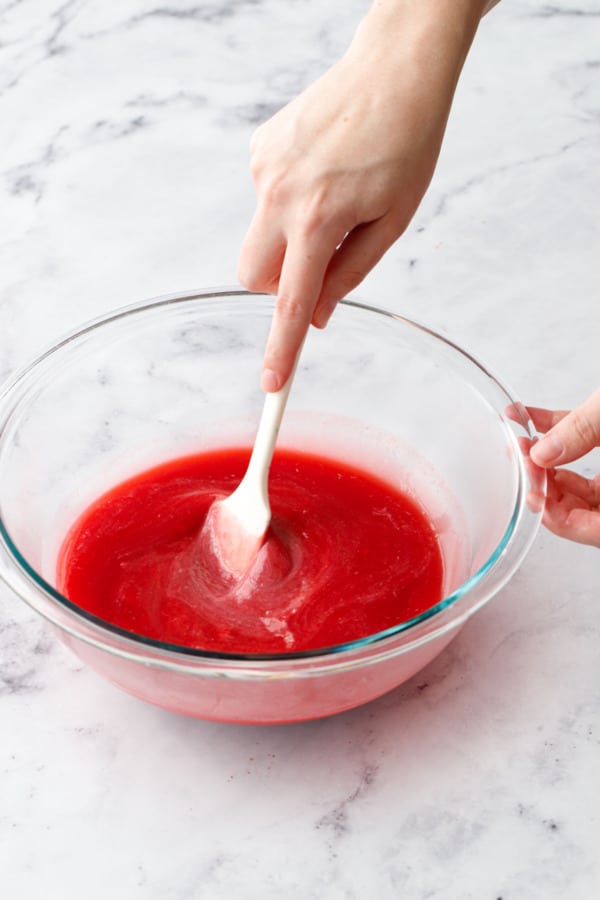
Then, heat up the raspberry puree along with the lemon juice to a simmer. Stir the softened gelatin into the warm puree and then pour over the ruby chocolate, stirring until fully melted and smooth. Let this cool to lukewarm while you whip up the cream, but don’t let it sit too long lest the gelatin start to set.
Note that the raspberry paired with the ruby chocolate will produce a very soft mauvy pink color. If you want a brighter pink mousse, add a few drops of red or pink food coloring at this point in the process. You could also fold in some pulverized freeze-dried raspberries for extra color and a punchier raspberry flavor.
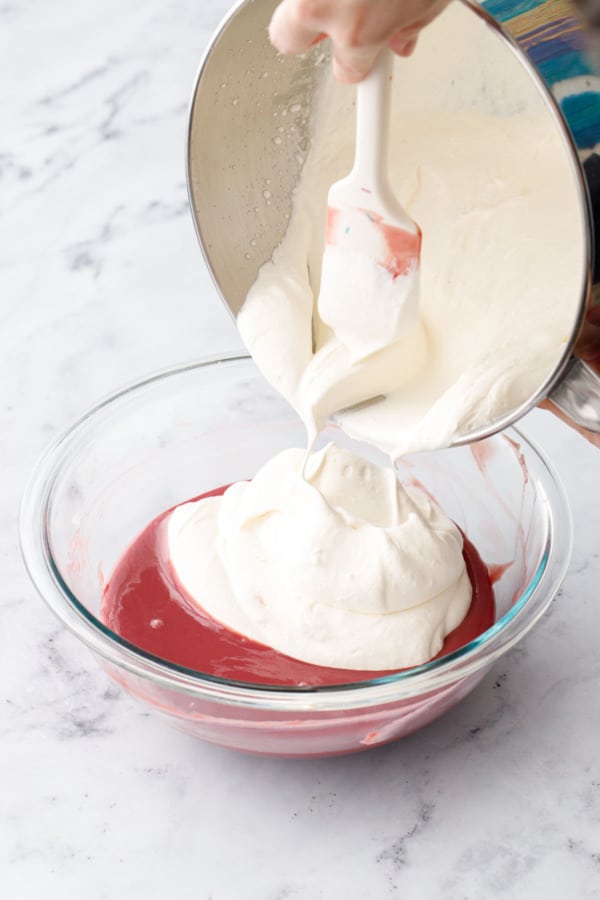
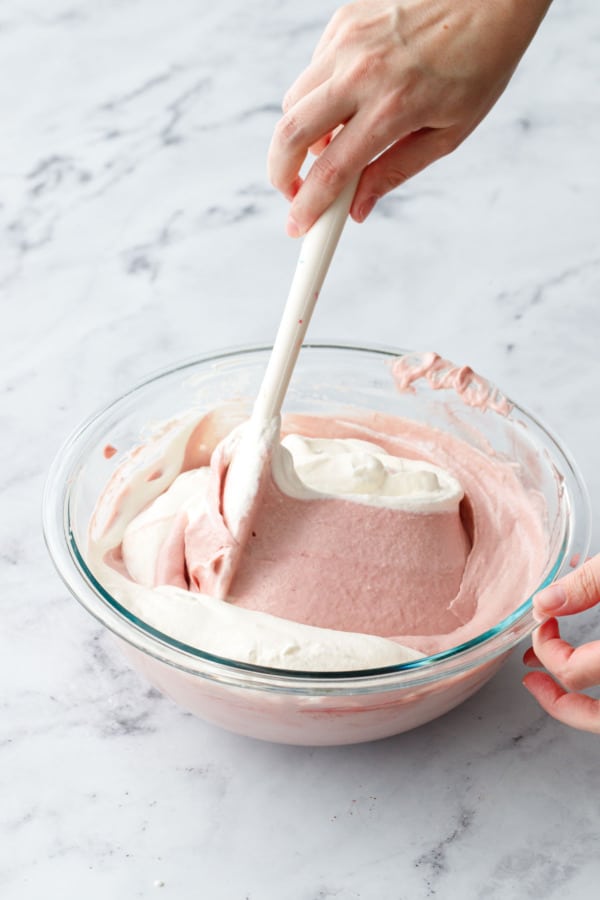
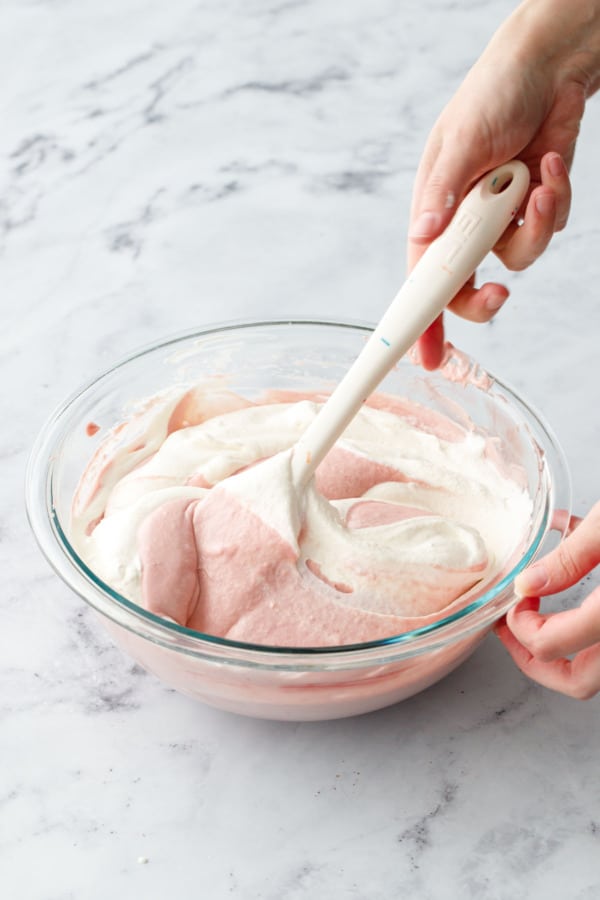
When whipping cream for a mousse, you ultimately what something slightly softer than soft peaks (I don’t even know if there’s a proper term for this). It should appear noticeably thickened, not drippy, and slump back on itself when spooned, but not form any distinct points or peaks. Soft hills, if you will, rather than peaks.
My cream was ever so slightly overbeaten (I’m talking like 25 seconds too much). Cream that’s beaten to just before soft peaks is ideal, and will make the mousse almost ‘pourable’ into the mold. A bit easier to get it in all the nooks and crannies that way, though it won’t have quite as much final volume in the end. Firmer cream is harder to fold in, and the mousse will be harder to pour into the molds (which is why I ended up piping it).
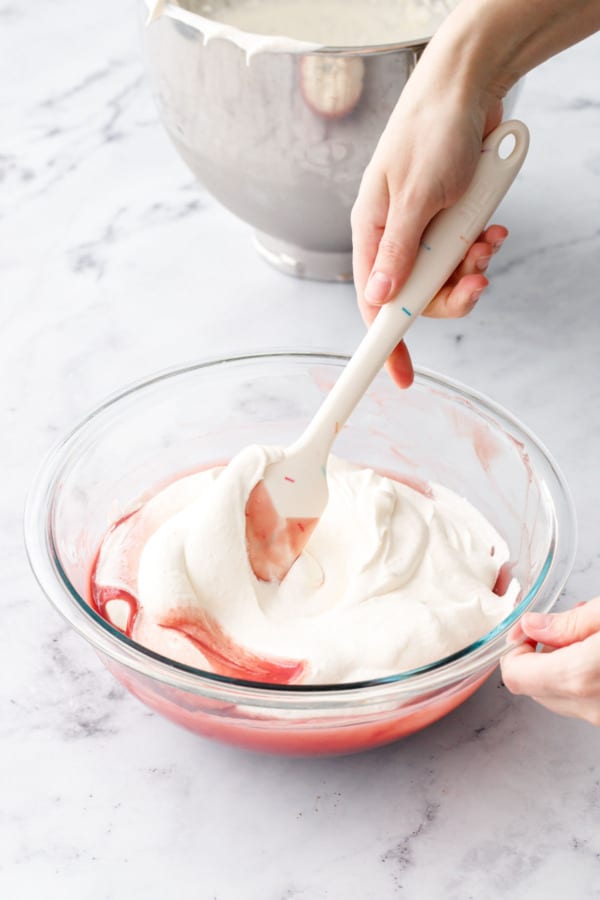
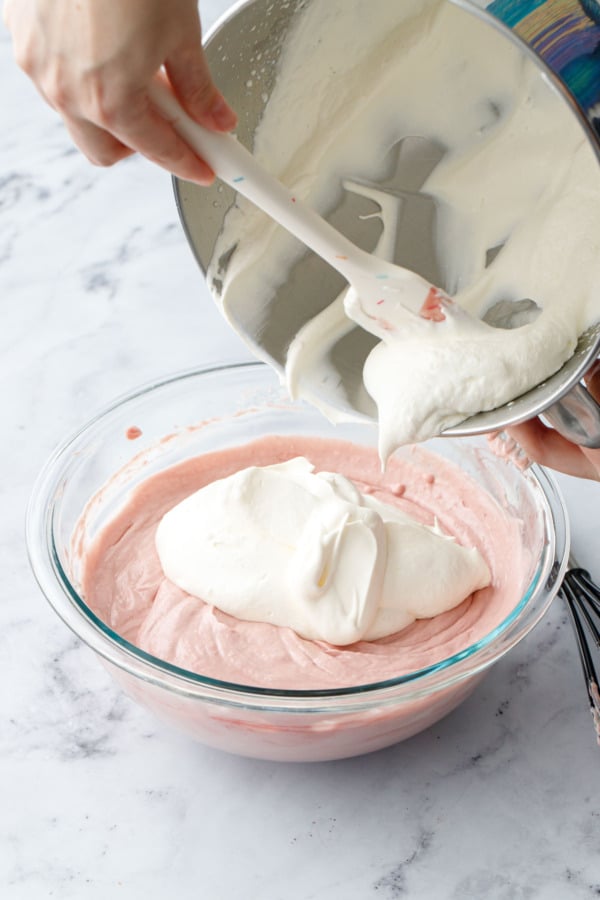
Fold in about a third of the cream into the raspberry mixture to begin with. I like to do this first batch with a whisk to get a smoother result (you don’t have to be too gentle with it, we’re just trying to lighten and smooth out the mousse). Then add the rest of the cream and use a large rubber spatula to fold it in until the mousse is uniformly pink and no streaks remain.
Assembly
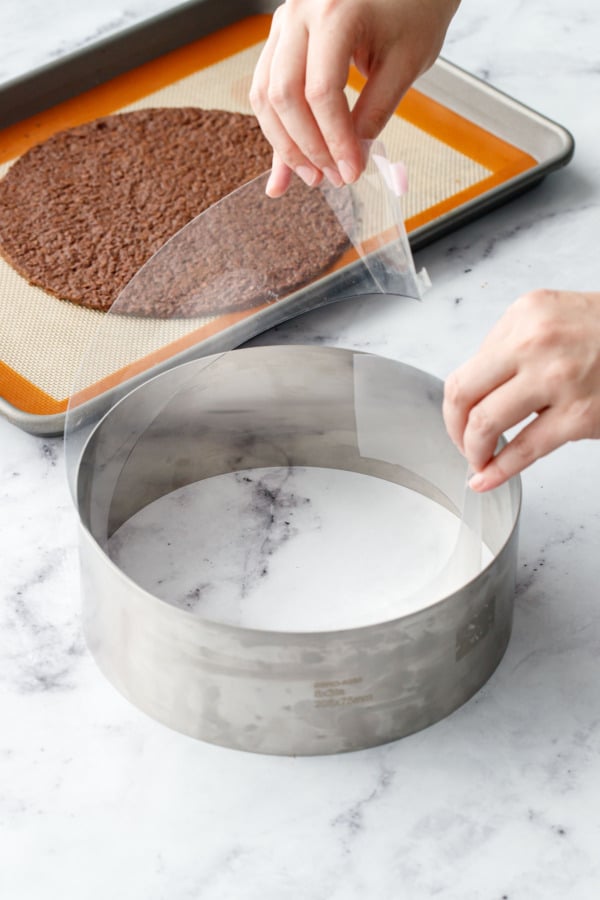
The mousse, until it’s chilled and the gelatin is completely set, cannot support itself. Thus the need for a mold of some sort to hold it all together.
Using a silicone mold or a cake ring with a strip of acetate around the border is the best way to ensure super smooth sides. And you want the sides and top to be as smooth and blemish-free as possible (the mirror glaze will not cover up imperfections like, say, a buttercream would).
You have three good options for the assembly vessel:
- A cake/pastry ring lined with a strip of acetate, set on a silicone mat or parchment-lined baking sheet or other level surface.
- A springform/cheesecake pan with a removable bottom (removable bottom is not negotable if you ever want to get it out of the pan). I also recommend using acetate here too, it’ll make removing it smoothly far easier. I’d also recommend a round of parchment on the bottom, especially if you opt to skip the croustillant base.
- A silicone cake pan or mold with straight sides (not angled). No acetate or parchment necessary with this one, though I’ve not had much luck finding the right size for these (they’re usually only 2″ tall not 3″).
Start with the croustillant base, place the layer of cake spread with jam in the center, then pour or pipe the mousse around it to the very top of your mold. Level off the top surface as cleanly as you can so you have a smooth, level surface for the mirror glaze.
Place the entire cake in the freezer, taking care to place it on a level surface. The cake needs to be frozen completely before glazing. You could probably get away with 6-8 hours (or less if you have a flash freezer), but the mousse needs to be completely and fully frozen before glazing.

Dark Chocolate Mirror Glaze
Mirror glaze is a super shiny, glossy glaze used in professional bakeries to make extra glossy, oh-so-fancy looking cakes and desserts. While it’s not much more work to make than a chocolate ganache or other frosting, it will elevate your baked goods make them look like they came from a professional bakery.
The dark chocolate version I’ve used here requires no food coloring, the dark and dramatic color comes naturally from bittersweet chocolate and cocoa powder.
Mirror Glaze Tips & Tricks
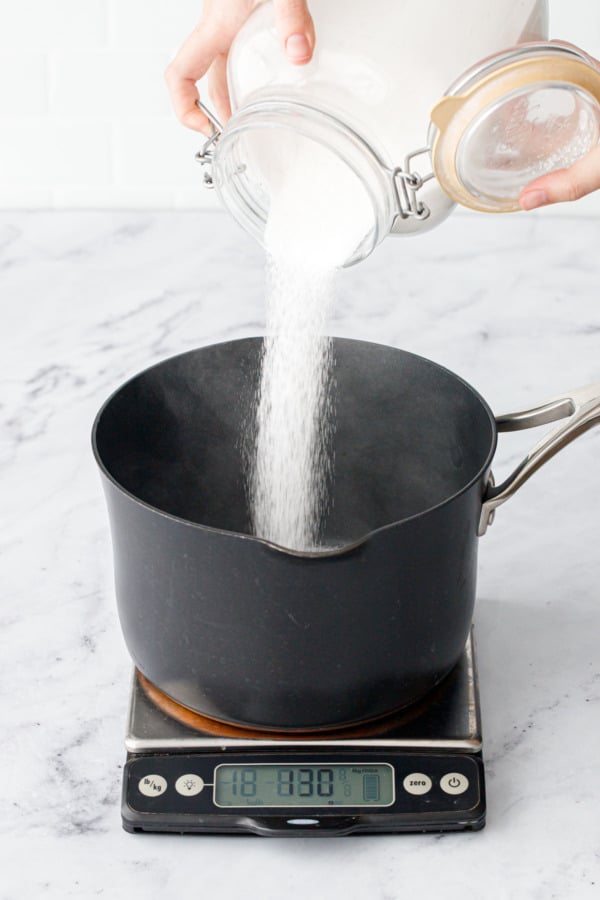
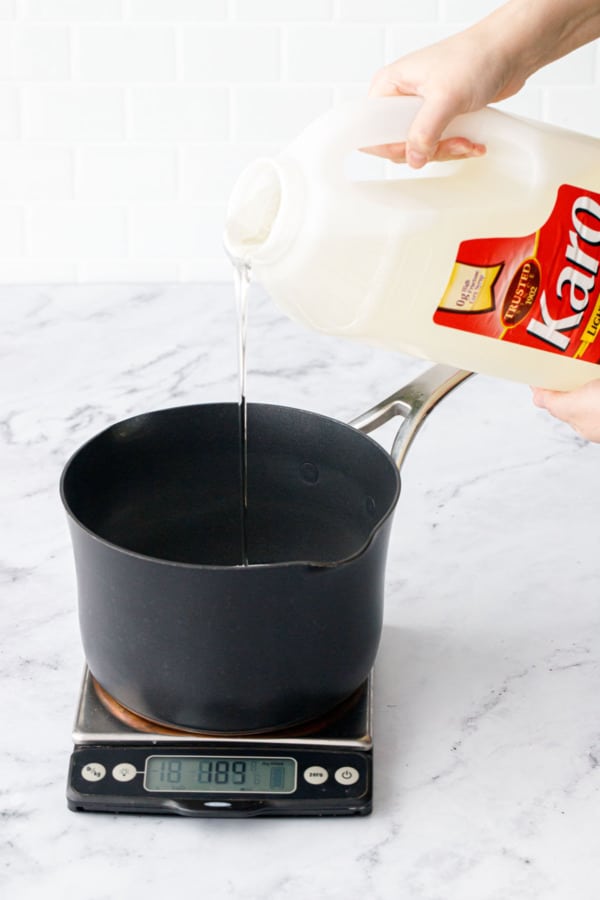
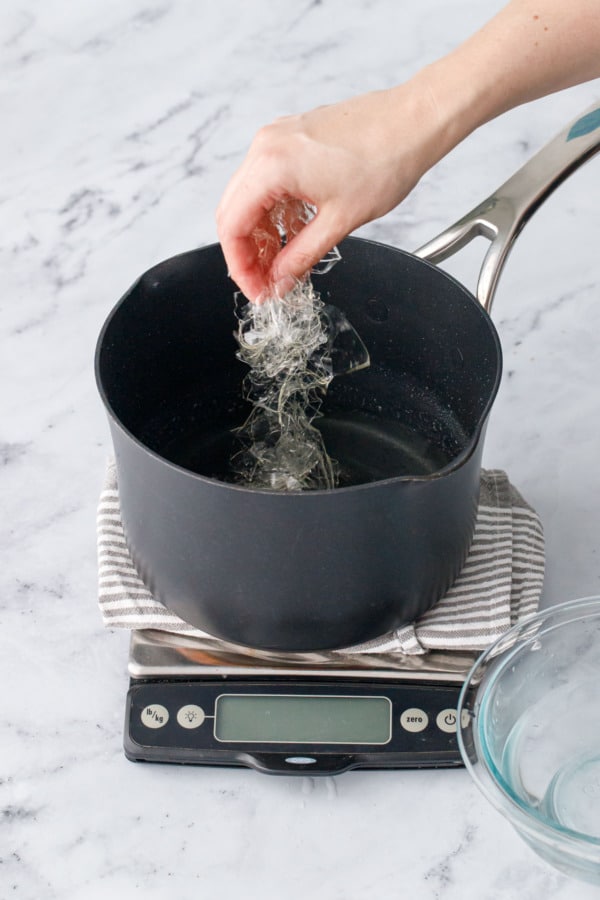
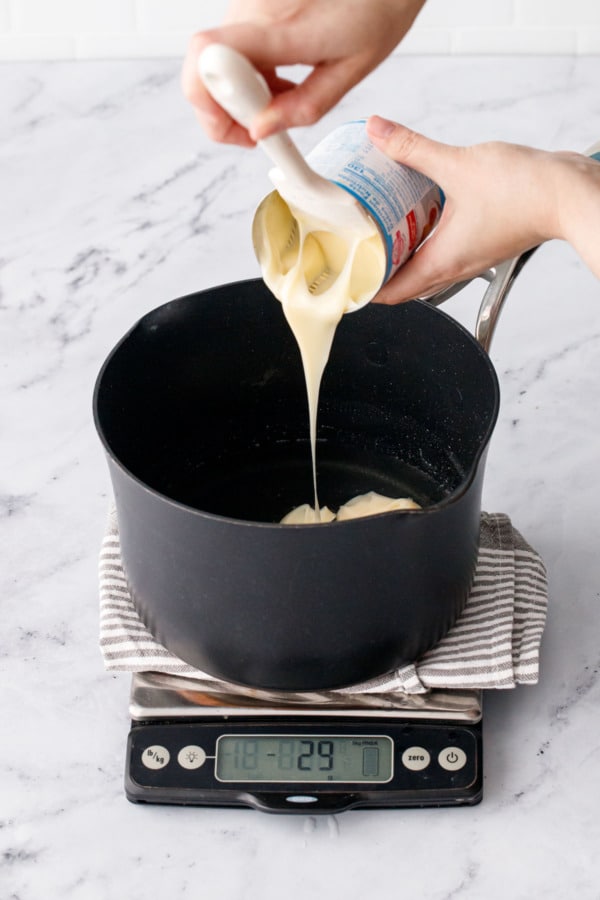
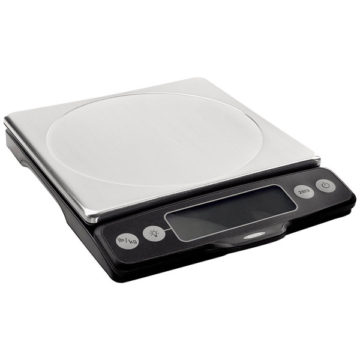
When measuring liquid ingredients such as corn syrup and sweetened condensed milk, put the saucepan on a scale and tare out the weight, then pour the liquid ingredient directly into the saucepan to the exact weight called for, no measuring cup necessary!
Temperature is everything when it comes to mirror glaze! I’ve found that dark chocolate mirror glazes need to be slightly warmer than milk or white chocolate versions, the latter of which usually hit the perfect pouring consistency around 85 to 90 degrees F, while milk chocolate is best at 93 to 95. This dark chocolate version, however, needs to be a bit warmer—95 to 98 or so seems like the sweet spot. The glaze in my photos was 94, which was just a tiny bit too thick still (the sides aren’t quite as smooth as they could be).
To ensure your glaze is at the right temperature, use an instant read digital thermometer—and be sure it’s calibrated and accurate before you begin! A few degrees can make a huge difference here.
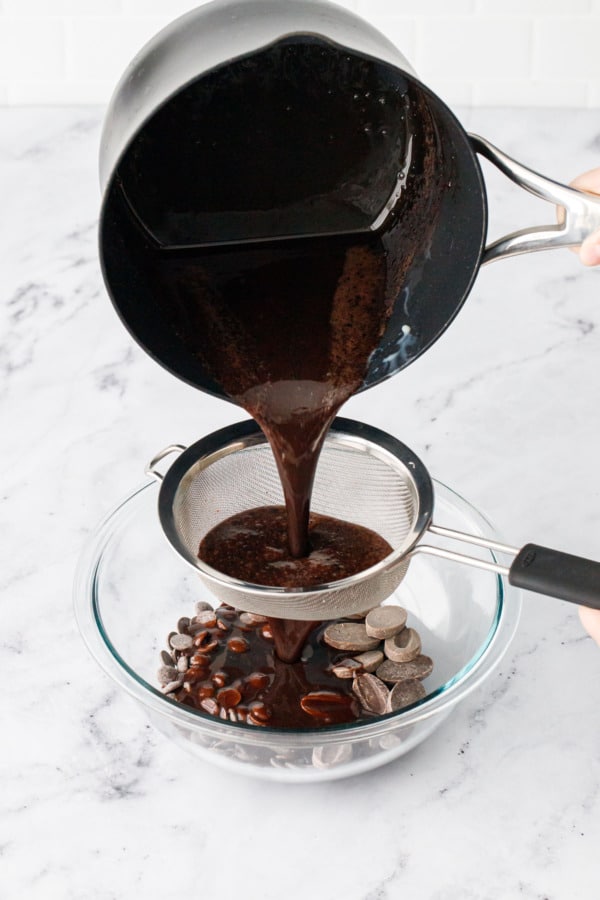
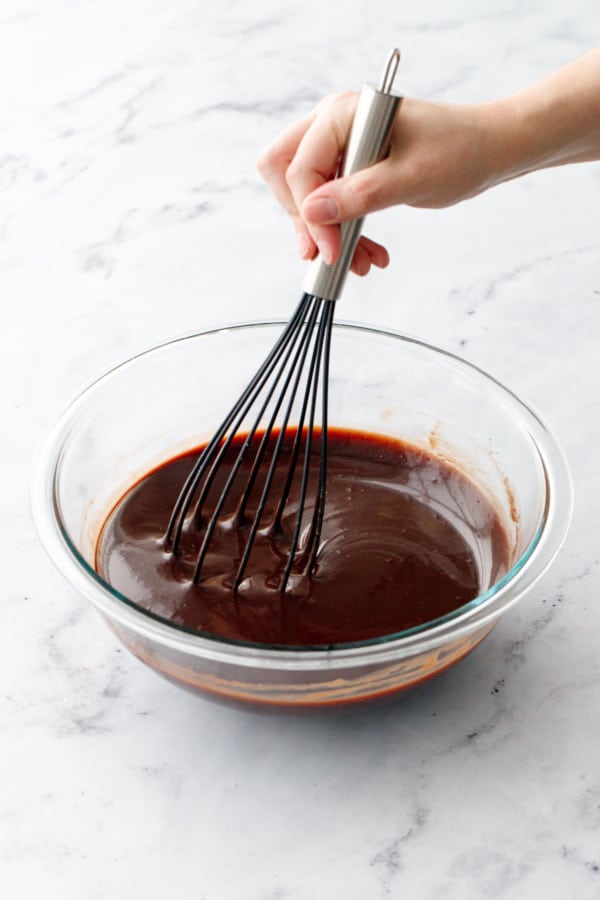
Stir gently as the chocolate melts—you want to mix in as little air as possible (which will result in bubbles in the final finish). Some pros use immersion blenders for this step, but I found it incorporated too much air (I think it works better with very large quantities so the blender head never breaches the surface). I used a whisk and just stirred very slowly until the chocolate was completely melted.
If you have any imperfections or bubbles in the final glaze, you can pass a kitchen torch briefly over the surface. This will pop the bubble, but will also set the glaze somewhat and make it ever so slightly less shiny in that spot, so only use this trick for the biggest of bubbles.
Mirror glaze keeps beautifully and can be made ahead of time; cover and refrigerate in an airtight container for up 5 days, or freeze for up to 3 months. Let thaw overnight and then bring to room temperature before warming it gently in the microwave until smooth, then let it come down to the ideal glazing temperature again.
You can also scrape up any overflow glaze from the baking pan (assuming it didn’t pick up any bits of mousse or cake), and reheat and reuse it again.
Ingredient Notes & Substitutions
The recipe specifically calls for light Karo® Syrup (do not use dark). You can use glucose syrup or golden syrup in place of the light corn syrup, but you do need this invert sugar component to keep the glaze fluid and glossy and prevents it from crystalizing.
In the mousse, I used ruby chocolate, which has a natural pink color and fruity flavor. You can replace this with good quality white chocolate, or even milk or dark chocolate in equal qualities (darker chocolates will product a slightly firmer mousse).
Conversely, in the glaze, you can use milk chocolate or white chocolate in place of the dark chocolate in this recipe (omit the cocoa powder if so). A glaze made with white chocolate can be colored with powdered or gel food coloring for a colorful finish. You could also use ruby chocolate, with a bit of pulverized freeze dried raspberries mixed in even, for a natural pink color.
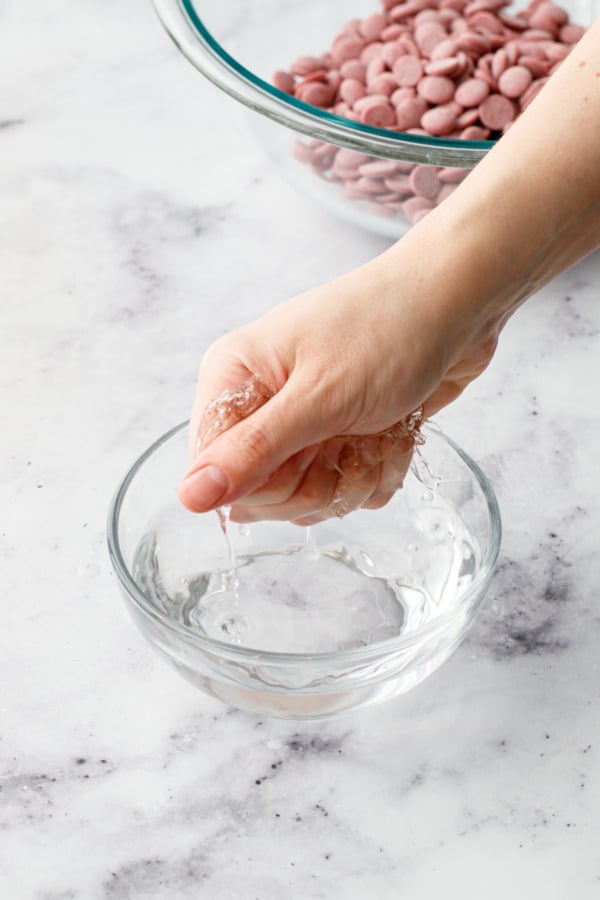
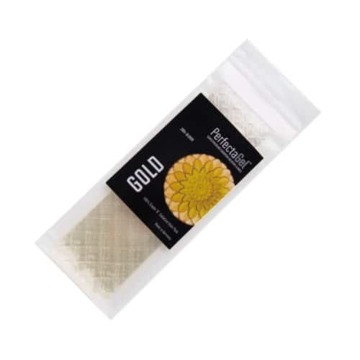
I used gold-strength leaf gelatin in this recipe (the mousse and glaze components are set with gelatin), which I find produces a cleaner flavor and shinier final product. To substitute powdered gelatin, use 1 teaspoon of powdered gelatin for every 1 sheet of leaf gelatin called for in the recipe. Instead of softening the gelatin in cold water and then wringing it out, sprinkle the gelatin over a few tablespoons of cool water to allow it to soften. Before adding it to whatever mixture as specified in the recipe, microwave in short 3 to 5 second bursts until it’s melted, then add it to the mixture as instructed in the recipe.
Because of the gelatin this recipe is not considered vegetarian; I have not tested this recipe with gelatin alternatives and cannot attest to their results.
Shortcuts and Timing
At the bare minimum, make the cake and the mousse layers. The croustillant and jam layers are optional and can be skipped if you’re short on time.
Instead of the mirror glaze, leave 1/4 inch of space at the top of your mold and then fill it with a little bit of chocolate ganache. When you peel away the layers of acetate you’ll have a lovely layered dessert.
2-Day Condensed Schedule
This is the most condensed timeline for making and serving this cake. The mousse layer needs to freeze completely, so it can’t be condensed any further.
Day 1: Make the croustillant base; chill. Make the chocolate cake, let cool completely and pop it in the freezer for as long as you can spare. It doesn’t have to be completely frozen. Make the mousse and assemble the whole thing in your cake mold.
Day 2: Make the mirror glaze, bring it down to the proper temperature, then glaze your cake. Serve right away, or refrigerate until ready to serve.
3-Day Perfect Schedule
Day 1: Make the croustillant base and the chocolate cake and freeze it overnight (or wrap it up more tightly and it’ll keep in the freezer longer). If you’re making your own raspberry jam do that today too.
Day 2: Make the raspberry mousse and assemble the whole thing in your cake mold. You can also make the mirror glaze ahead of time if you want!
Day 3: Make the mirror glaze if you haven’t already (or if you have, warm it up to the right temperature), then glaze, decorate, and serve, or refrigerate until ready to serve.
5-Day Extended Schedule:
Day 1 or 2: Make the mirror glaze.
Day 1 or 2: Make the raspberry jam.
Day 3: Make the croustillant base and the chocolate cake and freeze.
Day 4: Make the raspberry mousse and assemble; freeze overnight.
Day 5: Glaze, decorate, and serve!
Scaling
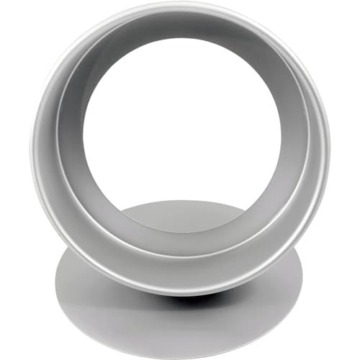
This recipe is written for one 8-inch-round by 3-inch-tall cake. You can use a springform cheesecake pan or a cake ring, with a strip of acetate/cake collar (ideally 3″ tall but you can trim if larger) around the sides.
If you’re using a silicone cake mold like the one I used for my Nutella Mousse Cake (which was advertised as 8″ but is really more like 7.25″), or if you’re using a pan or mold that’s only 2 inches tall instead of 3, you can reduce the quantity of the mousse by a third (multiply all quantities by .66—so use 200g ruby chocolate, 1 1/2 cups heavy cream, and so forth). The other portions of the recipe are fine as is.
Halve the recipe for a 6-by-3-inch round cake, or about ten 3-inch domes (which can be assembled in silicone molds similarly to my chocolate strawberry entremets).
Yields of individual components are below, for reference if you’re trying to figure out how this recipe will work in a different sized mold.
Croustillant base: enough for an 8-inch round base, with a few scraps leftover. You could probably make it work in a 9-inch round if you spread it thin enough.
Chocolate cake: 8×8 square (or a slightly thinner 9×9 square), then cut into a 6-inch round (I’m sure you won’t have any difficulties disposing of the scraps). I don’t recommend baking in a 6-inch round, the cake will be too thick.
Chocolate raspberry jam: my chocolate raspberry jam recipe makes about 1/2 cup, but you’ll only need 1/4 cup here. Again, I don’t think the leftovers will prove to be a problem (this stuff is GOOD). You can also use regular raspberry jam.
Mousse: makes approximately 6 cups by volume. This is enough to fill a deep 8-by-3-inch round cake ring. If you’re using a shorter pan or a smaller mold (for example, the silicone one I used for my Nutella Mousse Cake is only about 7.25×2.25″ in size) you can cut the mousse recipe by a third (multiply all ingredients by .66). Halve the mousse recipe for a 6-by-3-inch round.
Glaze: makes 3 cups (this is more than enough to glaze this cake, but you don’t want to be short on glaze. Any leftover glaze you can scrape up off the pan and store for another use).
At some point you’ll have made enough entremet-style cakes that you can start to mix and match the various components. Maybe you want a brownie here instead of a cake, or a brightly colored mirror glaze instead of a chocolate one, or even add in a layer of raspberry gelée or crémeux on top of the cake for even more elements. Entremet cakes, of course, are all about bringing together multiple unique components into a beautiful, delicious whole.
Serving & Storage
After glazing, the frozen mousse should sit at room temperature for 30 minutes or so before you slice it for optimal texture (otherwise the cake will be very firm and the mousse will still be icy).
I don’t recommend letting the cake sit out at room temperature for longer than an hour or so, especially if it’s hot, as the glaze may start to slump and slide off the cake.
The glazed cake will keep surprisingly well in the refrigerator for a few days, though the texture of the mousse does degrade a bit with time.
If you want to make the cake ahead of time, you can either assemble the entire thing and store the unglazed cake in the freezer for up to a month. The mirror glaze will freeze too, you’ll just need to thaw it out, rewarm it, and pour it over your cake.
While the glazed cake will freeze reasonably well, you’ll need a container that will allow it to sit flat and not touch anything (plastic wrap for example, will stick to the mirror glaze so you don’t want it touching the surface). The mirror glaze won’t be quite as shiny this way, but it’ll still look beautiful and taste delicious.
Chocolate Raspberry Mousse Cake
Ingredients
For Croustillant Base:
- 2 ounces / 56 g dark chocolate, finely chopped
- ¼ cup / 74 g Nutella
- ¾ cup / 40 g feuilletine, or substitute puffed rice cereal, cornflakes, or crushed fortune cookies
For Chocolate Cake:
- 3.5 ounces / 100 g dark chocolate, finely chopped
- ⅓ cup / 35 g Dutch-processed cocoa powder, sifted
- 2 tablespoons / 56g unsalted butter, cut into cubes
- ¼ teaspoon espresso powder, omit if using coffee rather than water
- ½ cup / 120 g boiling water or hot coffee
- ¾ cup / 94 g all-purpose flour
- ¾ cup / 200 g granulated sugar
- ½ teaspoon baking soda
- ¼ teaspoon salt
- 6 tablespoons / 90 g sour cream
- 1 large eggs, at room temperature
- 1 large egg yolk
- 2 tablespoons / 28 g vegetable oil
- ¼ cup chocolate raspberry jam, or regular raspberry jam
For Raspberry Mousse:
- 2 ½ sheets / 5 g leaf gelatin*
- 10.5 ounces / 300 g ruby chocolate or good quality white chocolate, chopped
- 2 cups / 300 g (1 pint) fresh or frozen raspberries
- 1 ½ tablespoons lemon juice
- 2 ½ cups / 600 g heavy whipping cream
For Dark Chocolate Mirror Glaze:
- 6 sheets / 12 g leaf gelatin*
- 1 cup / 200 g granulated sugar
- ⅔ cup / 200 g light Karo® Syrup
- ½ cup / 120 g filtered water
- ½ cup / 150 g sweetened condensed milk
- 7 ounces / 200 g dark chocolate, finely chopped
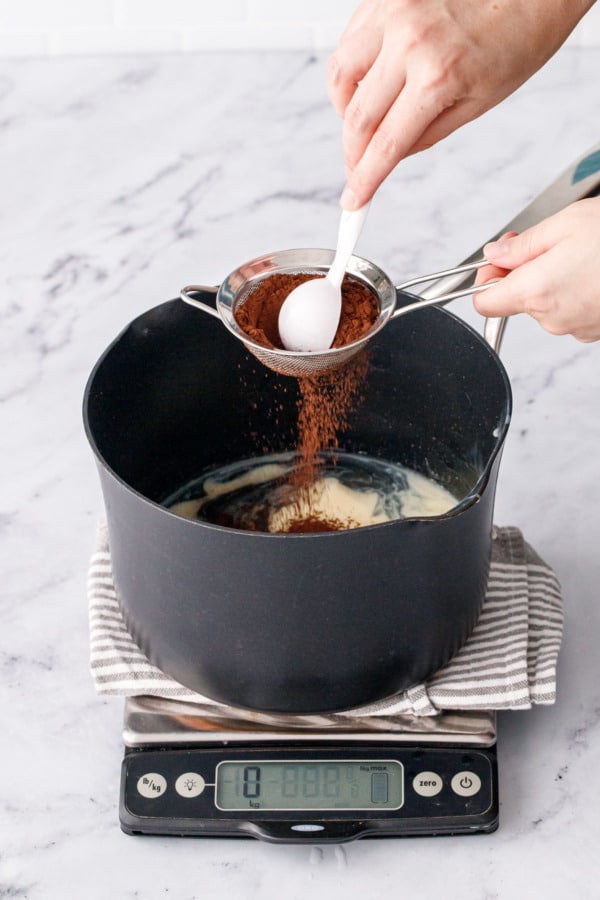
- 2 tablespoons dark or Dutch process cocoa powder
Instructions
For Croustillant Base:
- In a bowl, gently melt chocolate, in short bursts at half power in the microwave, or over a double boiler. Once fully melted, mix in nutella, stirring until smooth, then fold in feuilletine until evenly coated and distributed.
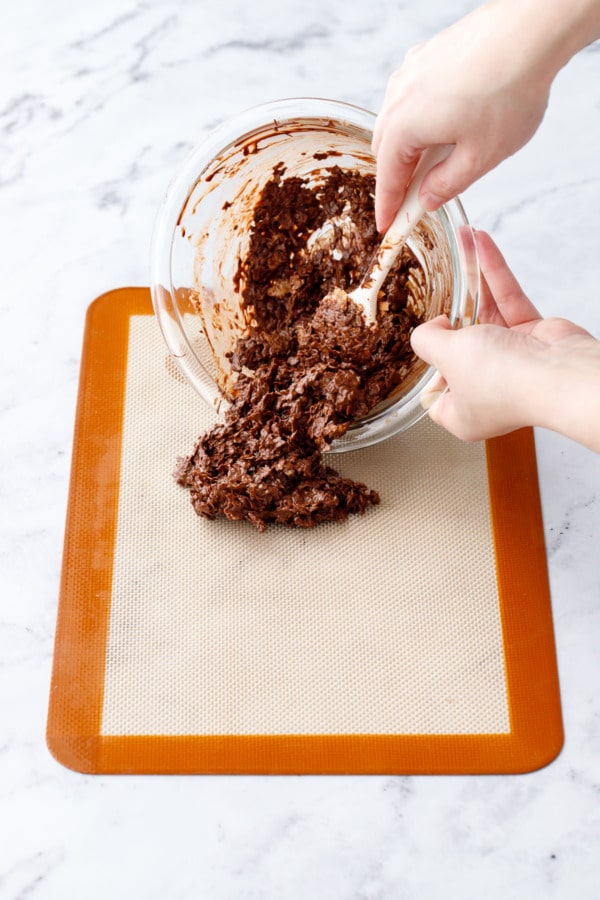
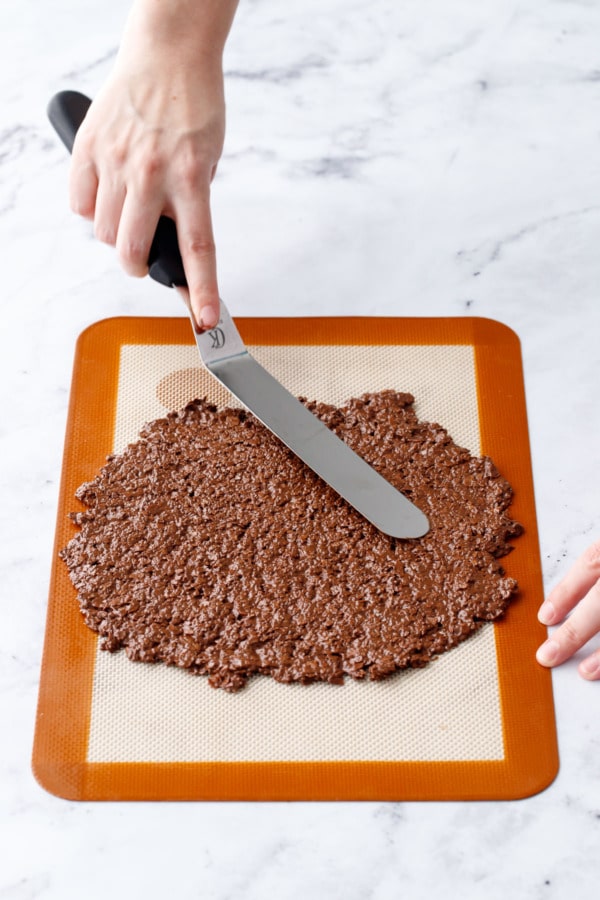
- Spread mixture onto a silicone or parchment-lined baking sheet, spreading it as thinly as possible in a roughly 8-inch round (it should be slightly larger than your the pan or ring you'll be using to assemble the cake). You can try spreading it directly into the bottom of your pan (if using a springform or removable bottom pan), but I find it's harder to get a thin even layer that way.
- While the chocolate is still soft, use the cake ring to cut out a round that will fit perfectly into the bottom. You can also trace the bottom of your springform pan and then cut out the round with a knife (careful you don't cut through to your silicone mat).
- Keeping the base flat on a cookie sheet, refrigerate until set and ready to use. This layer can be made ahead of time and refrigerated for a few days or even frozen for longer.
For Chocolate Cake Layer:
- Preheat oven to 350 degrees F. Line an 8-by-8-inch baking pan with parchment paper.
- In a bowl, combine chocolate, cocoa powder, espresso powder, and cubed butter. Pour boiling water over top, let sit for 30 seconds, then stir until chocolate and butter are fully melted. Set aside to cool to lukewarm.
- In another bowl, whisk together flour, sugar, baking soda and salt and set aside.
- To lukewarm chocolate mixture, whisk in egg and egg yolk, sour cream, and oil until smooth.
- Pour into bowl with dry ingredients and stir until just incorporated and no streaks of dry ingredients remain.
- Pour into prepared baking pan. Bake for 28 to 30 minutes or until a toothpick inserted near the center comes out mostly clean with a few moist crumbs attached (but no gooey batter). Place pan on a wire rack and let cool completely.
- Optionally, you can compress the cake a bit as it cools, which will give it a flatter top and slightly denser texture. Lift out cake from pan and set on a wire cooling rack. Press a piece of lightly buttered or oiled parchment paper on top of the cake, then top with the square cake pan. Put a few things in the cake pan to weight it down slightly (maybe a pound or two of weight max, and space the weight evenly in the entire pan).
- Once fully cooled, put the cake back into the baking pan, lightly cover, and freeze until ready to use, up to a month (if freezing for longer than a few days, you may want to wrap it tightly in plastic wrap and bag it to prevent freezer burn).
For Assembly:
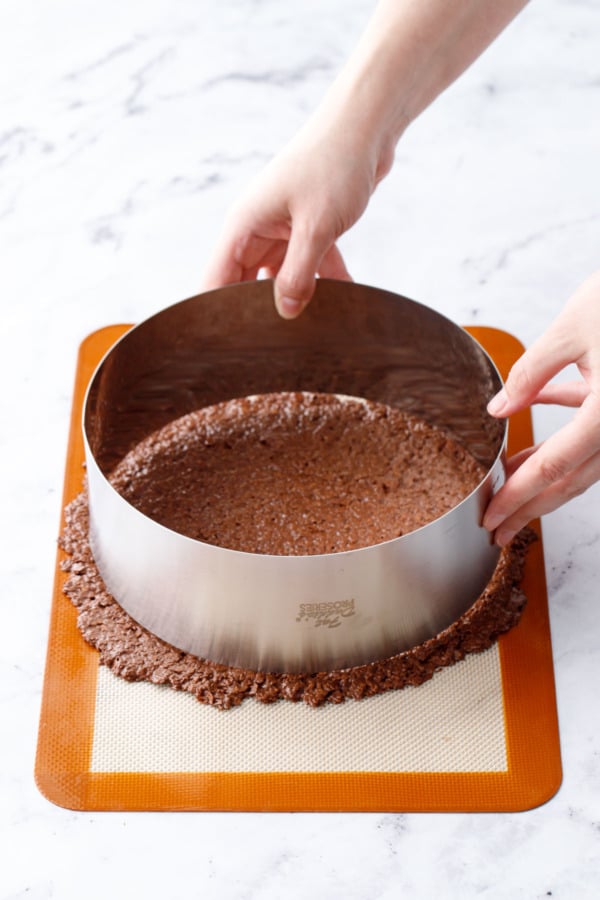
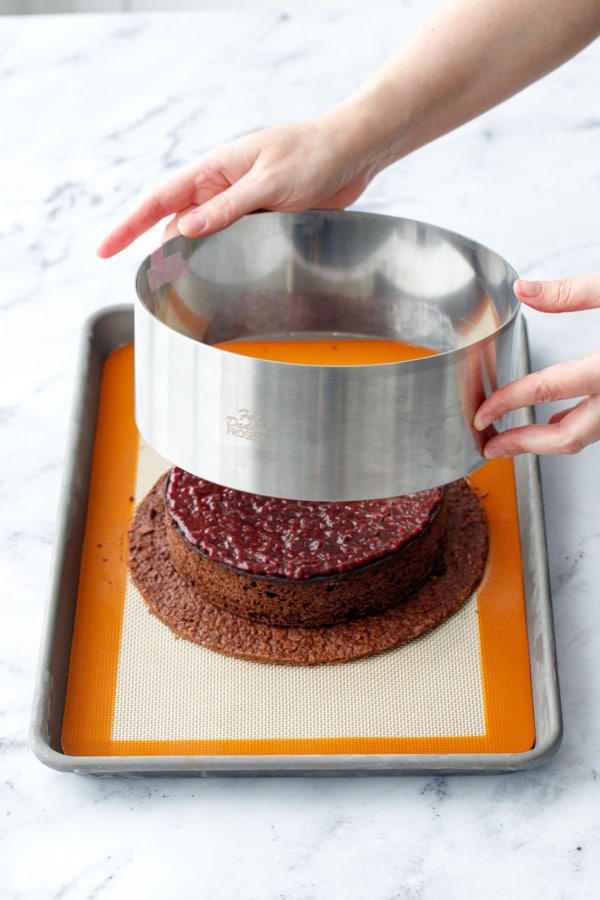
- When you're ready to assemble, prepare an 8-inch cake ring or an 8-by-3-inch round cake pan with removable bottom or a springform pan. Line sides with a 3-inch strip of acetate, securing in place with tape if necessary. If you are using a cake ring, set ring on a baking sheet lined with parchment paper or a silicone baking mat. You can also use a silicone cake pan/mold for this, no acetate needed (note the size difference though as it'll likely be smaller/shorter so you will need less mousse [**see notes]).
- Place chilled croustillant base in the bottom of your prepared cake pan or inside your cake ring.
- Remove cake from freezer and cut into a 6-inch round. You can use a 6-inch round cutter if you have one, otherwise trace the bottom of a smaller cake pan or other round object, and then cut carefully with a serrated knife. Place on top of croustillant base; whichever side feels stickier should go down.
- Spread a thin layer of raspberry jam on top of cake, then put the whole thing in the freezer until your mousse is ready to go.
For Raspberry Mousse:
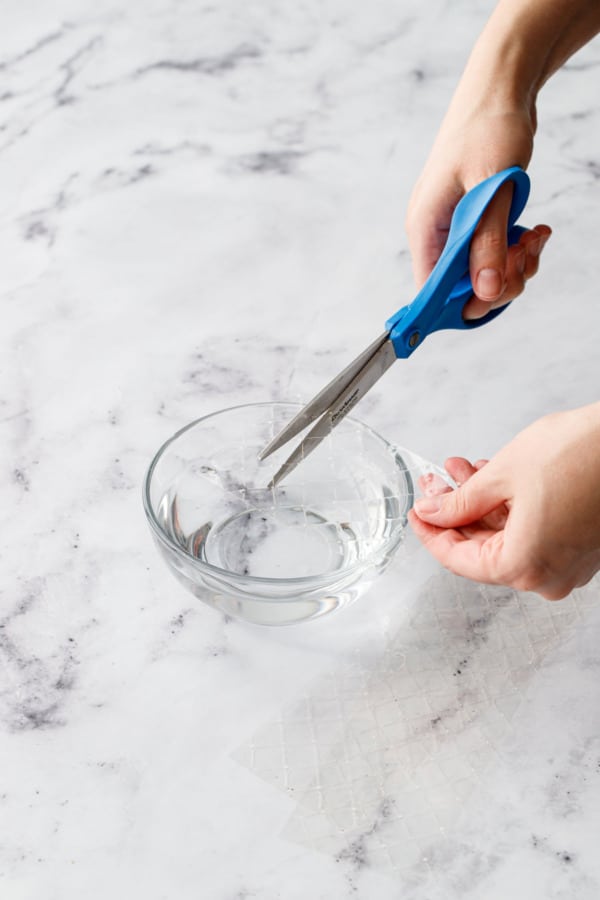
- Cut gelatin sheets into 1-inch strips and submerge in cool water for at least 5 minutes to soften. If using powdered gelatin, sprinkle 3 teaspoons over 3 tablespoons of cool water to soften.
- Place ruby chocolate in a large heat-proof bowl (the bowl should hold at least 2 quarts volume).
- Puree raspberries in a blender or food processor, then strain through a fine mesh sieve, pushing out as much of the puree as you can. You should have about 3/4 cup or 200g of raspberry puree.
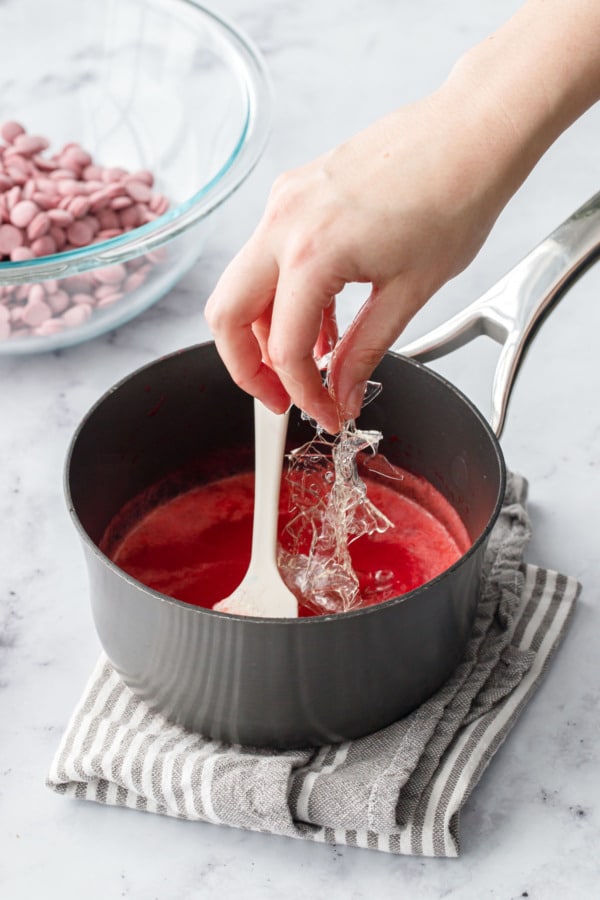
- Transfer raspberry puree to a small saucepan. Add lemon juice and bring to a gentle simmer, stirring occasionally.
- Remove from heat and add gelatin (if using leaf gelatin, squeeze out as much water as possible first) and whisk until gelatin is completely melted and smooth.
- Pour still-warm raspberry puree over ruby chocolate. Gently whisk, starting in the center and working in small concentric circles, until a smooth and shiny emulsion forms, then gradually whisk in larger circles until all the liquid is completely incorporated and mixture is smooth. Set aside to cool for 5 to 10 minutes while you whip the cream (no longer or the gelatin will start to set).
- In a clean bowl or the bowl of a stand mixer, beat heavy cream until it holds very soft peaks. Whisk in 1/3 of cream to the raspberry mixture to lighten, then add the rest of the cream and fold with a large rubber spatula until fully incorporated.
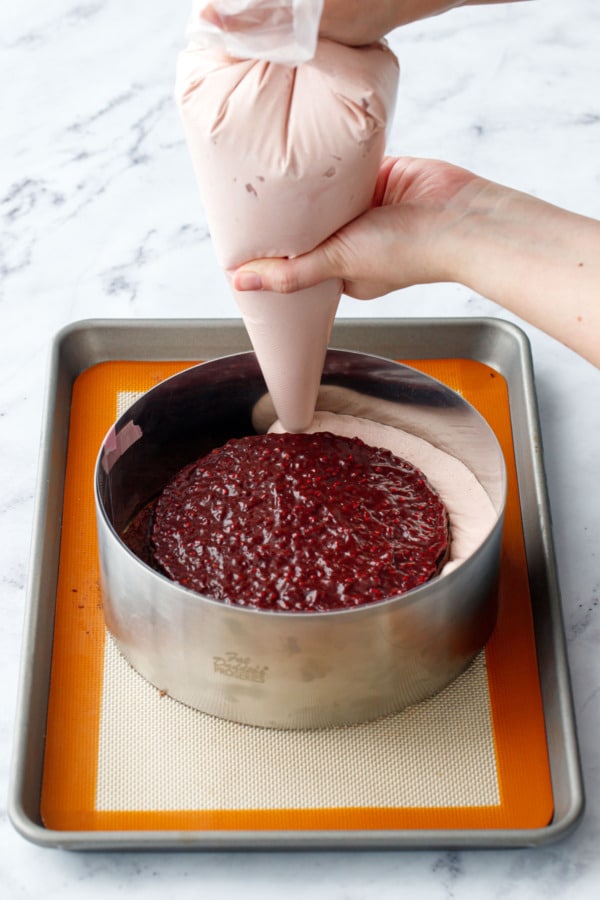
- If desired, transfer some of the mousse to a piping bag or a plastic bag with 1-inch of the end cut off; I find it easier to get around the edges of the cake this way.
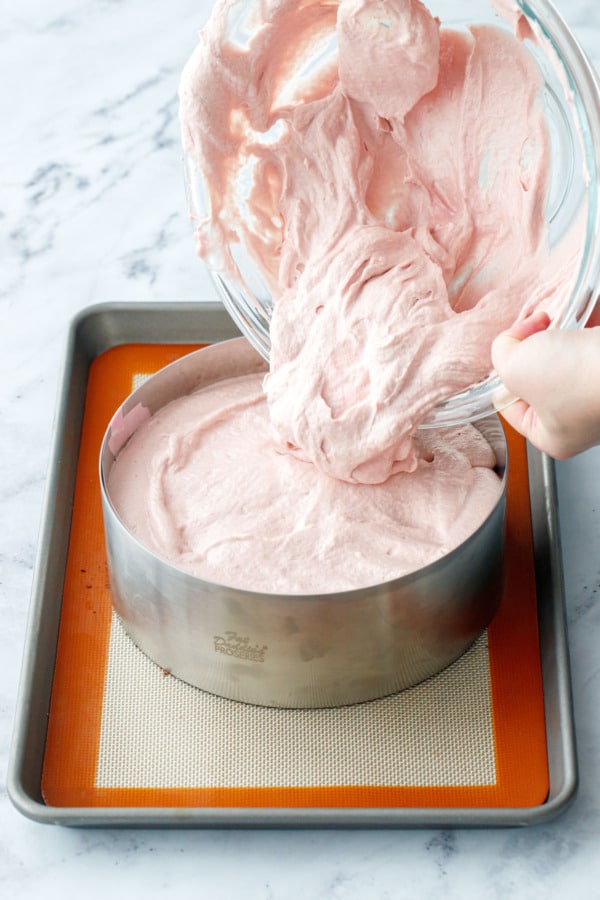
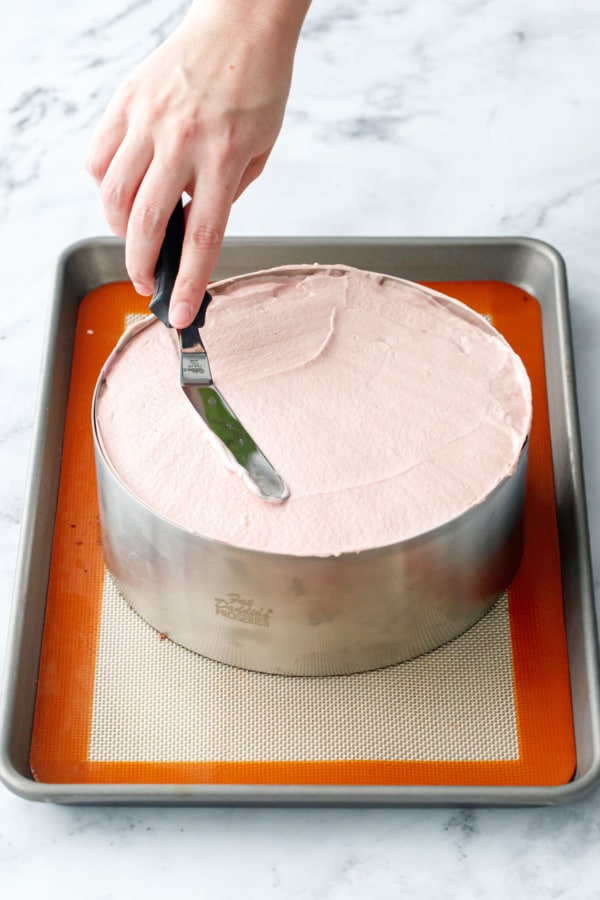
- Pour or pipe mousse into cake pan or mold, taking care to spread it into all the corners and crannies around the cake. Fill to the very top of your mold then run a straight edge over the top to level; if it's not quite to the top, use a small offset spatula to get it as flat and smooth on top as you can. Tap it a few times against the counter to remove any air bubbles and even out the top surface.
- Place entire assembly into the freezer and let freeze until completely firm, at least 6 hours or overnight if possible. Remove from mold or cake pan, peeling off acetate. Smooth out any rough spots with an offset spatula if necessary. Place on a baking pan or a cake board or and put back in the freezer until ready to glaze.
For Mirror Glaze:
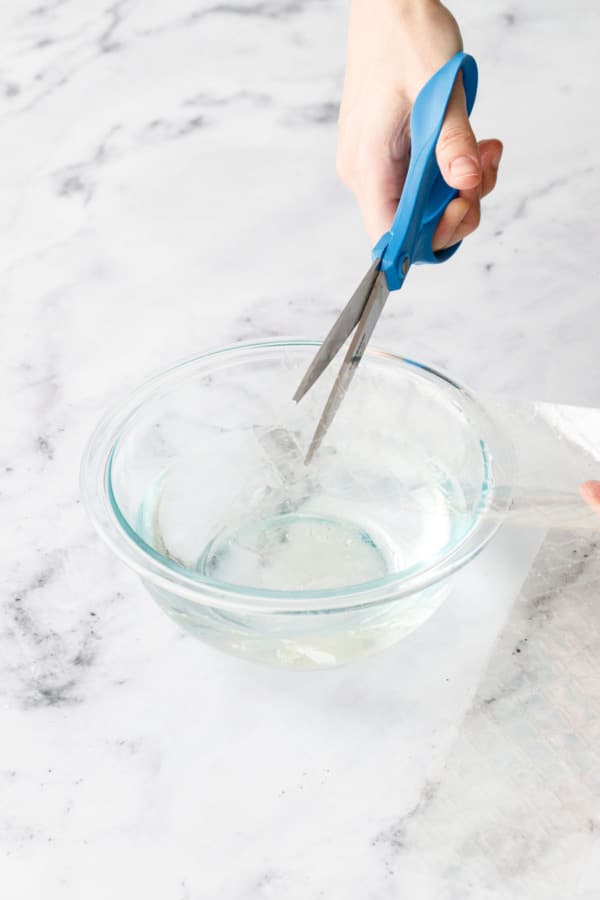
- Cut gelatin into 1-inch strips and submerge in cool water for at least 5 minutes to soften. Place chocolate in a heat-proof bowl and set aside.
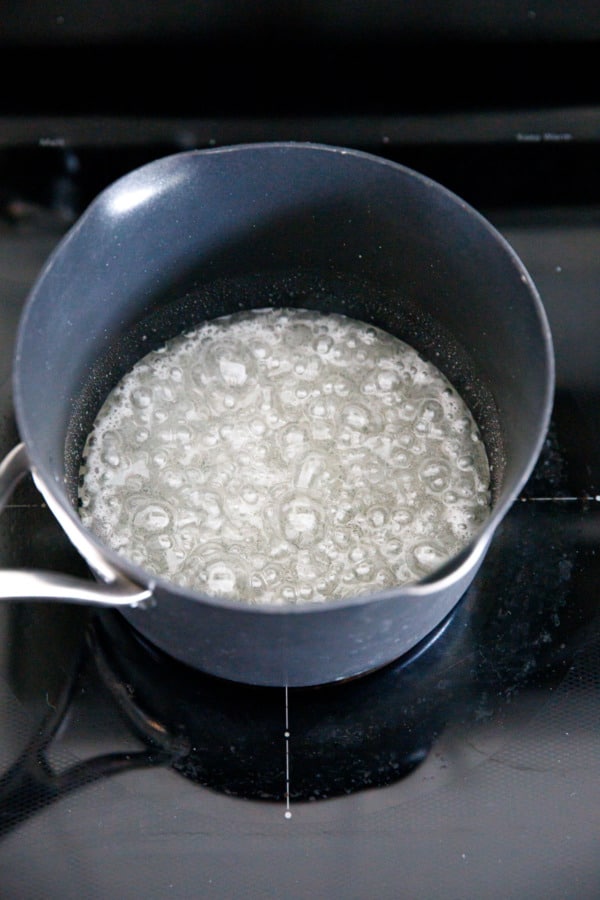
- Combine sugar, corn syrup, and water in a saucepan and bring to a boil over medium heat until sugar is completely dissolved and mixture is clear.
- Remove from heat, then add gelatin (squeeze out as much water as possible first) and whisk until dissolved. Whisk in sweetened condensed milk followed by cocoa powder. Pour hot mixture over chopped chocolate and let sit for 30 seconds, then stir until chocolate is completely melted and mixture is smooth (stir gently to avoid air bubbles which are almost impossible to remove).
- Let glaze cool, stirring occasionally, until glaze reaches approximately 95-98 degrees F on an instant-read thermometer. The glaze needs to be the correct temperature or it will not form a thick enough layer on the outside of the cakes. Mirror glaze can be made up to 5 days ahead of time; store in an airtight container in the refrigerator and rewarm in the microwave or a double boiler to ideal temperature before using.
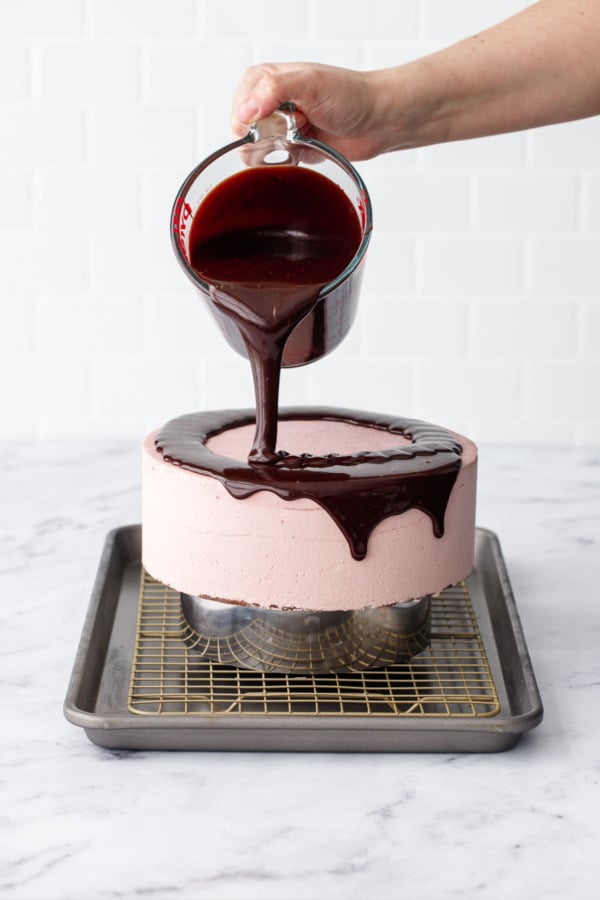
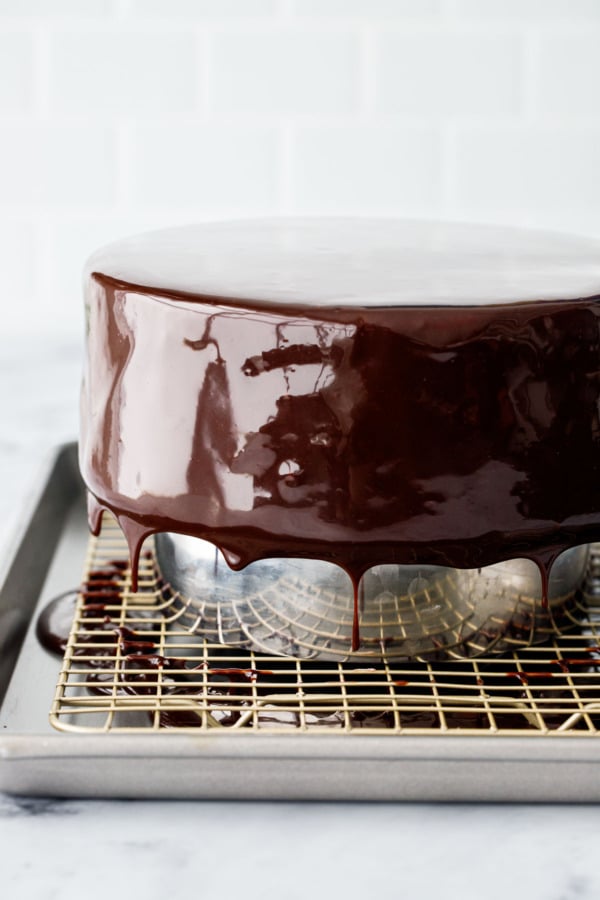
- Remove your cake from freezer and place on a wire rack set inside a cookie sheet, or elevated off the sheet using something slightly smaller in diameter than the cake itself so the glaze can drip off (the same 6-inch cake ring you used to cut the cake for example).
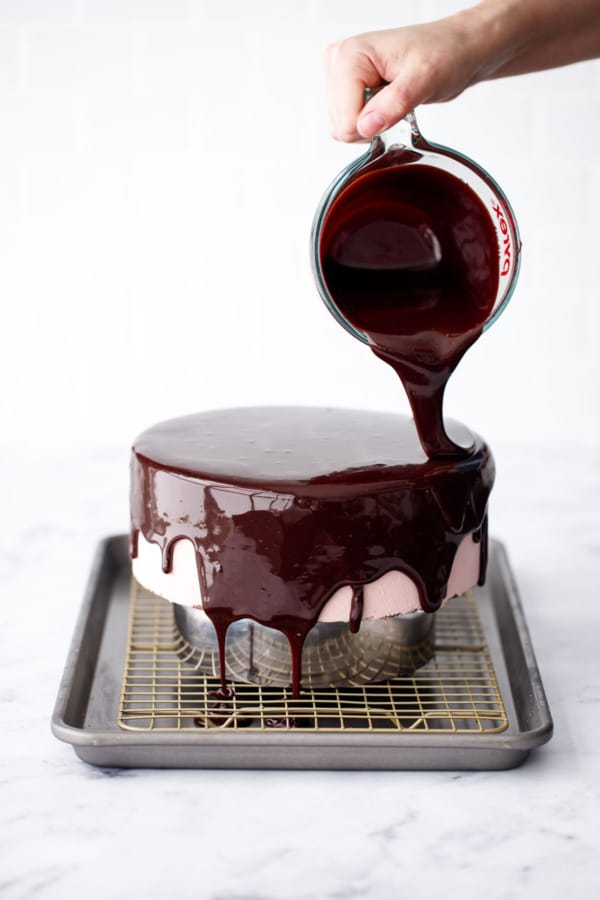
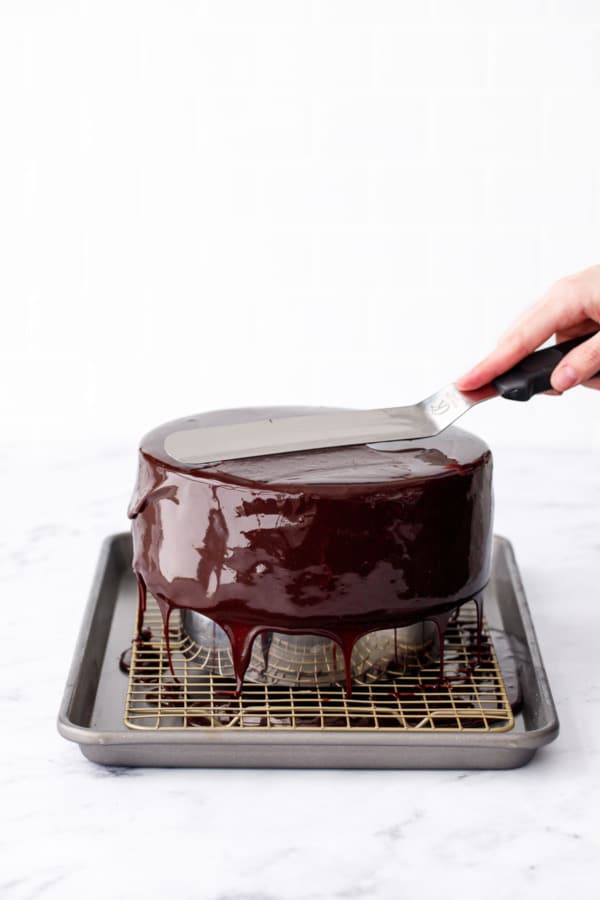
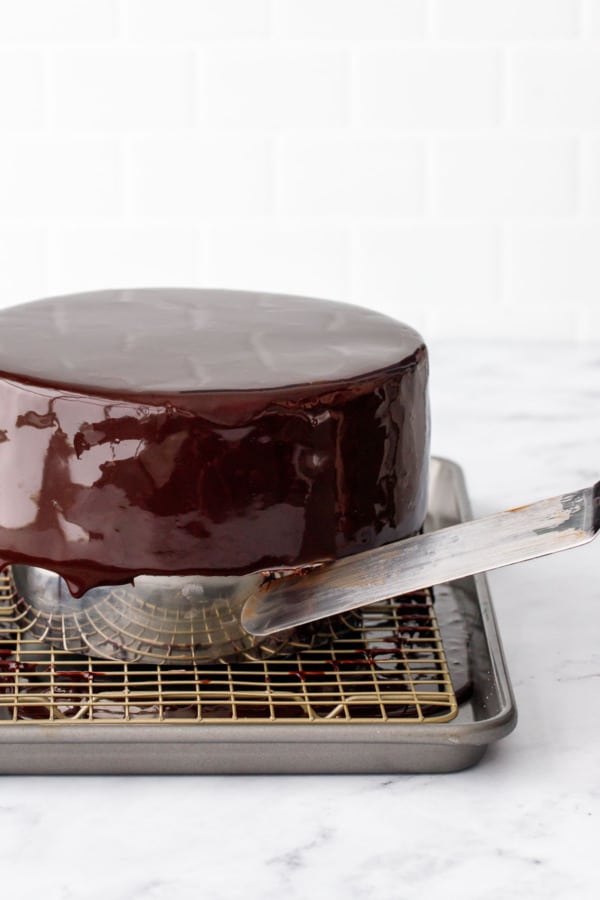
- Pour glaze generously over cake until cake is completely covered. Allow the excess glaze to drip off for 5 or 10 minutes, then gently scrape the edges to remove any remaining drops or built up glaze. Carefully transfer cake to cake stand or serving plate and refrigerate until ready to serve.
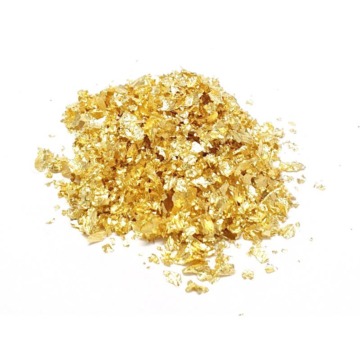
- Decorate with a mixture of fresh and crushed freeze-dried raspberries, plus a few flakes of gold leaf. If your bottom edge is a bit messy looking, you can do a border of fresh raspberries, chocolate curls, or sprinkles to finish it off.
- For perfect slices, dip a large knife into hot water to warm it before slicing, and wipe off the blade completely between each cut. Glazed cake will keep uncovered in the refrigerator for up to 5 days.
Notes
- * To substitute powdered gelatin, use 1 teaspoon of powdered gelatin for every 1 sheet of leaf gelatin called for in the recipe. Instead of softening the gelatin in cold water and then wringing it out, sprinkle the gelatin over a few tablespoons of cool water to allow it to soften, then add the whole mixture to the hot liquid to dissolve.
- **If you’re using a smaller silicone cake mold, or if you’re using a pan or mold that’s only 2 inches tall instead of 3, you can reduce the quantity of the mousse by a third (multiply all quantities by .66—so use 200g ruby chocolate, 1 1/2 cups heavy cream, and so forth). The other portions of the recipe are fine as is.
- ***Mirror glaze can be made up to 5 days ahead of time or frozen for even longer; rewarm in the microwave or double boiler until fully melted and smooth, then let cool to ideal temperature before using. This recipe makes enough glaze for two full cakes, but I always like to have more than enough glaze to ensure an even coat.
Did you make this recipe?
Let us know what you think! Leave a Review below or share a photo and tag me on Instagram with the hashtag #loveandoliveoil.Disclosure: This post was created in partnership with Karo® Syrup. As always, all opinions written are purely our own. We’re incredibly grateful for opportunities like these that allow us to continue sharing delicious recipes with you, so thank you for supporting us and the brands we love.
Beautiful!!